What's inside
As an Amazon Associate I earn from qualifying purchases. This post may contain affiliate links at no extra cost to you.
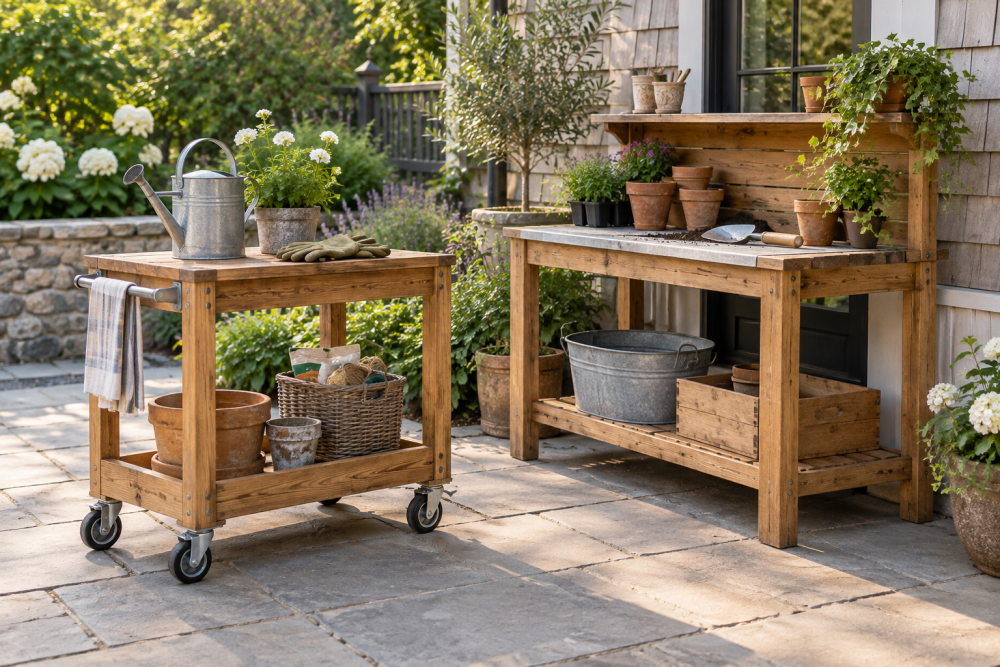
A simple outdoor serving cart is a useful weekend woodworking project: it gives you a stable surface for drinks and food, a lower shelf for supplies, and enough mobility to move everything from the kitchen to the patio. This version uses common lumber, exterior screws, and two fixed wheels plus two legs. It is sturdy without becoming so heavy that you avoid using it.
Contents
Project overview
The finished cart is approximately 36 inches wide, 18 inches deep, and 34 inches high. That is a comfortable working height for serving, while the 18-inch depth keeps the cart manageable on a porch or patio. Adjust the dimensions if your doorway, grill, or storage area requires it.
| Material choice | Advantages | Trade-offs |
|---|---|---|
| Cedar | Light, naturally rot-resistant, easy to work | Soft; dents and splits more easily |
| Pressure-treated pine | Inexpensive and widely available | Heavy, often wet, and can twist while drying |
| Exterior-rated plywood | Stable and efficient for shelf surfaces | Edges need sealing; avoid ordinary interior plywood |
Cedar is the easiest all-around choice for a serving cart. Pressure-treated lumber is fine when price matters, but buy boards that are reasonably straight and let them dry before applying finish. For the top and shelf, you can use slats or one piece of 3/4-inch exterior-rated plywood. Slats look more furniture-like and drain rainwater; plywood is faster to build and less likely to trap spilled liquid in gaps.
Materials and tools
Buy two 8-foot 2x4s for the frame, four or five 1×4 boards for the top, three or four 1×4 boards for the lower shelf, and one 2×4 for the legs and supports. You will also need two 6-inch outdoor wheels, two 3-inch exterior door hinges or heavy-duty wheel brackets, 2-1/2-inch exterior screws, 1-1/4-inch exterior screws, exterior wood glue, sandpaper, and an outdoor finish.
Choose 6-inch outdoor cart wheels with a load rating of at least 100 pounds per pair. Larger wheels roll more easily over cracks, but they raise the cart and can make it less stable. A drill/driver, miter saw or circular saw, tape measure, square, clamps, and a sander are sufficient. A pocket-hole jig is convenient but not required.
Cut list and layout
Cut the two long upper frame pieces to 36 inches and the two short upper frame pieces to 15 inches. When the short pieces fit between the long pieces, the frame’s outside dimension will be about 36 by 18 inches. Cut four legs to 31 inches. This produces a roughly 34-inch-high cart after adding the frame and top, though wheel placement can change the final height.
Cut lower shelf long rails to 32 inches and short rails to 15 inches. Cut the shelf boards to approximately 32 by 15 inches, allowing a small gap between slats. Measure your actual lumber before cutting; nominal 1×4 boards are usually about 3/4 by 3-1/2 inches, and small errors accumulate quickly.
Build the upper frame
Set the two long frame pieces parallel on a flat surface. Fit the short pieces between them, check both diagonals, and adjust until the measurements match. Apply a thin bead of exterior wood glue to each joint and drive two 2-1/2-inch screws through each long piece into the end grain of the short piece. Predrill near the ends, especially in cedar, to prevent splitting.
Attach the four legs inside the corners of the frame. Clamp each leg flush with the top edge and check that it is square in both directions. Use two screws through the frame into each leg, then add a second screw from the adjacent frame member if the joint permits. Do not rely on glue alone outdoors; seasonal moisture movement eventually weakens a glued end-grain joint.
Install the lower shelf
Measure up 7 to 9 inches from the bottom of each leg and mark the shelf height. A lower shelf at 8 inches leaves room for a beverage tub or storage bin while keeping the center of gravity low. Attach the two long shelf rails between the legs, then fit the short rails. Keep the rail tops level so the shelf boards sit flat.
Drive two exterior screws at each rail-to-leg connection. Add a center support beneath the shelf if you use plywood, or if the shelf will carry more than about 30 pounds. Lay the shelf boards across the rails with 1/8-inch gaps and fasten each board with 1-1/4-inch screws. Do not make the shelf completely sealed if the cart will stay outdoors; water needs a way out.
Add the top and wheels
Arrange the top boards across the upper frame. Use a straightedge to keep the ends aligned, leave 1/8-inch gaps, and secure each board at every frame member. Slightly round the exposed corners with a sander. Sharp corners are uncomfortable when people gather around the cart and are more likely to chip.
Mount the wheels at one end, with their axles parallel to the cart’s width. Install the wheel brackets on the outside of the legs or use a short axle board between the legs, depending on the hardware. The wheels should turn freely without rubbing the frame. The opposite two legs act as feet; add rubber furniture glides if the cart will sit on a finished deck.
For easier handling, install a stainless steel outdoor cabinet handle on the end opposite the wheels. A handle is optional, but it keeps your hands away from the loaded top and makes tipping less likely. Fasten it through the end board with bolts or the manufacturer’s screws, using washers where possible.
Sand, seal, and test
Sand all surfaces to 120 or 150 grit. Ease every edge, especially the top perimeter and shelf ends. Apply two or three coats of an exterior penetrating oil or a quality outdoor water-repellent finish, following the recoat instructions. A clear finish preserves the wood’s color briefly but usually needs more frequent maintenance than a pigmented stain. Do not finish damp pressure-treated lumber; it may peel or remain tacky.
After the finish cures, load the top with roughly 50 pounds and the shelf with 30 pounds. Push the cart across the surface where you will use it. If it racks from side to side, add diagonal braces beneath the top or shelf. If it tips when turning, reduce the load, widen the wheel spacing, or use larger wheels. Store the cart under cover during winter and inspect screws, wheel brackets, and finish each spring.
Where to spend and where to save
Do not overspend on decorative hardware. The cart’s strength comes from square frames, sound joints, and adequate screws. Spending more on straight lumber and weather-resistant fasteners is worthwhile; the cheaper option is fine for wheels if they are rated for the load and roll smoothly. If you expect frequent rain, upgrade the finish and cover rather than using indoor paint or untreated steel hardware.
For a faster build, use exterior wood screws and a pre-cut exterior plywood shelf. For a more polished cart, substitute stainless or hot-dipped galvanized fasteners and add a removable tray on the top. Keep the design simple: fewer joints mean fewer places for water to collect and fewer repairs next season.