What's inside
As an Amazon Associate I earn from qualifying purchases. This post may contain affiliate links at no extra cost to you.
Contents
Why a Cold Frame in Spring Actually Works
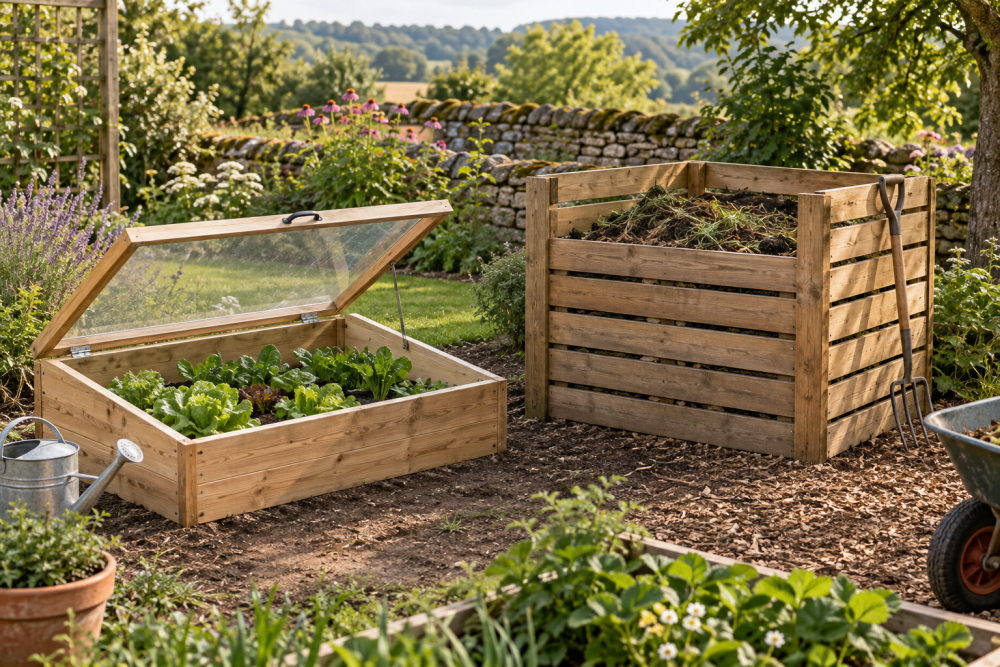
A spring cold frame is just a bottomless box with a transparent, angled lid. It traps solar heat during the day and slows heat loss at night, which lets you start lettuce, spinach, radishes, and brassicas 4 to 6 weeks before your last frost date. Inside a well-built frame, soil stays 10 to 20°F warmer than outside air on a sunny 45°F day, and you avoid the leggy seedlings you get on a windowsill.
The trick is not to build a greenhouse. You want low, heavy, and ventable. A box 48 inches long by 24 inches deep is the sweet spot: big enough for two 10×20 seedling trays side-by-side, small enough that a single sheet of plexiglass can cover it without sagging or needing a center support that shades the plants.
Materials and Cut List
Use rot-resistant wood. Untreated cedar is the best long-term value for a cold frame that sits on damp soil. Pine is fine if you seal it and accept you will replace it in 2 to 3 seasons. Avoid pressure-treated lumber made before 2004 or anything you cannot confirm is ACQ or CA-B rated if you are growing edibles.
For a 48″ x 24″ frame with an angled top (18″ high in back, 12″ high in front):
Back wall: 1×12 cedar, 48″ long (1 piece). Front wall: 1×8 cedar, 48″ long (1 piece – actual height 7.25″, you will gain 12″ with the side slope). Sides: 1×12 cedar, 24″ deep (2 pieces, cut with an angled top edge from 18″ at the back to 12″ at the front). Bottom cleats: 1×2 cedar or scrap, 22.5″ long (2 pieces) to support the lid when closed. Optional floor: none. You want direct soil contact.
Lid frame: 1×2 cedar or 1×3, built as a rectangle 48″ x 24″ outside dimension. Miter or butt-joint with glue and screws. One sheet of 1/8″ or 3/16″ clear acrylic (plexiglass) cut to 48″ x 24″. 1/8″ is lighter and cheaper but will flex in wind; 3/16″ is noticeably stiffer and worth the extra $15 to $20 if your site is exposed. You will also need a pair of 2-inch butt hinges or a 48″ continuous piano hinge, 1-1/4″ exterior deck screws, and exterior wood glue.
When you order your glazing, a standard plexiglass sheet 48×24 clear is cheaper than having a hardware store cut it, and it arrives with protective film that prevents scratching during build. For the wood, look for flat, straight cedar boards 1×12 without large knots on the edge that will be ripped at an angle.
Tools You Need
You do not need a shop full of tools. A circular saw or miter saw for crosscuts, a straightedge and clamps to guide the angled side cuts, a drill/driver, a tape measure, and a square are enough. A pocket-hole jig helps on the lid frame but is not required. A sander or sanding block keeps the plexiglass seat flat so the sheet does not crack at a high spot.
Building the Box
1. Cut the sides with the slope. Mark 18″ up from the bottom at the back end of each side board and 12″ at the front end, then snap a line between them. Cut with a circular saw guided by a straightedge. If your cut wanders, sand it flat. A wavy top edge is the main reason lids do not close tight.
2. Assemble the box. Predrill and screw the front and back boards into the side boards with two 1-1/4″ deck screws per joint. Run a bead of exterior glue on each joint. Check for square by measuring diagonals before the glue sets. The box should be square within 1/16″.
3. Add lid supports. Screw the 1×2 cleats inside the front and side walls, 3/4″ down from the top edge. This creates a ledge that supports the lid, blocks wind-driven rain, and stops the lid from sliding.
4. Build the lid frame. Assemble your 1×2 rectangle on a flat surface. Confirm it is square, then screw corners with two screws per joint and glue. Optional but recommended: add a 24″ cross brace in the middle if you are using 1/8″ acrylic. It prevents sag without casting much shadow.
5. Mount the plexiglass. Lay the acrylic on the frame, peel the film back from the edges only, and drill oversized pilot holes. This is critical. Acrylic cracks if you drive screws tight into tight holes. Drill holes 1/16″ larger than your screw shank, and use #6 pan-head screws with a small rubber washer or a dab of clear silicone under the head. Do not overtighten. Six screws per long side and three per short side is enough. Alternatively, bed the sheet in a thin bead of exterior silicone and hold it with 1/2″ x 1/2″ stops screwed over the top – this is the most crack-proof method.
6. Hinge the lid. Set the lid on the box, overhang 1/4″ on the sides and front for drip edge, flush at the back. Attach your continuous piano hinge 48 inch or two butt hinges to the outside of the back wall and the lid frame. A continuous hinge spreads load and keeps wind from ripping the lid off – it costs more but fails far less often than two small hinges. Add a screw eye and chain or a simple notched stick to prop the lid open.
Glazing Options Compared
Plexiglass (acrylic) is the default for a DIY cold frame lid because it is clear, light, and easy to cut. It is not the only option, and it is not always the best.
| Material | Light Transmission | Durability | Weight & Workability | Typical Cost for 48×24″ |
|---|---|---|---|---|
| Acrylic (Plexiglass) 3/16″ | 92% clear, best for seedlings | Scratches easily, cracks if screwed tight, yellows slowly over 5+ years | Very light, cuts with fine-tooth saw, can be drilled | $35 – $55 |
| Twinwall Polycarbonate 6mm | ~82% diffused, less scorching | Virtually unbreakable, better insulation (R-value ~1.6 vs 0.9 for acrylic) | Light, cuts easily, needs edge tape to keep bugs/moisture out of flutes | $25 – $40 |
| Single-Pane Glass | 90% clear | Scratch-proof, will not yellow, shatters on impact, heavy | Heavy, requires stronger hinge and frame, cannot be drilled at home | $20 – $30 if salvaged |
For most spring builds, acrylic is the best balance of clarity and ease. If your site gets hail or you want better frost protection at night without adding a blanket, twinwall polycarbonate is worth the slight light loss and the need to tape the open ends. Glass makes sense only if you have a salvaged storm window of the right size and a very sturdy hinge setup.
Placement, Venting, and Failure Modes
Face the low side south (in the Northern Hemisphere) and place the frame against a south-facing wall or fence if you can. The reflected heat adds several degrees at night. Angle matters less than people think – 15 to 20 degrees of slope sheds rain and catches sun well enough at spring sun angles. Your 6-inch drop over 24 inches gives you about 14 degrees.
Overheating kills more seedlings than cold. On a sunny 50°F day, the inside of a closed cold frame can hit 90°F by 11 a.m. Prop the lid 4 to 6 inches open when inside temps exceed 65°F for cool-season crops. An automatic vent opener ($30 to $40, wax cylinder type) is reliable and pays for itself the first time you forget to vent on a warm afternoon.
Three common failures: First, soil waterlogging. Do not set the frame in a low spot. Dig out 2 inches of soil inside, add a layer of coarse compost, then replace soil. Second, lid blow-off. A light acrylic lid becomes a sail. Always add a hook-and-eye or a barrel bolt to lock it down at night. Third, acrylic cracking. As mentioned, oversized holes and no overtightening are non-negotiable. If you do crack a corner, stop-drill the crack with a 1/8″ bit and patch with clear acrylic cement rather than replacing the whole sheet.
Making It Last More Than One Season
Cedar will gray but not rot quickly. Apply a single coat of exterior linseed oil or tung oil if you want to slow checking, but do not use film-forming polyurethane that will peel. In late spring when you are done, remove the lid, store it vertically out of UV, and use the box as a raised bed. If you leave plexiglass in full sun all summer with no ventilation, it will warp and haze faster.
Total build time is 2 to 3 hours, cost is $80 to $140 depending on wood choice and whether you buy acrylic locally. That is less than a cheap pop-up greenhouse and far more wind-proof, and you can build it from two boards and a sheet of plastic in an afternoon with no special joinery.