What's inside
As an Amazon Associate I earn from qualifying purchases. This post may contain affiliate links at no extra cost to you.
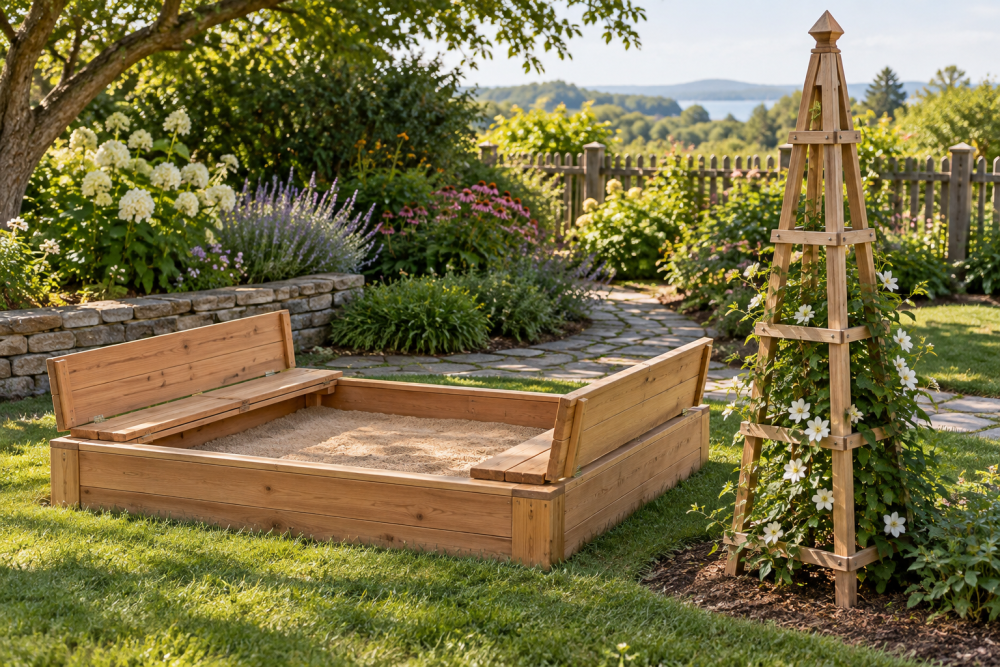
A four-rail garden obelisk is a tapered wooden frame for climbing beans, peas, sweet peas, or small flowering vines. The build uses four long corner rails joined by short crosspieces, with the rails narrowing toward the top. It is sturdy enough for a home garden without complicated joinery, provided the base is wide, the parts are weather-resistant, and the frame is anchored securely.
Contents
Choose a size and materials
This plan makes an obelisk about 6 feet tall, with a footprint roughly 24 inches square. Adjust the height to suit your plants, but keep the base wide enough that the frame does not wobble. For a taller structure, increase the footprint or add stronger ground anchors.
Use four straight 1-by-2-inch boards for the rails, each about 6 feet long. Cedar or redwood naturally resists decay and is easy to cut, but costs more than untreated construction lumber. Ground-contact-rated pressure-treated lumber is another practical option; check its label and use exterior-rated fasteners. Avoid untreated pine where the rails touch damp soil. For the crosspieces, use 1-by-2-inch stock, and allow about 20 to 24 inches of total material for each of four horizontal levels.
You will also need exterior screws, a saw, drill and driver, tape measure, square, clamps, and a pencil. A box of exterior wood screws around 1⅝ inches long is suitable for joining the crosspieces to the rails. Pre-drilling helps prevent splits, especially near the ends of narrow rails.
Mark the four tapered rails
Lay the rails side by side and mark the bottom end of each one as the ground end. Measure and mark the top at 6 feet. The rails do not need to taper along their length: the frame tapers because the four rails lean inward as they rise. This is simpler and leaves the rails strong and consistent in width.
Set the bottom ends in a 24-inch square, with one rail at each corner. Bring the tops together so they form a small bundle, leaving room to fasten them with a cap or short blocks. A temporary strap or clamp around the top keeps the rails from spreading while you fit the crosspieces. If the top is too tight to accept all four rails neatly, trim the rail ends at a slight angle or use a small cap block to cover the joint.
For a consistent taper, mark matching crosspiece heights on all four rails: about 12, 26, 40, and 54 inches above the bottom. These are measured along the rails, not vertically. The lowest level should sit above the soil line to reduce rot and keep the frame clear of mulch.
Cut and fit the crosspieces
Each level needs four crosspieces, one for each side of the square. Because the rails angle inward, crosspiece lengths decrease toward the top. Start with approximate lengths of 24 inches at the bottom, then 19, 14, and 9 inches at successive levels. These are starting dimensions, not guaranteed final cuts: rail spacing changes with the actual setup.
Clamp the rails in their final position and measure the gap between the inside faces of each pair at every marked level. Cut the crosspieces to fit that measured gap. A piece that is a little long can force the rails out of alignment; one that is too short leaves a loose joint. Test-fit each level before fastening. Keep the sides parallel and check the footprint with a tape measure.
Fasten each crosspiece between its two rails using two screws at each end. Drill pilot holes first, keeping them centered in the rail to avoid splitting. Drive screws snugly, not so hard that they crush the wood. Work from the lowest level upward, checking that the base remains square as the frame stiffens. A drill with adjustable clutch is useful for this; a basic cordless drill-driver is enough for this project, and there is no need for a high-torque model.
Choose a joint style
| Joint method | Best for | Trade-off |
|---|---|---|
| Butt joints with screws | Quick garden builds and basic tools | Visible screw heads; pilot holes matter |
| Half-lap joints | A cleaner, more rigid frame | More marking and cutting; easy to remove too much wood |
| Exterior pocket screws | Hidden fasteners on accessible faces | Requires a pocket-hole jig and suitable outdoor screws |
Butt joints are the sensible choice for most garden obelisks. The plants and crosspieces distribute the load, and repairs are straightforward. Half-laps can look neater, but they weaken narrow rails if the cuts are deep or inaccurate. Glue is optional; ordinary interior wood glue can fail outdoors, and even exterior glue does not replace sound mechanical fastening.
Finish the top and anchor the frame
Bring the four rail ends together at the top and fasten them with a small exterior-grade cap block or a short piece of wood across the bundle. A cap block makes the joint easier than trying to drive screws through several rails at an awkward angle. Leave no sharp points or exposed screw tips. If desired, sand the cut edges and apply an exterior finish compatible with the wood; finish slows weathering but does not make the structure rot-proof.
Set the obelisk in place before planting. Push the rail ends 6 to 8 inches into firm soil, or attach metal stakes to the base if the ground is soft. In windy locations, shallowly buried rails can loosen as the frame acts like a sail when covered in leaves. A wider footprint, longer stakes, or a position near a fence can help. Do not rely on the plant’s roots to stabilize a newly installed frame.
Check the build and maintain it
Before adding plants, push gently from two directions. If the frame racks, check for loose screws, unequal crosspieces, or a base that is no longer square. Add a diagonal brace on one or more sides if the obelisk will carry a heavy, dense vine. Keep the lower crosspieces above standing water and avoid burying untreated ends.
Inspect the joints each spring and after strong winds. Replace split crosspieces promptly; a single failed rung can let the rails spread and pull other joints loose. At the end of the season, remove dead vines so wet plant matter does not hold moisture against the wood. With dry lumber, pre-drilled screws, and a firmly anchored base, this straightforward frame should support several seasons of climbing growth.