What's inside
As an Amazon Associate I earn from qualifying purchases. This post may contain affiliate links at no extra cost to you.
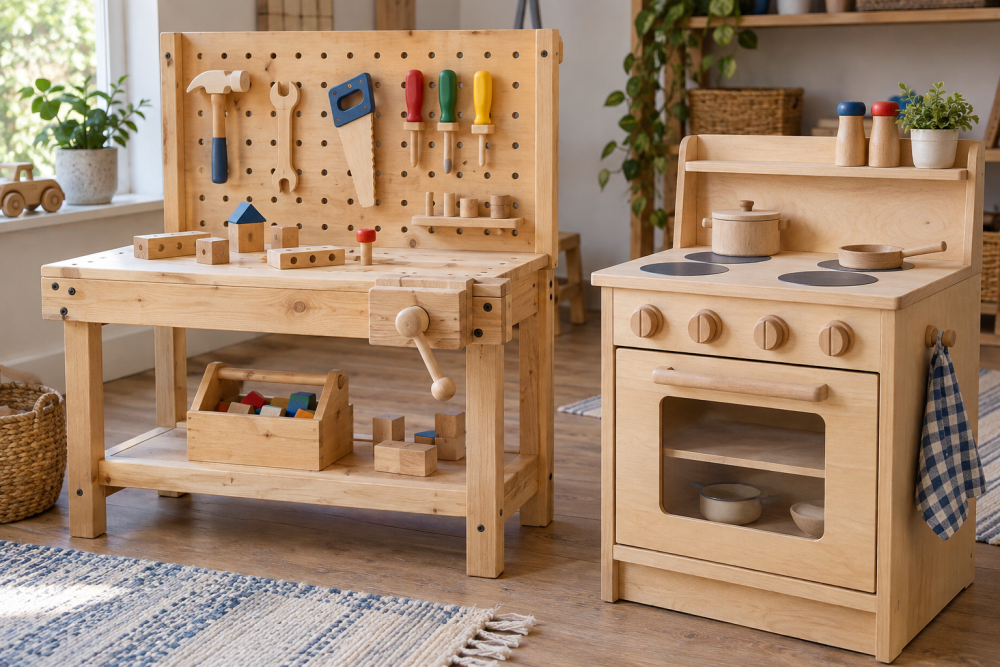
A wooden play kitchen stove is a manageable weekend project, but the turning knobs need more care than the box itself. The stove should be sturdy, easy to wipe clean, and free of small parts that can break off. This design uses a plywood cabinet, a countertop, painted burner rings, and three wooden knobs that rotate without controlling anything real.
Contents
Plan the Stove Before Cutting
A practical finished size is 24 inches wide, 12 inches deep, and about 24 inches high, not including a backsplash. That gives a child enough room to stand in front without making the unit difficult to move. For a younger child, reduce the height to 20 or 21 inches. Keep the cabinet shallow enough that it cannot easily be climbed.
| Part | Suggested material | Quantity and size |
|---|---|---|
| Sides | 1/2-inch plywood | 2 pieces, 24 by 12 inches |
| Top | 3/4-inch plywood or pine | 1 piece, 24 by 12 inches |
| Bottom shelf | 1/2-inch plywood | 1 piece, 23 by 11 inches |
| Back | 1/4-inch plywood | 1 piece, 24 by 24 inches |
| Door | 1/2-inch plywood | 1 piece, about 13 by 14 inches |
Use a 1/2-inch plywood sheet for the cabinet. Cabinet-grade plywood is easier to sand and has fewer voids than construction plywood, but construction plywood is acceptable if you fill the edges carefully. Avoid MDF for the whole project if the stove may encounter spills; its edges swell when wet.
Cut and Assemble the Cabinet
Cut the side panels, top, bottom, back, and door to size. Before assembly, sand every exposed edge with 120-grit paper. Follow with 180 grit on the parts children can reach. A sharp 1/8-inch round-over bit makes the top and front edges safer, although careful hand sanding also works.
Attach the bottom shelf between the side panels, with its top surface about 2 inches above the floor. Use glue and 1 1/4-inch screws driven through the sides. Drill clearance holes first so the plywood does not split. Add the top with glue and screws from underneath if possible. If screws must be visible, counterbore them and cover the heads with filler.
Check the cabinet for square by measuring both diagonals. They should be within about 1/8 inch of each other. Install the back panel with glue and 3/4-inch brads or screws. The back is more than cosmetic: it prevents the cabinet from racking sideways.
For a safer freestanding unit, add a 2-inch-wide mounting cleat inside the back near the top. If the stove is tall, narrow, or used by an energetic child, anchor it to a wall stud with an appropriate furniture strap. Do not rely on the weight of the wood to prevent tipping.
Make the Oven Door
Use a simple drop-down door rather than a door that swings outward into a child’s legs. Mount two small butt hinges along the bottom edge, leaving an even gap of about 1/8 inch around the door. Add a short length of cotton webbing or a chain inside the door to stop it at roughly 90 degrees. Without a stop, a child can lean on the open door and pull the stove forward.
A wooden handle can be made from a 3/4-inch dowel or a small hardwood strip. Round its edges and attach it with glue and screws from the inside of the door. If you add a clear “oven window,” use thin acrylic rather than glass, and capture it in a shallow routed groove or behind a screwed-on frame. Do not leave an acrylic panel held only by glue.
Install the Turning Knobs
The easiest reliable knob system uses short bolts as axles. Mark three knob centers across the front, about 2 1/2 inches apart and 3 inches below the countertop. Drill a 1/4-inch hole through the front panel at each mark. Enlarge the outside surface slightly with a countersink or 3/8-inch drill bit so the bolt head sits below the paint.
Use three wooden knobs, 1 1/2 to 2 inches in diameter, with a 1/4-inch hole through each. A set of unfinished wooden knobs is usually cheaper than turning them yourself. Fit a 1/4-inch bolt through the front, add a washer behind the knob, and secure it with a locknut on the inside. Tighten the nut until the knob has slight resistance but still turns freely.
Use bolts long enough to pass through the panel, knob, washer, and nut, but not so long that sharp threads project inside the cabinet. Cut off excess thread and file it smooth. Cover the nut with a dab of flexible adhesive or a small wooden guard. Do not use a wing nut: its shape invites tampering and can loosen quickly.
To make the knobs feel more like controls, glue a short contrasting line onto each knob or paint one line on the face. Add printed or painted markings around them. Keep the markings decorative; the knobs should not be connected to electrical parts, gas, springs, or hidden mechanisms.
Finish and Decorate the Stove
Fill screw holes with paintable wood filler, then sand the entire stove through 180 grit. Apply two or three thin coats of water-based enamel or furniture paint, sanding lightly between coats. A water-based enamel made for furniture or toys is easier to clean than ordinary wall paint. The cheaper option is fine for a lightly used indoor stove, but it may show scuffs sooner.
Paint two black or dark gray burner circles on the countertop using plates as templates. For a raised effect, glue down thin plywood rings, but round their edges and make sure they are firmly attached. Avoid loose metal lids, magnets, and small plastic pieces that could become choking hazards.
A clear water-based topcoat can improve stain resistance, but it is not essential. If you use one, choose a compatible product and allow the finish to cure according to its label. “Dry” does not always mean fully cured; wait several days before regular play.
Test the Finished Play Stove
Push and pull the stove from several directions. It should not rock, rack, or tip. Open the oven door repeatedly and check that the hinges do not pull out. Turn each knob at least 50 times, looking for loose nuts, rubbing paint, or excessive wobble.
Run your hand over every edge and corner. There should be no splinters, exposed screw points, trapped finger gaps, or detachable trim. Inspect the stove every few months and retighten the knobs if needed. The simplest design is often the safest: a solid cabinet, rounded edges, secure hardware, and knobs that turn without adding complicated parts.