What's inside
As an Amazon Associate I earn from qualifying purchases. This post may contain affiliate links at no extra cost to you.
Contents
Why Build a Compost Sifter in Spring
Finished compost is useful, but it often contains sticks, roots, stones, eggshell pieces, and clumps that are too large for seed trays or fine potting mixes. A simple wooden sifter separates the usable material without requiring a powered machine. Spring is a good time to build one because you can screen last year’s compost before filling beds and starting seedlings.
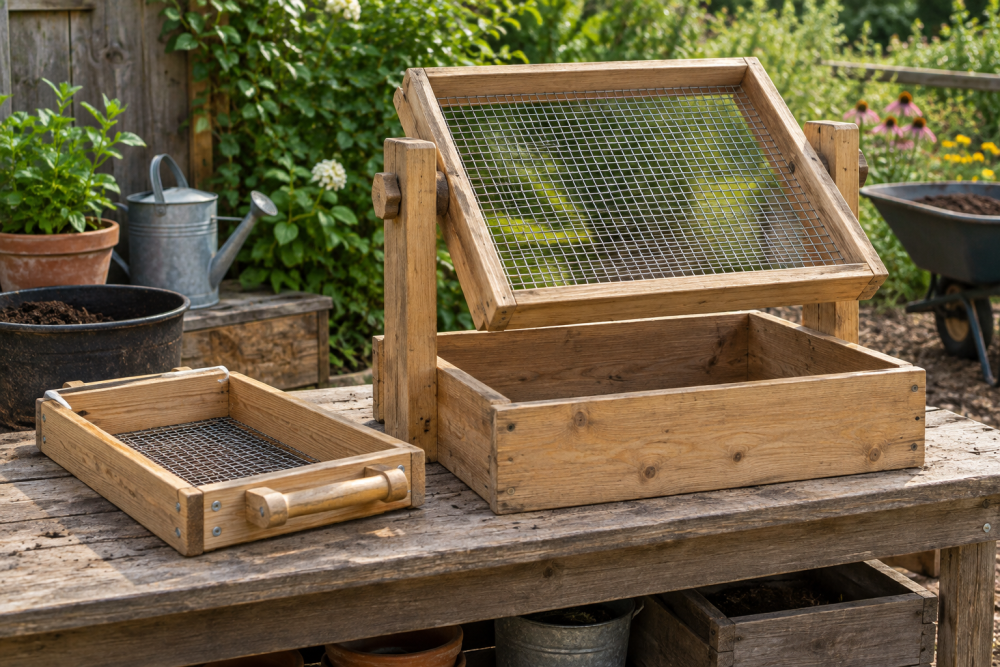
This beginner project is a shallow wooden frame with hardware cloth stretched across the bottom. You shake it over a wheelbarrow, garden cart, or tarp. The frame does not need to be perfectly square, but it does need to be sturdy enough to support several shovelfuls of damp compost.
Materials and Tools
Build the sifter at roughly 24 by 36 inches. That size is large enough to be useful but still manageable for one person. A smaller 18-by-24-inch frame is easier to handle if you have limited strength or mostly work with containers.
- Two 1-by-4 boards, 36 inches long
- Two 1-by-4 boards, 24 inches long
- Hardware cloth, approximately 24 by 36 inches
- 1 1/4-inch exterior screws
- 3/8-inch staples or fencing staples
- Exterior wood glue, optional
- Drill, driver, tape measure, pencil, and square
- Hand saw or circular saw
- Tin snips and work gloves
For most compost, 1/2-inch hardware cloth is the best starting point. It lets fine compost through while stopping woody chunks. Choose 1/4-inch mesh for seed-starting mix, but expect slower screening and more clogging. One-inch mesh moves material quickly but leaves too many coarse pieces for pots.
Choose the Mesh for the Job
| Mesh opening | Best use | Main trade-off |
|---|---|---|
| 1/4 inch | Seed mix and fine top-dressing | Clogs easily and takes more shaking |
| 1/2 inch | General garden compost | Good balance of speed and fineness |
| 1 inch | Removing large sticks and stones | Leaves coarse material behind |
Cut and Assemble the Frame
Cut the boards to length and check that the ends are reasonably square. Arrange the 36-inch boards as the long sides, with the 24-inch boards between them. This produces an outside dimension close to 24 by 36 inches if the shorter pieces fit between the long boards.
Drill two pilot holes through each long board into the end grain of each short board. The pilot holes reduce splitting, especially in inexpensive pine. Apply a small amount of glue if desired, then drive two screws at each corner. Check the frame with a carpenter’s square before tightening all eight screws. Measure both diagonals; if they are within about 1/4 inch of each other, the frame is square enough for this project.
Do not use untreated interior trim or thin lattice material. Compost is damp, and the frame will be dropped or dragged. Standard construction-grade pine is cheap and adequate. If you already have scrap cedar or exterior-rated lumber, it may last longer, but buying premium wood is unnecessary for a first sifter.
Attach the Hardware Cloth
Place the frame face down on the hardware cloth. Mark a piece that is about 1 inch larger than the frame on every side, then cut it with tin snips. Wear gloves: the cut edges are sharp and can cause deep punctures.
Center the mesh on the frame and fold the extra edge upward against the outside of the boards. Start by driving staples along one long side, spacing them about 3 inches apart. Pull the cloth tight across the opening, then staple the opposite side. Finish the short sides, working from the center toward each corner.
A manual staple gun with 3/8-inch staples is sufficient for most small sifters. If the mesh lifts between staples, add more rather than trying to stretch it aggressively. Over-tightening can pull staples out or deform the frame.
For a more durable edge, cover the mesh perimeter with thin wood strips or perforated metal strap. This is optional. It helps when the sifter will be used frequently, but it adds cost and can make repairs more difficult.
How to Use the Sifter
Set the sifter over a wheelbarrow or place it across two sturdy supports. The support surface must carry the frame without blocking the mesh. Add 2 to 4 inches of compost at a time. Shake the frame forward and backward, or lift one edge and tap it lightly.
Dry or slightly damp compost screens well. Very wet compost forms sticky balls that smear over the mesh. If the screen clogs, let the compost dry for a day or break up the lumps with a gloved hand. Do not fill the frame completely; excessive weight bends the hardware cloth and makes shaking tiring.
The material left on top is not waste. Return large pieces to the compost pile, or use them as rough mulch around established plants. Stones and plastic should be removed rather than mixed back in.
Common Failure Modes
Mesh sags: The opening is too wide for the wire gauge, or the load is too heavy. Use smaller batches and add a center support if necessary. A 24-by-36-inch screen normally works without one when used carefully.
Staples pull out: The edge was not supported, or the staples are too short. Add a wood lath over the mesh edge and fasten it with screws. This is a useful repair and usually cheaper than rebuilding the frame.
The frame twists: One corner may not be square, or a board has warped. Add a diagonal brace across the underside, but keep it outside the mesh opening so it does not catch compost.
Screening is painfully slow: The mesh may be too fine for unfinished compost. Switching from 1/4-inch to 1/2-inch galvanized hardware cloth is often a better fix than building a larger frame.
Spring Storage and Maintenance
After use, shake out trapped compost and rinse the screen only if it is heavily clogged. Let the sifter dry before storing it under cover. Leaving wet compost against the wood encourages rot and makes the mesh rust faster.
Inspect the staples and corners at the start of each season. Tighten loose screws and replace damaged mesh before it tears farther. If you expect to screen several cubic yards, consider a second frame with a different mesh size. For occasional garden use, however, this inexpensive 1/2-inch version is usually all a beginner needs.