What's inside
As an Amazon Associate I earn from qualifying purchases. This post may contain affiliate links at no extra cost to you.
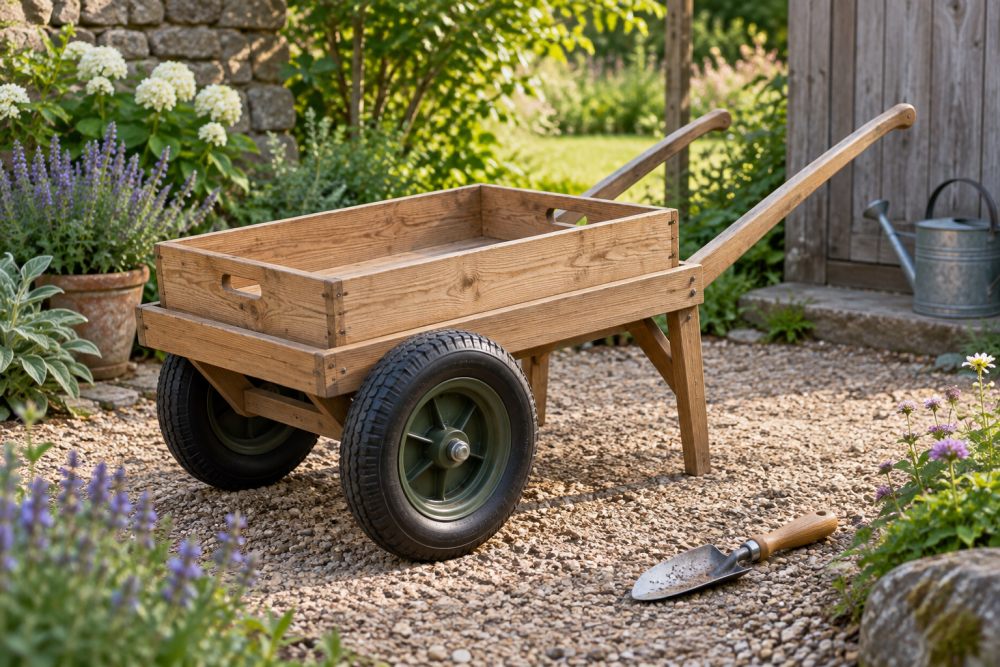
A wooden garden cart is useful for hauling soil, mulch, firewood, tools, and weeds, but a fixed box quickly becomes awkward when you need to empty it. This version uses a removable dump tray: lift the tray off the cart, carry it separately, or tip it over a compost pile. The build suits a confident beginner and can be completed over a weekend with common tools.
Contents
Project Overview
The cart has a 24-by-36-inch tray, two fixed rear legs, two large wheels at the front, and a simple handle at the rear. The tray is a shallow wooden box that rests on four cleats. Two removable retaining pins stop it from sliding off while you pull the cart.
| Part | Recommended material | Reason |
|---|---|---|
| Tray bottom | 3/4-inch exterior plywood | Strong, flat, and less prone to splitting than solid boards |
| Tray sides | 1-by-8 cedar or treated lumber | Lightweight and weather resistant |
| Cart frame | 2-by-4 treated lumber | Inexpensive and stiff enough for garden loads |
| Wheels | 16-inch pneumatic utility wheels | Roll more easily over soil and gravel than small hard wheels |
Expect a practical load of about 150 pounds, assuming sound lumber and inflated tires. The cart may carry more briefly, but the wheels, axle, and tray bottom become the limiting parts. For wet soil or firewood, keep the load low and centered.
Materials and Tools
Buy one 4-by-4-foot sheet of 3/4-inch exterior plywood, two 1-by-8-by-36-inch boards, two 1-by-8-by-24-inch boards, and three 8-foot treated 2-by-4s. You will also need a 5/8-inch steel axle about 32 inches long, two 16-inch pneumatic wheels, washers, cotter pins, exterior screws, construction adhesive, and two removable hitch or clevis pins.
A 16-inch pneumatic utility cart wheel set is the better choice for lawns, gravel, and loose soil. Solid wheels never need inflation, but they transmit more vibration and can make a loaded cart difficult to pull over uneven ground.
Use a circular saw, drill, 5/8-inch drill bit, countersink bit, clamps, tape measure, square, and wrench. A box of exterior wood screws is preferable to drywall screws, which rust and can snap under movement. Wear eye protection when cutting treated lumber or plywood.
Cut the Parts
Cut the plywood tray bottom to 24 by 36 inches. Cut the long tray sides to 36 inches and the end sides to 22 1/2 inches. The shorter end pieces fit between the long sides, producing an outside tray size close to 24 by 36 inches.
Cut two frame rails to 36 inches. Cut two crossmembers to 21 inches so they fit between the rails. Cut two rear legs 24 inches long, two handle arms 36 inches long, and one handle crossbar 24 inches long. Round over sharp corners with sandpaper. Slightly beveling the bottom edges of the tray sides helps prevent them from catching on the frame.
Build the Cart Frame
Lay the two 36-inch frame rails parallel and install the 21-inch crossmembers between them, one about 4 inches behind the wheel axle and the other near the rear. Use two 3-inch exterior screws at each joint, drilling pilot holes first. Check that the frame is square by measuring both diagonals; adjust it until the measurements are within 1/8 inch.
Position the axle centerline 5 inches from the front ends of the rails. Drill a straight 5/8-inch hole through each rail. A long bit or drill guide helps, because a misaligned axle causes the wheels to wobble. Slide in the axle, add a washer, wheel, washer, and cotter pin on each side. Leave enough clearance that the tire does not rub the frame.
Attach the rear legs beneath the back of the frame, angled slightly outward if desired. Fasten each with screws from two directions. Add the handle arms to the outside of the rear legs and connect them with the 24-inch handle crossbar at a comfortable height, usually 34 to 38 inches above the ground. Round the grip edges thoroughly; a sharp handle becomes painful when the cart is loaded.
Make the Removable Tray
Set the plywood bottom on a flat surface. Apply a thin bead of exterior construction adhesive along each edge, then screw the tray sides to the plywood with 1 1/4-inch screws spaced 6 to 8 inches apart. Keep the screw heads flush, not buried deeply. Seal the plywood edges with exterior paint or a suitable wood sealer, since exposed end grain absorbs water quickly.
Fasten two 24-inch 2-by-4 cleats under the tray, running across its width about 5 inches in from each end. These cleats reinforce the bottom and give the cart frame something solid to support. Pre-drill every hole near the plywood edges to prevent splitting.
Install two 2-by-4 support cleats across the cart frame in positions that line up with the tray cleats. When the tray is seated, the cleats should nest against one another rather than leave the plywood carrying the entire load. Add a 1/2-inch spacer under one edge if the tray rocks; a rocking tray will loosen screws quickly.
Add the Retaining Pins
With the tray on the frame, drill a 1/2-inch hole through each rear tray cleat and into the support beneath it. Insert a removable clevis pin or hitch pin through each hole. Place the pins where they can be reached without unloading the cart.
These pins are not meant to carry the load. Their job is to stop the tray from sliding backward when you pull. If the tray shifts under braking, add a front stop block across the frame. Keep the stop low enough that you can still lift the tray clear.
Test, Finish, and Maintain
Sand the handle and all exposed corners to 120 grit. Apply two coats of exterior paint, porch enamel, or penetrating outdoor finish. Painting the plywood edges matters more than applying a thick finish to the broad faces. Let the finish cure before loading the cart.
Test it first with 25 pounds, then 75 pounds, watching for frame flex, wheel wobble, and tray movement. If the cart pulls to one side, check axle alignment and tire pressure before changing the frame. If the tray bottom bows, add a third support cleat under its center.
Before each season, tighten the wheel hardware, inspect the cotter pins, and look for split tray sides. Store the cart under cover when possible. Pneumatic tires lose pressure during cold weather, while treated lumber shrinks as it dries; both are normal reasons to recheck the cart before hauling a heavy load.