What's inside
As an Amazon Associate I earn from qualifying purchases. This post may contain affiliate links at no extra cost to you.
Contents
Why a Curved Footrest Works
A straight footrest does the job, but it forces you to plant your feet in one spot. A gentle curve – about a 10 to 12-inch rise in the center over a 16-inch span – lets you shift your feet naturally and it forgives small errors in leg length. It also stiffens the stool. Four legs tied together with two straight stretchers can rack. Replace one stretcher with a curved footrest set 8 to 9 inches off the floor, and the whole base triangulates. For a simple shop stool that will hold 250+ pounds daily, that curve is structural, not just decorative.
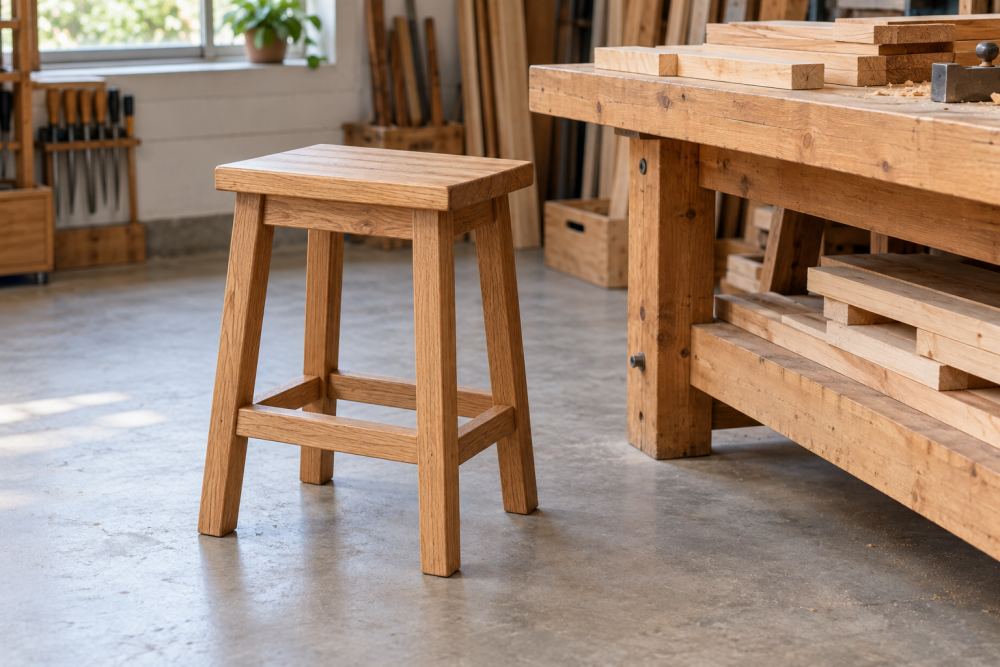
This build is a weekend project for a confident beginner. No mortise-and-tenon required. We’ll use dowels and screws with plugs, which are strong, fast, and don’t need a dedicated jig. Total build time is about 4 to 6 hours plus glue drying. Finished height is 24 inches, which works for a 34 to 36-inch workbench. Scale the legs to 18 inches for a dining-height stool.
Materials and Tools
Use dry hardwood. Construction lumber (SPF 2x4s) will work for a practice stool but it moves a lot and dents easily. For a stool you keep, poplar is the cheapest hardwood that paints well, hard maple is the most durable, and white oak handles moisture if the stool lives in a garage or near an entry.
| Wood Species | Cost for This Project | Durability | Best For |
|---|---|---|---|
| Poplar | $25 – $35 | Medium, paints well, dents more easily than maple | First build, painted finish |
| Hard Maple | $45 – $65 | Very hard, excellent wear resistance | Daily-use shop stool, clear finish |
| White Oak | $50 – $70 | Hard, water and rot resistant | Garage, mudroom, covered porch |
| Southern Yellow Pine (2×10) | $15 – $20 | Soft, prone to dents and resin bleed | Prototype or budget shop stool |
For tools, you don’t need a full shop. A miter saw or circular saw with a straightedge, a jigsaw for the curve, a drill/driver, and a random orbit sander will handle 90% of the work. If you have a table saw, use it to rip the seat and footrest to width, but it’s not required if you buy S4S boards. You’ll also want four 24-inch bar clamps for the glue-up and a compass or thin batten to lay out the curve.
Cut List and Dimensions
All dimensions are for 4/4 (3/4-inch actual) hardwood. Buy one 6-foot 1×12 for the seat and footrest, and one 8-foot 1×4 for the legs and stretchers. Or buy 5/4 stock and plane to 3/4 inch if you have access to a planer.
Seat: 1 piece, 13 inches deep x 16 inches wide x 3/4 inch thick. Glue up from two 6-1/2 inch boards if you can’t find a wide board. Legs: 4 pieces, 23-1/4 inches long x 3-1/2 inches wide x 3/4 inch thick. Taper optional. Straight side stretchers: 2 pieces, 10 inches long x 2-1/2 inches wide. Curved footrest: 1 piece, 16-1/2 inches long x 4-1/2 inches wide (this gives room to cut the arch and still have 3 inches of width at the center).
Hardware: 16 x 3/8-inch x 1-1/2-inch fluted dowels, wood glue (Titebond II or III), 8 x 1-1/4-inch #8 wood screws with 3/8-inch plugs if you want to reinforce the dowel joints. 120, 150, and 180-grit sandpaper.
Step 1: Prep Stock and Lay Out the Legs
Mill or select flat, straight boards. Check for twist by sighting down each board – any rock on a flat table will telegraph into a wobbly stool. Cut the four legs to length at the same time by gang-cutting or using a stop block. This keeps them identical to within 1/64 inch. If your floor is uneven, you’ll true the legs later, but starting equal matters.
For a lighter look, taper the inside two edges of each leg. Mark 5 inches down from the top (where the seat will hide the full width) and taper to 2-1/2 inches at the bottom. Cut the taper on a table saw with a taper jig or with a jigsaw and clean up with a hand plane. If you skip the taper, the stool looks blocky but it’s stronger and faster – the cheaper option is completely fine here.
Sand legs to 150 grit before assembly. It’s much harder to sand inside corners after glue-up.
Step 2: Cutting the Curved Footrest
This is the only tricky cut. Lay out the footrest blank flat. Find the center (8-1/4 inches from each end) and make a mark 3 inches up from the bottom edge – that’s the top of the arch. On each end, mark 3/4 inch up from the bottom to leave a 3/4-inch tenon/dowel area where it meets the legs. Connect these three points with a fair curve. A thin strip of 1/8-inch plywood bent between nails at the three points makes a perfect arc. Trace it.
Cut just outside the line with a jigsaw using a fresh fine-tooth blade. Don’t force the saw – let the blade cut or it will wander and leave burn marks. Stay 1/16 inch proud of the line and sand to the line with 80-grit on a sanding block or with a compact router and a curved template if you have one. The arch height is not critical, but symmetry is. If one side is higher than the other, the stool will look off from across the room.
Failure mode to avoid: cutting the curve too deep. If you leave less than 2-1/2 inches of width at the center of the footrest, it can crack under foot pressure, especially in pine or poplar. Keep at least 2-3/4 inches in the middle.
Step 3: Assembly Sequence
Dry-fit everything. The seat sits on top of the legs, overhanging 3/4 inch on the sides and front/back. The two straight stretchers connect the front and back legs, 5 inches up from the floor. The curved footrest connects the left and right legs, also 8 to 9 inches up. This height lets you rest feet without hitting the stretcher with your ankles.
Mark dowel locations: two dowels per joint, spaced 1-1/2 inches apart, centered on the 3/4-inch thickness. Drill 13/16-inch deep holes with a doweling jig or a self-centering jig. If you don’t have a jig, clamp the pieces together and drill straight by eye – then use 1-1/4-inch screws plus plugs as backup. Screws alone will loosen with racking; dowels alone are strong if holes are tight.
Glue in stages. First, glue the two side assemblies (each with two legs + one straight stretcher + the curved footrest on one side). Check for square by measuring diagonals – they should be within 1/16 inch. Let cure 45 to 60 minutes. Second, join the two sides with the remaining stretchers and the seat. Use clamps across the width and a strap or two long bar clamps along the length. Don’t overtighten and starve the joint; you want a thin, consistent glue line with small squeeze-out.
After the glue sets, reinforce each leg-to-seat joint with two 1-1/4-inch screws driven up through the leg into the seat, then plug the holes if you want a clean look. This mechanical backup prevents the seat from popping off if the stool is dragged sideways, which is the most common failure.
Step 4: Leveling and Finishing
Even with careful cuts, most stools rock. Place the stool on a known-flat surface (table saw top or kitchen counter). Shim until it doesn’t rock, then measure the gap under the short leg. Trim that amount off the long legs with a flush-cut saw or by sanding on a flat board with 80-grit stuck to it. Take off 1/32 inch at a time.
Round over all edges with 1/8-inch roundover or just break them with 150-grit. Sharp edges chip and feel bad on the back of your legs. Sand the whole stool to 180 grit, vacuum, and wipe with a tack cloth.
For a shop stool, three coats of oil-based polyurethane or water-based poly with 320-grit scuff between coats is the most durable low-maintenance finish. For an entry stool that might get wet shoes, add paste wax over the poly or use an exterior varnish on white oak. Avoid film finishes that are too thick on the seat – they crack when the seat expands and contracts. If you want a natural oil look, use a hardwax oil, but plan to recoat yearly.
Final trade-off: If you paint, poplar plus screws-and-plugs is fast and cheap and no one will see the joint choice. If you want clear wood to show, spend the extra 20 minutes per joint to do dowels cleanly and use maple or oak. The result looks better and will still be solid in ten years.