What's inside
As an Amazon Associate I earn from qualifying purchases. This post may contain affiliate links at no extra cost to you.
Contents
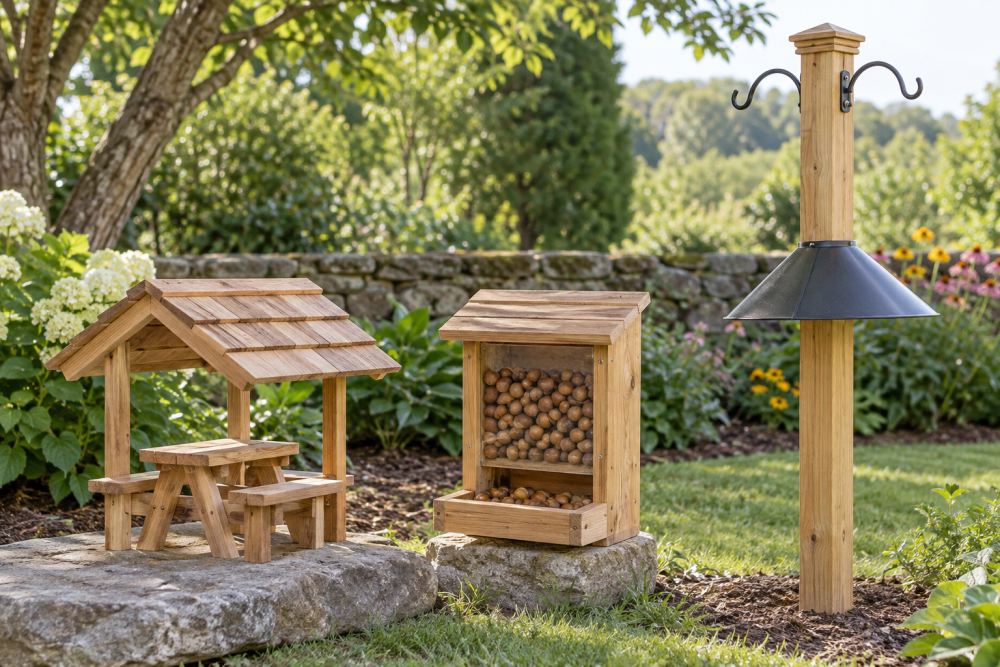
Why wood works for a feeder pole
A wooden pole is cheaper than a steel pole kit, easier to customize for multiple feeders, and holds screws for hooks and baffles without special clamps. The trade-off is maintenance. An untreated pine pole will rot at ground level in 1-2 seasons. A properly sealed cedar or pressure-treated post will last 8-12 years before it needs replacement, even with ground contact. If you want zero maintenance, buy metal. If you want a weekend build you can adapt as you add feeders, wood is the better choice.
This build uses a single vertical 4×4 post, two to four side hooks, and a stovepipe-style baffle below the feeders. Total cost is typically $45 to $90 in materials if you already own a drill and saw, compared to $120 to $200 for a comparable powder-coated steel pole station.
Materials and tools
For one pole with two feeder hooks and one baffle:
Post: 8-foot 4×4. Buy a 10-foot if you plan to bury 2 feet in the ground instead of using a ground sleeve. Cedar is ideal, pressure-treated southern yellow pine is the budget workhorse. Avoid whitewood or untreated spruce for outdoor use.
Hooks: 2x 8-inch to 12-inch heavy-duty plant hanger hooks with lag threads, rated for at least 15 lbs each. Get the type with a brass or stainless steel screw thread and a vinyl-coated hook arm. A feeder full of wet seed and a squirrel hanging off it easily hits 10-12 lbs of dynamic load.
Baffle: Either a 6-inch diameter by 24-inch long stovepipe with end cap, or a 16-inch diameter cone baffle. The stovepipe is more effective against raccoons and squirrels because it wobbles.
Hardware: 1/2-inch galvanized pipe flange or hose clamp to support the baffle, exterior wood screws (2-1/2 inch), gravel for drainage, and an outdoor wood sealer or spar urethane. If you are not burying the post, add a 4×4 ground spike or bolt-down post base.
Tools: Post hole digger or spade, level, drill/driver with 1/4-inch pilot bit, ratchet or socket for lag hooks, circular saw or handsaw, sandpaper (80 and 120 grit), and tape measure.
Choosing wood and finish
Not all 4x4s are equal. The center of a pressure-treated post is often less saturated with preservative than the outer 1/2 inch, so any cut end needs extra sealing.
| Wood | Cost for 8ft 4×4 | Rot Resistance | Workability | Best For |
|---|---|---|---|---|
| Pressure-Treated Pine | $12 – $18 | High (ground contact rated) | Heavy, prone to warping as it dries | Budget buried posts |
| Western Red Cedar | $30 – $45 | High naturally, no chemicals | Light, stable, easy to drill | Above-ground or sleeved installs, near gardens |
| Douglas Fir | $15 – $25 | Moderate | Strong and straight | When you will seal all sides thoroughly |
If you use pressure-treated lumber, let it dry 2-3 weeks before sealing and wear a dust mask when cutting. For any species, seal all six sides including the buried bottom end with two coats of exterior sealer. The cheaper option is fine here: a $12 pressure-treated post sealed correctly will outlast an unsealed $40 cedar post.
Step 1: Cut and prep the post
Cut your post to 84 to 96 inches if you bought a 10-footer. Sand the sharp edges with 80 grit, then 120 grit. This is not just for looks – a slightly rounded edge holds finish better and is less likely to split when you drive lag hooks.
Mark your hook locations on two opposite faces or at 90 degrees if you want feeders to hang without tangling. Place the top hook 6 inches from the top of the post and the second hook 12 to 14 inches below it, on the opposite side. This staggers weight and keeps 12-inch long feeders from banging into the pole.
Pre-drill pilot holes for the hooks with a 3/16-inch bit for softwood, 1/4-inch for hardwood or cedar. Drill 2-1/2 inches deep and drive the lag hooks in by hand until the threaded base is tight to the wood. Do not use an impact driver for the final turn. It will strip the threads in soft pine and the hook will sag under load.
Step 2: Build and fit the baffle
The baffle must sit at least 4 feet off the ground and at least 18 inches below the lowest feeder. Anything lower and squirrels jump over it. Anything higher and raccoons can reach around it.
The most reliable DIY baffle is a stovepipe baffle. Take a 24-inch length of 6-inch galvanized stovepipe and a matching end cap. Cut a cross slit in the cap just large enough for the 4×4 to pass through, then fold the tabs inward so the cap slides snugly but can wobble. Assemble the pipe to the cap. The baffle should not be fixed tight to the pole – the wobble is what dumps a climbing animal.
To hold it up, mount a support below it. The simplest is a large stainless hose clamp tightened around the post at 48 to 52 inches high, with a couple of screws through the clamp band into the wood to stop slipping, or a small L-bracket on each side of the post. Slide the stovepipe over the top of the post and let it rest on the support. It should spin and tilt freely. If you prefer a cone baffle, buy a pre-made stovepipe baffle style cone and mount it the same way. Cones look cleaner but are easier for raccoons to grip if the cone is under 15 inches in diameter.
Failure mode to avoid: screwing the baffle directly to the pole. A fixed baffle becomes a ladder. Also avoid baffles under 14 inches in diameter. Fat gray squirrels can hug them and get around.
Step 3: Set the pole
You have two solid options. Burying is strongest but makes replacement harder. A ground sleeve or spike keeps the wood out of soil and makes the pole removable for winter.
For a buried install, dig a 24 to 30 inch deep hole, 10 to 12 inches wide. Add 4 inches of gravel for drainage. Set the post, check plumb on two faces with a level, then backfill with tightly tamped soil in 6-inch lifts, or with concrete if your soil is sandy. If you use concrete, dome the top of the concrete above grade so water runs away from the post. Do not pour concrete to the very top of the hole – leave 2 inches of soil on top to hide it and reduce UV cracking.
For a surface install, drive a 4×4 ground spike per its instructions until the socket is about 1 inch above grade, or bolt a post base to a patio pier. Slip the post in and secure with the spike’s bolts or with 1-1/2 inch exterior screws. This method adds about $15 to $25 to the cost but doubles the life of a pine post because end grain never sits in wet soil.
Finished height should put the hooks at 6 to 7 feet above ground. That is high enough to keep feeders out of deer reach and to meet the 4-foot baffle clearance, but low enough to refill without a ladder.
What goes wrong and how to prevent it
Pole leans after first winter: Usually insufficient depth or loose backfill. In frost-prone areas, you need 30 inches minimum depth. Tamp soil hard. If you wobble the pole and the ground moves, it will not hold a 15-lb feeder in wind.
Hooks pull out: Undersized pilot hole or hook driven into a knot. If you hit a hard knot, move the hook 2 inches. If the hole strips, fill with exterior wood glue and a 3/8-inch dowel, let cure, then re-drill.
Baffle fails: Squirrel jumps from nearby fence, branch, or second pole within 8 feet. No baffle defeats a 6-foot lateral jump. Place the pole at least 10 feet from any launch point. Trim branches annually.
Wood splits at top: Water enters the end grain, freezes, and cracks. Seal the top end grain with two extra coats of sealer or cap it with a small piece of aluminum flashing held with exterior screws.
If you maintain it once a year – tighten hooks, re-seal the top and south-facing side, and check that the baffle still wobbles – a wooden feeder pole is a 30-minute build that will quietly do its job for years without the wobble and rust you get from cheap sectional metal poles.