
What's inside
As an Amazon Associate I earn from qualifying purchases. This post may contain affiliate links at no extra cost to you.
Contents
How Each Joint Works on a Chest Lid
A storage chest lid is a wide, flat panel that gets lifted, slammed, sat on, and exposed to seasonal humidity swings. How you join the boards determines whether it stays flat, how it looks in a year, and how much work it takes to build. Tongue and groove and shiplap both solve the same core problem — joining narrow boards into a wider panel without a single wide board — but they do it differently.
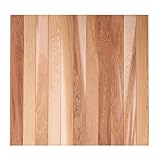
Tongue and groove (T&G) locks boards together with a centered tongue on one edge that fits into a matching groove on the next board. On a 3/4-inch thick lid, the tongue is typically 1/4-inch long and about 1/4-inch thick. When glued, the joint self-aligns and resists vertical movement between boards, which helps keep the lid face flush. Most T&G for chest lids is edge-glued into a solid panel.
As an Amazon Associate we earn from qualifying purchases at no extra cost to you.
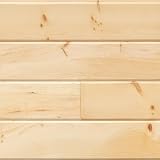


Shiplap uses a rabbet — a stepped notch — on opposite faces of each board so they overlap. A standard shiplap for 3/4-inch stock has a 3/8-inch wide by 3/8-inch deep rabbet. The overlap hides gaps but does not mechanically lock the boards vertically the way T&G does. Shiplap lids are often left unglued or only lightly glued/pinned at the center to allow movement, with the overlap acting as a shadow line that expands and contracts.
Wood Movement and Staying Flat
This is where lids fail. A solid-wood chest lid 18 to 24 inches deep will move a lot across the grain. Expect roughly 1/4-inch to 5/16-inch of total seasonal width change for plain-sawn pine or poplar 20 inches wide in most indoor environments (roughly 6% to 12% equilibrium moisture content swing). Quarter-sawn white oak moves about half that, but it still moves.
If you edge-glue a T&G panel into a solid slab and then screw it rigidly to cleats or strap hinges without allowance, that movement has nowhere to go. The failure mode is a cracked glue line, a split board, or a lid that cups and binds against the chest sides in summer. To make T&G work, you must build it as a floating panel or attach it with elongated screw holes in cross-grain cleats or use a breadboard end that allows expansion. The interlocking joint itself does not prevent wood movement — glue and rigid fastening do.
Shiplap is more forgiving because the overlap is designed to move. Boards can be attached to underlying battens or cleats with a single row of fasteners down the center of each board, letting each board expand and contract under the overlap. You will see the shadow line get slightly wider in winter and tighter in summer, but you will not get a split panel. That is why shiplap is common on blanket chests that live in unheated garages, cabins, or porches where humidity swings are larger.
For either joint, do not trap a solid-wood lid inside a rigid frame without a groove for expansion. Leave 1/8-inch per foot of width as expansion space inside the frame if you are doing a framed lid design.
Strength and Daily Use
Once glued, a T&G panel is structurally a single board. Glue surface area is high, and the tongue prevents one board from deflecting above its neighbor when someone presses on the lid. With proper edge glue-up, the joint is stronger than the wood itself. For a chest lid that doubles as a bench — a common use — that rigidity matters. A 3/4-inch thick pine T&G panel glued up with PVA and supported only by hinges on the back and a lid stay will span 30 to 36 inches without noticeable sag if the boards are grain-matched and flat.
Shiplap that is not edge-glued relies on the battens or cleats underneath for strength. The boards will flex independently between supports. If you build a shiplap lid with two cross battens 12 inches apart, it will feel solid. If you only use battens at the front and back edges, the center of each board can deflect and the overlap can open when weight is applied. You can edge-glue shiplap too, but then you lose its main movement advantage and you might as well have used T&G, which gives better alignment.
Both joints fail if boards are cupped before assembly. T&G will force a slight cup flat during glue-up but creates internal stress that later telegraphs as a bow across the whole lid. Shiplap will simply show an uneven shadow line and may not close tightly. Start with boards that are flat within 1/32-inch over 4 feet, and let them acclimate in your shop for 3 to 5 days before milling.
Appearance: What You Will See in a Year
T&G, when glued and sanded flush, looks like a solid panel with faint glue lines. With a small V-groove or micro-bevel milled into the joint, you get the classic beadboard look. Without it, you get a clean, furniture-like top that takes stain evenly. The downside is that any seasonal gapping shows as a light-colored crack in the finish, which is hard to hide.
Shiplap is intentionally rustic. The 1/8-inch to 3/16-inch reveal creates a shadow line at every joint. Dust collects there, but the line hides movement and imperfect milling. On a farmhouse or coastal chest, that is the point. On a refined keepsake chest where you want a smooth top for writing or serving, shiplap will look out of place and feel uneven under your hands.
Tools, Time, and Skill Level
T&G requires precise, matched milling. You need a router table or shaper and a matched tongue and groove router bit set or a table saw with a grooving blade. Setup time is 30 to 45 minutes to get the tongue centered and the fit snug but not tight — you want a hand-pressure fit, not a mallet fit. Dry-fit the whole lid first; if you have to force boards together, the joint will starve for glue and later crack. Glue-up needs at least four wood clamps for panel glue-up for a 20×36-inch lid, plus cauls to keep the panel flat while the glue cures overnight.
Shiplap is faster with fewer tools. A single shiplap router bit or a table saw with a dado stack cuts both rabbets with one setup. Tolerances are looser because the overlap hides small errors of 1/64-inch. Assembly is usually mechanical — screws or nails into cleats — so there is no stressful panel glue-up and no need for a perfectly flat glue surface. A beginner can mill and assemble a shiplap lid in an afternoon. A T&G glued panel is a solid intermediate project due to the milling and glue-up.
Cost and Materials
Material cost is nearly identical — both use the same amount of 3/4-inch stock. Waste differs. T&G removes more material per joint and any miscut ruins the board because the profile is on both edges. Expect 10 to 15% waste on your first T&G lid. Shiplap removes less and miscuts can often be re-trimmed to a slightly narrower board and still used.
Tool cost favors shiplap if you are buying bits specifically for this project. A quality shiplap bit is $25 to $40. A matched T&G set is $45 to $80. If you already own a biscuit joiner or domino, you can also get T&G-like alignment without a dedicated bit set, but that adds cost.
| Factor | Tongue and Groove | Shiplap |
|---|---|---|
| Best for | Flat, furniture-grade lids and bench-top chests | Rustic chests, high humidity swings, quick builds |
| Movement handling | Must be built as floating panel with allowance; shows cracks if restrained | Overlap hides gaps; boards move independently on cleats |
| Flushness | Self-aligning, very flat after sanding | Boards can step slightly; relies on battens |
| Strength (unsupported span) | High when edge-glued; acts as one panel | Depends on cleat spacing; weaker between supports if unglued |
| Tools needed | Matched T&G bits or shaper, 4+ clamps, cauls | Single rabbeting setup, screws/nails, 2 battens |
| Skill level | Intermediate | Beginner |
| Finish look | Clean, minimal lines; V-groove optional | Visible shadow lines every board |
Which Should You Build?
Choose tongue and groove if your chest will live indoors year-round, you want a smooth, gap-free top that can serve as a seat, and you are comfortable with a precise router setup and a full panel glue-up. Build it 1/4-inch undersized for the chest opening, attach any cross-battens with slotted holes, and finish both faces equally to slow cupping. Do not screw a glued T&G lid solid to cleats across the grain.
Choose shiplap if the chest will see wide humidity changes, you want the fastest build with the most forgiving joints, or you like the shadow-line look. Use kiln-dried boards at 8% to 10% moisture, attach each board to two or three interior battens with one screw per board per batten centered on the board, and leave a 1/16-inch gap at the overlap during dry winter assembly. Pre-finish the rabbet overlaps before final assembly so you do not get unfinished stripes when the boards shrink.
If you are on a budget and only building one chest, shiplap is the cheaper, safer option and the thinner overlap is perfectly durable for light storage. If you are building a keepsake chest to last decades and be passed down, the extra time to mill and glue a T&G panel is worth it for a lid that stays flat and feels like a single piece of furniture.