What's inside
As an Amazon Associate I earn from qualifying purchases. This post may contain affiliate links at no extra cost to you.
Contents
What This Project Is
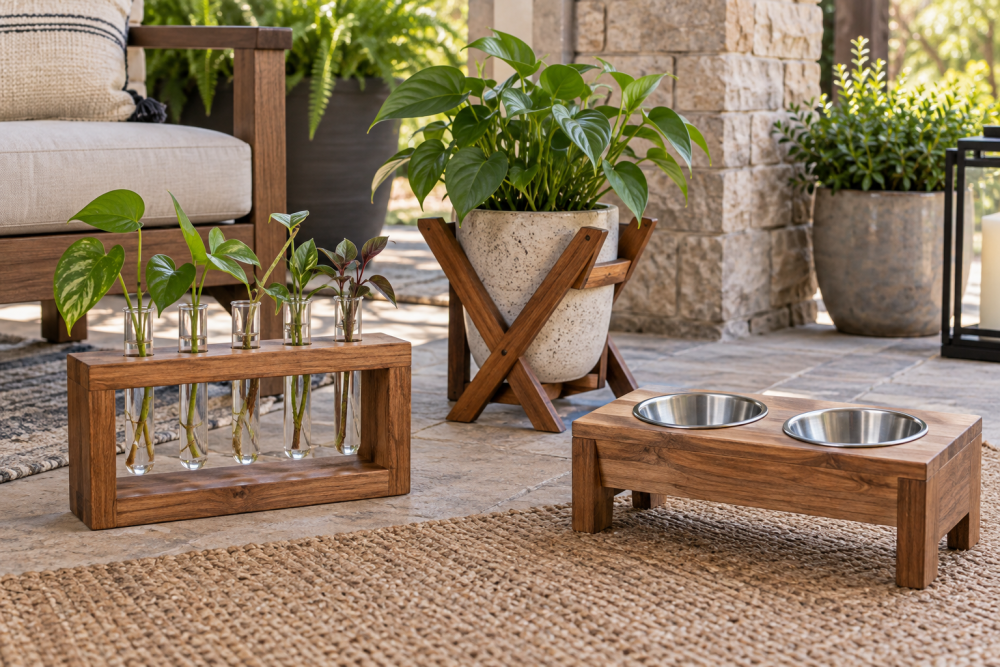
This is a low, rectangular wooden stand with two circular cutouts that hold standard stainless steel pet bowls. The bowls drop in from the top and lift out for cleaning. No plumbing, no hinges, no drawer slides. It’s one of the best beginner builds because it teaches four core skills — accurate measuring, straight crosscuts, cutting curves with a jigsaw, and sanding/finishing — without requiring joinery beyond butt joints and screws.
Expect 2-3 hours of build time plus dry time for finish. If you can cut a 2×4 to length and drill a hole, you can build this.
Sizing Your Feeder Correctly
Do not guess. Take your bowls and measure them. You need two numbers: the outer diameter of the rim, and the diameter of the bowl body just below the rim. Your cutout should be 1/4 inch larger than the body and 1/2 to 3/4 inch smaller than the rim, so the rim sits securely on the wood.
Height matters more than people think. A feeder that is too tall forces a small dog or cat to strain upward; too low and a large dog still has to hunch. Measure your pet standing naturally and measure from the floor to the top of the front shoulder (withers). For most pets, the top of the feeder should be about 2-3 inches below that point. For cats and very small dogs, 4 inches is usually right.
| Pet Size | Typical Bowl Capacity | Common Bowl Diameter | Recommended Platform Height | Cutout Diameter (for bowl) |
|---|---|---|---|---|
| Cat / Small Dog (under 15 lbs) | 8-16 oz | 5 – 5.5 inches | 3 – 4 inches | 4.75 inches |
| Medium Dog (20-50 lbs) | 32 oz (1 quart) | 6.5 – 7 inches | 7 – 9 inches | 6.25 inches |
| Large Dog (60+ lbs) | 64 oz (2 quart) | 8 – 8.5 inches | 12 – 14 inches | 7.75 inches |
If you are building for two different size bowls (water and food), size each hole separately. Trace the actual bowls, don’t rely on the table.
Materials and Tools
For a two-bowl feeder for medium dogs, you need one 1×12 pine or poplar board, 4 feet long, for the top and sides, plus a 1×2 or 1×3 for simple internal cleats. Pine is cheapest and perfectly fine if you seal it well. Poplar is harder, paints better, and dents less — worth the extra $10 if the feeder will live on a hard floor and get bumped.
Do not use MDF or particle board. One spilled water bowl will swell it permanently. Plywood can work but the exposed edge ply will wick water unless you seal it thoroughly.
Tools you actually need: tape measure, speed square, circular saw or miter saw, drill/driver, jigsaw, and sandpaper (120 and 220 grit). A forstner bit set helps to drill the starter hole for the jigsaw, but a standard 3/8-inch drill bit works. If you want perfectly smooth cutouts, a jigsaw with guide makes the curves far easier to control than a basic model.
Fasteners: 1-1/4 inch wood screws and wood glue. Have a compass or a simple shop-made trammel (a nail, a strip of wood, and a pencil) for marking circles.
Cut List for Two-Bowl Feeder
Dimensions below are for a feeder using two 32 oz bowls (approx. 7-inch diameter) with an overall size of 24 inches wide x 10 inches deep x 8 inches tall. Adjust length and hole spacing to your bowls.
Top: 1×12 at 24″ x 10″ (actual 11.25″ wide, you will rip to 10″ or leave it at 11.25″ and adjust side length)
Two sides (legs): 1×12 at 8″ tall x 10″ deep (or 11.25″ if you didn’t rip the top)
Two cleats: 1×2 at 8.5″ long — these screw inside the legs to support the top
Optional center divider: 1×12 scrap at ~6″ tall x 10″ deep, placed between the bowls to prevent sag on longer feeders.
Cut everything to length first, then dry-fit. The top should overhang the sides by 1/4 inch on the front and sides for a cleaner look, but flush is also fine and simpler.
Step-by-Step Build
1. Mark the bowl holes. Find the centerline of the top board lengthwise and depth-wise. From each end, measure in 6.5 inches to locate the center of each hole. Check that you have at least 2 inches of wood between the holes and at least 1.5 inches from the hole edge to the board edge. If not, lengthen the top.
2. Draw the circles. Set your compass to half the cutout diameter (for a 6.25-inch hole, radius is 3-1/8 inches). Draw both circles. Double-check with the actual bowl — the line should sit just inside the rim.
3. Drill a starter hole. Inside the waste area of each circle, drill a 3/8 to 1/2 inch hole close to the line. This is where you insert the jigsaw blade.
4. Cut the holes. Keep the saw base flat and feed slowly, just outside the line. Do not force the turn; let the blade do the work or you will get burn marks and a wavy edge. Stay 1/16 inch proud of the line and then sand to the line with 120-grit wrapped around a dowel or sanding drum. Test-fit the bowl after every few passes — you want a drop-in fit that doesn’t rattle. If it’s tight, sand more. You can’t add wood back.
5. Assemble the base. Attach a cleat flush to the top inside edge of each side piece with glue and two screws. Then set the top upside down on a flat surface, place the sides and cleats against it, and drive 1-1/4 inch screws down through the top into the sides and cleats. Predrill to avoid splitting pine. Two screws per side into the edge plus two into each cleat is plenty. Glue adds strength but screws alone will hold.
6. Sand everything. Break all edges with 120-grit, then finish with 220-grit. Pay extra attention to the inside of the bowl holes — that’s where chapped hands will feel any splinter. Vacuum the dust, then wipe with a tack cloth or damp rag.
Finish and Food Safety
This feeder will get wet. Every day. Water slosh, drool, and washing mean an unfinished pine top will stain, grow mildew, and warp within months. You must seal it.
The bowls themselves keep food off the wood, so you don’t need a certified cutting-board finish, but you do need something water-resistant, durable, and cured hard. Two honest options:
A water-based polyurethane (satin) is the most durable and cheapest. Three thin coats, light sand with 220 between coats. Odor is low and dry time is about 2 hours per coat. Look for a food safe wood finish polyurethane labeled low-VOC if the feeder will be in the kitchen.
Hardwax oil or salad-bowl finish looks more natural and is easier to spot-repair, but costs more and needs reapplication every 6-12 months in a wet spot. It’s fine if you don’t mind maintenance.
Do not use straight mineral oil or butcher block oil alone — it offers almost no water resistance against standing water. And do not leave the underside raw; seal the bottom and inside of the holes too, or moisture will enter unevenly and cup the top.
Add four small rubber bumper pads on the bottom of each leg. They prevent sliding, protect the floor, and lift the wood just enough to avoid trapping water underneath.
Common Failures and How to Avoid Them
Hole too big and bowl falls through: You drilled to the rim diameter instead of the body diameter. Always cut to the smaller number and sneak up on the fit. If you do overshoot by 1/8 inch, glue a thin shim ring inside the hole or add a plywood donut underneath — don’t rebuild the whole top.
Top sags between bowls: Span is too long for 3/4-inch pine. Keep total length under 26 inches for 1×12 pine, or add that center divider leg. Poplar sags less but still benefits from a divider over 24 inches.
Wobbly legs on uneven tile: Legs were cut at slightly different lengths or the floor is uneven. Assemble on a known flat surface like a tablesaw top, and use adjustable felt pads or slightly longer rubber feet if your kitchen floor has a crown.
Finish peeling around holes: You didn’t sand past the jigsaw burn marks. Burnished wood won’t absorb finish. Sand until the dark burn line is gone before you apply poly.
If you want a neater look on your next build, add a 1-inch tall back lip (a 1×2 on edge across the back of the top) to keep the bowls from hitting the wall, and round over the top edges with a router or by hand-sanding. Neither is needed for function.