What's inside
As an Amazon Associate I earn from qualifying purchases. This post may contain affiliate links at no extra cost to you.
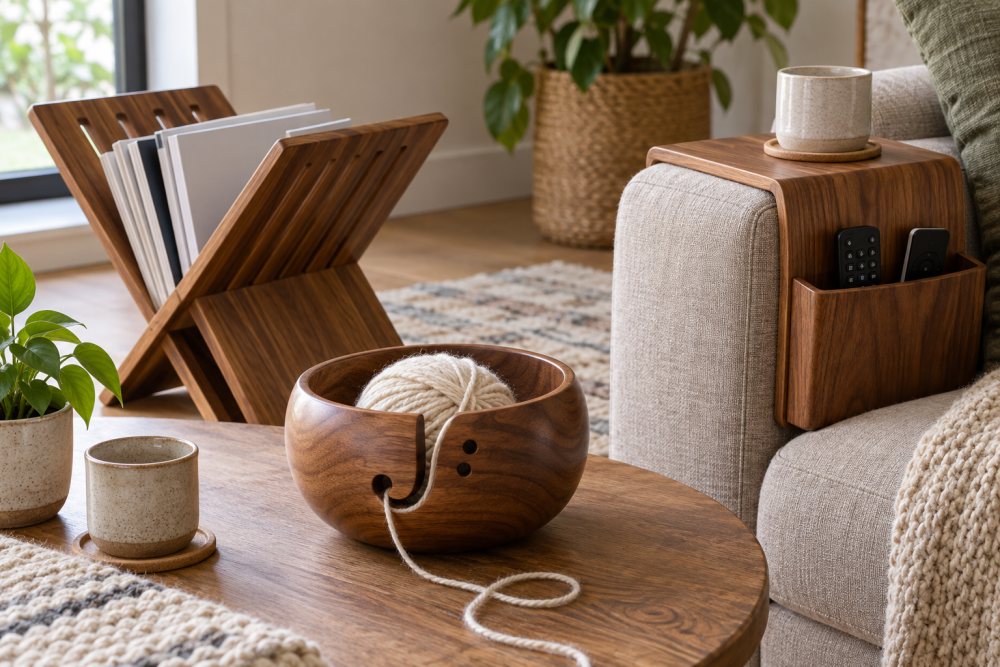
Winter is a good time for a small turning project, and a wooden yarn bowl is useful enough to justify the bench space. The bowl keeps a yarn ball from rolling across the floor, while a curved thread channel guides the strand out without snagging. This beginner plan uses a shallow dish, a side channel, and a smooth interior. It can be made with hand tools, a router, or a lathe, but the safest approach for a first project is to work from a prepared wooden blank and remove material gradually.
Contents
Project Overview and Materials
Plan on a finished bowl about 7 inches in diameter, 3 inches high, with a 1/2-inch-thick wall and a channel roughly 3/8 inch wide. These dimensions fit most medium yarn balls without making the bowl unnecessarily heavy. A wider bowl is more stable, but it also takes longer to hollow and needs more wood.
Use a dry hardwood such as maple, beech, cherry, or birch. Avoid construction lumber and soft pine: they dent easily, shed fibers, and can tear badly around the channel. A 9-inch-square blank that is 2 inches thick gives enough extra material for shaping and mistakes. A glued-up blank is acceptable, provided the glue joints are tight and fully cured.
You will need a compass, pencil, ruler, bandsaw or jigsaw, rasp, files, sandpaper from 80 through 240 grit, a drill, and a 3/8-inch round-over bit if using a router. A small woodworking clamp set is useful if you glue up your own blank, but expensive specialty clamps are not necessary for this project.
| Method | Best for | Advantages | Drawbacks |
|---|---|---|---|
| Jigsaw, rasp, and drill | First-time builders | Low cost and easy to understand | More sanding; less uniform curves |
| Router and template | Repeatable bowls | Clean, consistent channel and rim | Requires careful clamping and dust control |
| Wood lathe | Turners with basic experience | Fast shaping and naturally round results | Hollowing a shallow bowl still requires practice |
Winter Shop Preparation
Cold wood and fast temperature changes can cause problems. Store the blank indoors for at least several days before cutting, especially if it came from an unheated garage. Let it reach roughly the same temperature and humidity as the room where the bowl will be used. Mark the grain direction and inspect all faces for cracks, knots, and loose glue joints.
Keep the workshop above about 50 degrees Fahrenheit if possible. Wood glue cures slowly in a cold shop, and water-based finishes can become cloudy or fail to level. Wear eye protection during every cutting operation, and use a dust mask or suitable respirator when sanding. A shop vacuum for woodworking is more useful than a large air filter for this small project because it captures dust at the tool.
Cut and Shape the Blank
Draw a 7-inch circle on the blank and mark a second circle about 5 1/2 inches across for the inside cavity. The bottom should remain at least 1/2 inch thick. Cut the outside circle with a jigsaw or bandsaw, staying 1/16 inch outside the line. That extra wood gives you room to true the edge with a rasp or sanding block.
Mark the bowl’s center and drill a shallow 1/4-inch pilot hole. This is not a required feature; it simply helps position a compass, template, or router jig. If using a router, secure the blank firmly to a sacrificial board and make several shallow passes rather than one deep cut. Never rely on double-sided tape alone for a forceful cut.
Shape the outside into a gentle curve. Leave the base flat and about 4 1/2 inches in diameter so the bowl will not rock. A low, rounded profile is preferable to a tall bowl: yarn can be lifted out easily, and the piece is less likely to tip when the strand pulls sideways.
Hollow the Bowl
Remove the inside waste with a gouge, router, or drill-and-rasp method. If you are using a drill, bore overlapping holes inside the inner circle, stopping at least 1/8 inch above the final depth. Clean the ridges with a rasp, then refine the curve with a sanding block. Do not chase a paper-thin wall. A 3/8- to 1/2-inch wall is strong enough for ordinary use and leaves room to correct uneven spots.
Blend the bottom into the sidewall rather than leaving a sharp inside corner. Sharp corners collect lint and are difficult to sand. Check the thickness often with a ruler or calipers. A common failure is drilling or routing through the bottom while trying to make the cavity deeper. Stop when the remaining floor is close to 1/2 inch; extra depth is less valuable than a sound bowl.
Cut the Thread Channel
Lay out a channel starting at the rim and curving downward toward the inside cavity. A channel about 3/8 inch wide will handle most yarn, while 1/2 inch is better for bulky yarn. Keep the slot at least 3/4 inch away from the outer edge so the rim does not split. The channel should make a smooth turn with no abrupt corner.
Drill a 3/8-inch hole at both ends of the marked channel, then connect the holes with a jigsaw, coping saw, or rotary tool. Remove waste slowly. Test the opening with a scrap of yarn as you work. If the yarn catches, widen or lengthen the curve rather than forcing it through. A rotary tool with wood-carving bits can clean the channel quickly, but a file is cheaper and gives a beginner better control.
Sand and Finish
Sand the bowl inside and out with 80, 120, 180, and 240 grit paper. Round every rim and channel edge generously; yarn will expose any rough spot that feels harmless to a fingertip. Wipe the surface with a dry cloth between grits, and inspect the channel under bright light. Do not flood the wood with water to raise the grain unless you are prepared to sand again after it dries.
For a simple finish, apply two or three thin coats of wipe-on polyurethane, wiping away excess after the time stated on the container. A hardwax oil is easier to repair and gives a less plastic feel, but it generally offers less resistance to stains and abrasion. The cheaper option is fine here: plain mineral oil can be used, but it provides limited protection and needs periodic reapplication. Let the finish cure fully before putting yarn in the bowl; “dry to the touch” is not the same as cured.
Final Checks Before Use
Set the bowl on a flat table and press lightly on opposite sides. It should not rock. Pull yarn through the channel from several angles, checking for snagging, scraping, or a tendency to lift the bowl. If it moves, add a thin cork or leather pad under the base. Avoid rubber feet that are taller than 1/8 inch because they can make a shallow bowl less stable.
Store the finished bowl away from a radiator or wood stove. Sudden dry heat can open a small crack, particularly in a glued-up blank. With a smooth channel, a stable base, and a fully cured finish, this is a forgiving winter project that produces a useful shop-made gift without requiring advanced joinery.