What's inside
As an Amazon Associate I earn from qualifying purchases. This post may contain affiliate links at no extra cost to you.
The best rock engraving ideas for beginners pair simple designs—initials, house numbers, paw prints, mountain silhouettes—with flat, fine-grained stones like river rocks or slate, engraved with a rotary tool and diamond burr at shallow depth. Below is how to match designs to stones, pick the right method and bits, control depth, and seal finished work for outdoor display.
As an Amazon Associate we earn from qualifying purchases at no extra cost to you.



Contents
Pick the Right Rock First
Design success depends more on the stone than on your drawing skills. Hardness, grain, and surface flatness decide which ideas are realistic.
| Stone type | Mohs hardness | Surface | Best design types | Difficulty |
|---|---|---|---|---|
| River rock (smooth granite/basalt) | 6–7 | Rounded, polished | Initials, paw prints, stars, simple silhouettes | Moderate |
| Slate | 3–4 | Flat, layered | Text, house numbers, engraved stone signs | Easiest |
| Limestone | 3–4 | Flat or rough | Letters, borders, rustic plaques | Easy |
| Sandstone | 6–7 (but soft, crumbly) | Grainy | Bold shapes only—fine lines disappear | Easy but imprecise |
| Flagstone | 5–7 | Flat-ish, textured | Garden markers, stepping-stone designs | Moderate |
| Polished granite tile | 6–8 | Flat, very hard | Fine lettering with diamond bits only | Hard |
Rule of thumb: if the stone is softer than the grit on your bit, expect fast carving but fuzzy edges. If it is harder, expect crisp lines but slow, dusty progress.
Beginner-Friendly Rock Engraving Ideas
- Engraved stone signs and house numbers: slate is the ideal surface—flat, dark, and carves like soap. High-contrast white lettering against dark slate reads well from 10+ feet.
- Garden markers: small river rocks with herb names or icons (a leaf for basil, a strawberry outline). A $10 garden stake collection becomes a sellable set.
- Pet memorials: a paw print plus name and dates on flagstone. Keep text under three lines.
- Motivational words: single words like “Grow” or “Grateful” on small polished stones—fast to produce, good for craft fairs.
- Silhouettes: mountains, trees, birds, fish. Silhouettes forgive wobbly lines because viewers read the shape, not the stroke.
- Mandala or dot patterns: on smooth flat pebbles; works best with a ball-shaped diamond burr.
Avoid faces, thin script fonts, and anything under ~3 mm line width until you have hours of practice—grains and vibration make fine detail the hardest thing to hold.
Engraving Methods: Which Fits Your Situation
| Situation | Recommended method | Typical tool cost | Why |
|---|---|---|---|
| First project, under $50 budget | Cordless rotary tool (e.g., Dremel 8220 or similar) | $30–80 + $10–15 bit set | Cheapest entry; handles river rock and slate |
| Frequent carving, hard granite | Corded rotary tool or pencil-grinder | $80–150 | Constant torque; cordless bogs down over ~20 min on hard stone |
| Crisp letters on signs, repeatable depth | Air micro-grinder (pneumatic, needs compressor) | $60–120 (plus compressor) | Higher RPM (~50,000+) gives cleaner edges on lettering |
| Deep relief carving, large flagstone | Mini angle grinder with diamond blade + rotary tool for detail | $100–200 | Rotary tools remove material too slowly below ~3 mm depth |
| Photo-realistic images | Laser engraver (diode won’t work—needs CO2/fiber or rotary prep) | $500+ | Only realistic route for portraits; major budget jump |
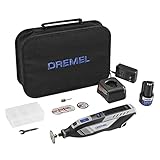
Popular rotary tools include the Dremel 4000/4300 (corded) and 8220 (cordless); WEN and Hardell offer budget alternatives. All accept standard 1/8″ shank accessories.
Bit Choices and Depth Guidance
Bits are the real consumable cost. Diamond-coated bits are the default for stone; carbide is for wood and will dull almost instantly on granite.
| Bit shape | Typical size | Use | Max practical depth |
|---|---|---|---|
| Ball/sphere diamond burr | 1–3 mm | Lettering, dots, outlining | 1–2 mm per pass |
| Cylinder diamond burr | 2–4 mm | Widening lines, filling shapes | 2–3 mm |
| Flame/taper burr | 2–3 mm | Curved strokes, organic designs | 1–2 mm |
| Silicon carbide grinding stone | 6–10 mm | Removing large areas, smoothing | 3–5 mm (aggressive, rough finish) |
Depth guidance: for lettering and signs, 1–2 mm is enough—deeper does not read better from a distance and doubles carve time. For designs that will be paint-filled, 1.5–2 mm gives the paint enough pocket to survive weathering. Anything over ~4 mm on a rotary tool should be done in multiple passes to avoid overheating the bit.
Worked example — sign project: a 20 cm × 15 cm slate house number with 4 characters, ~8 m of total line length at 1.5 mm depth, takes roughly 45–75 minutes of carving at a comfortable 3–4 mm/sec feed rate. One mid-range diamond burr ($2–4 each) typically survives 1–3 such signs before the coating wears—so budget $1–4 of bit wear per project.
Technique Basics
- Mark first: pencil or chalk lines, or print the design and transfer with graphite paper on slate.
- Wet the stone: a misting spray or shallow water tray suppresses silica dust and keeps bits cool. This matters—dry silica dust is a genuine respiratory hazard; still wear a P100-rated respirator and eye protection.
- Speed: run the tool at mid-to-high RPM but with light pressure. Let the diamonds cut; pushing hard overheats and strips the coating.
- Two passes: outline at ~0.5 mm, then deepen. You will catch layout errors before they are permanent.
- Secure the stone: a non-slip rubber mat or a clamped scrap-wood cradle. Rounded river rocks rolling under the bit is the most common beginner mistake.
Sealing for Outdoor Display
Unsealed engraving weathers fast: paint fades in 1–2 seasons outdoors, and freeze-thaw cycles can spall soft stones.
- Paint fill first: acrylic craft paint or exterior-grade paint pen pushed into the grooves, then wiped off the surface while wet.
- Sealer choice: a penetrating silane/siloxane masonry sealer (e.g., products sold for driveways and pavers) preserves the stone look without a plastic film. Acrylic “wet look” sealers add gloss but can peel on damp stone in 1–3 years.
- Reapply: penetrating sealers last roughly 3–5 years outdoors; film sealers 1–3. An annual wipedown and re-coat before winter extends sign life considerably.
- Slate caveat: seal slate only when fully dry—trapped moisture causes flaking.
What Wears First: Ownership Realities
- Bits: cheap 30-piece diamond sets ($10–15) are fine for learning but individual burrs may last only 1–3 projects on granite. Expect $3–10 per project in consumables at hobbyist volume.
- Tool brushes: brushed motors on budget rotary tools typically need new carbon brushes after 50–150 hours of use—stone dust accelerates this.
- Common mistakes: carving dry (dust + bit death), pressing hard (wander and chatter marks), choosing rounded stones for text (letters distort over the curve), and skipping the test pass on a sacrificial rock.
FAQ
Can I engrave rocks with a regular Dremel?
Yes—any rotary tool running 15,000+ RPM with diamond burrs handles slate, limestone, and river rock. Granite just goes slower; keep the stone wet and take light passes.
How do I make engraved stone signs weatherproof?
Carve 1.5–2 mm deep, fill with exterior acrylic paint, let cure 24–48 hours, then apply a penetrating masonry sealer. Properly done, a slate sign stays legible outdoors for 5+ years.
What rock is easiest for a first project?
A flat piece of slate or a smooth limestone—both cut cleanly at low pressure and forgive shaky hands. Avoid rounded polished river rocks until you can hold steady lines.