Key takeaways
- A complete weekend plan for a diy workbench under 200 dollars: cut list, 34-inch height, a doubled plywood top, and the mistakes that make cheap benches wobble.
What's inside
As an Amazon Associate I earn from qualifying purchases. This post may contain affiliate links at no extra cost to you.
Most beginner projects get built on the floor, across two sawhorses, or on a folding table that skates away the second you lean into a hand plane. A diy workbench under 200 dollars fixes that in a weekend, with no table saw, no hardwood, and no joinery past square cuts and screws. Seven 2×4 studs, one sheet of 3/4-inch plywood, and a box of structural screws is the whole shopping list.
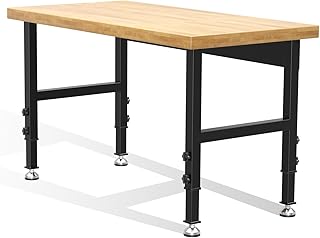
The bench below is 60 inches long, 24 inches deep, and 34 inches tall, with a doubled plywood top over a 2×4 base braced against racking. Lumber prices swing by region and season, so treat these figures as ranges and price your own aisle first.
As an Amazon Associate we earn from qualifying purchases at no extra cost to you. Product prices and availability are accurate as of the date shown and are subject to change.


| Material | Size and quantity | Typical cost range | |
|---|---|---|---|
| 2× | 4 studs, SPF or pine | Seven at 8 feet | $4 to $7 each |
| Plywood, 3/4 inch | One 4× | 8 sheet | $45 to $70 |
| Structural screws | 2-1/2 in and 3 in, 1 lb boxes | $12 to $20 per box | |
| Lag screws with washers | Sixteen at 5/16 x 3-1/2 in | $10 to $18 | |
| Wood glue | 16 ounces | $6 to $10 | |
| Hardboard, 1/4 inch (optional) | One sacrificial top panel | $10 to $25 |
In most markets the core build lands in the low $100s. That leaves real headroom under the $200 ceiling for a vise, casters, or sanded plywood instead of rough sheathing.
What a DIY Workbench Under 200 Dollars Has to Get Right
Mass. A 60-pound bench slides when you plane or chisel. Laminating two sheets of 3/4-inch plywood into a 1-1/2-inch top and running four full-length stretchers puts this bench past 100 pounds with material you already bought.
Resistance to racking. Wobble comes from the leg-to-stretcher joints flexing, not the top. Upper and lower stretchers on both long faces, pulled tight with lag screws, turn each side into a deep truss.
A surface you can ruin. You will drill into it and spill glue on it. Plan a replaceable sacrificial layer from day one instead of babying a top you cannot fix.
Tools for the Build
A circular saw with a straightedge clamp, a drill/driver, a 25-foot tape, a combination square, a countersink bit, a 3/16-inch twist bit, and four F-clamps will finish the entire bench. If you would rather not rip a full sheet on the driveway, have the lumberyard break it into two strips 24 inches by 96 inches and cut the rest yourself.
18V cordless drill/driver kit
The one purchase worth prioritizing if your kit is thin. Look for a two-battery kit with a clutch and a 1/2-inch chuck so it can seat 3-1/2 inch lags without stalling. Any major line will do this job and the next five projects.
Build the Base, Step by Step
Step 1: Sort the lumber before you cut. Sight down each stud on edge and on face. Reject twist, and save mildly crowned boards for stretchers where clamps can pull the bow out. Twist is the one defect you cannot correct, and a twisted leg means a bench that rocks forever.
Step 2: Cut to the list. Four legs at 32-1/2 inches, four long stretchers at 54 inches, four end rails at 18 inches. Clamp the legs in a bundle and cut them together. Identical legs matter more than hitting 32-1/2 inches exactly.
Step 3: Build the two end frames. Each frame is two legs with one rail flush across the leg tops and a second rail 8 inches up from the floor. Glue each joint, drive two 3-inch structural screws, then add one 5/16 by 3-1/2 inch lag with a washer. Drill a 3/16-inch pilot for every lag or the 2×4 splits along the grain. Measure both diagonals and adjust until they match within 1/16 inch.
Step 4: Connect the ends. Stand the frames 54 inches apart and fasten the long stretchers to the inside faces of the legs, the top pair flush with the leg tops, the bottom pair in line with the lower end rails. Clamp, check the diagonals across the whole base, then drive the lags. That order is what keeps the base square.
Step 5: Level it in place. Set the base where the bench will live and find the rocking corner. Shim it flat, mark the gap on the other legs, and trim with the circular saw. Garage slabs slope for drainage, so expect 1/8 to 1/4 inch of correction.
Top, Finish, and Final Assembly
Step 6: Cut the plywood. Two pieces at 24 by 60 inches for the top, plus two shelf panels near 21 by 27 inches from the offcuts. Set blade depth about 1/8 inch past the material and cut good face down so tearout lands underneath.
Step 7: Laminate the top. Spread glue over the full face, not in beads. Stack the second sheet, clamp the perimeter, and drive 1-1/4 inch screws from underneath on a grid roughly 8 inches apart. Fastening from below keeps the work surface free of screw holes.
Step 8: Flush and sand. Trim any overhang, then sand with 80 grit to level the seam and 120 grit to finish. Stop at 120. Finer grits polish the surface and let workpieces slide. Soften the top edges with a few passes of 120 so the corners do not splinter.
Step 9: Attach the top. Center it for a 1-1/2 inch overhang on all four sides so clamps have somewhere to bite, then drive eight to ten 2-1/2 inch screws up through the upper stretchers.
Step 10: Protect the surface. Two thin coats of wipe-on polyurethane or a coat of paste wax keeps glue from soaking in and lets it pop off with a chisel. Better still, screw a 1/4-inch hardboard layer down with countersunk screws at the perimeter so you can flip or replace it.
- ✔ Heavy and stiff enough for hand planing
- ✔ Builds with only a circular saw and a drill
- ✔ Sacrificial top replaces for a few dollars
- ✔ Easy to add a vise, dog holes, or shelves later
- ✘ SPF lumber dents easily
- ✘ Construction plywood is rarely dead flat
- ✘ Uneven slabs need trimming or shims
- ✘ 60 inches is short for long stock
Common Mistakes That Cost You a Solid Bench
A single layer of plywood. Three-quarter-inch ply over that span flexes and telegraphs every dent. Doubling it is the biggest upgrade in the build.
Drywall screws. They are brittle, they snap under side load, and the heads strip. Structural screws cost a little more per box and actually hold a base together.
Legs flush with the top edges. With no overhang you cannot clamp work to the bench, which cancels half the reason to build one.
Structural wood screws, 3 inch
Buy a pound each of 2-1/2 inch and 3 inch with star drive heads. They cut their own path in softwood, resist snapping, and the bits last. One box covers this bench with plenty left over.
FAQ
How tall should the bench be? Stand with your arms down and measure to your wrist crease, usually 32 to 36 inches. Go lower for hand planing, higher for assembly and sanding, and count the top thickness in your leg length.
Is MDF or plywood better for the top? MDF is flatter and cheaper but swells at the first spill and holds screws poorly. Plywood is stiffer and more forgiving. Use plywood for the structural layers and MDF or hardboard as the sacrificial face.
Can I put it on casters? Yes, with locking casters rated well above the bench weight, though you will feel some flex. For hand tool work a fixed bench with a loaded lower shelf stays put far better.
Use the bench for a week before you add anything to it. You will know exactly where the vise and the dog holes belong once your hands have picked their spots.
Front vise for a shop bench
With the core build near $100, a vise is the highest value addition left in the budget. Mount a front vise under the overhang at the left front corner if you are right handed, and add a wood jaw pad so it closes flush with the bench edge.