What's inside
As an Amazon Associate I earn from qualifying purchases. This post may contain affiliate links at no extra cost to you.
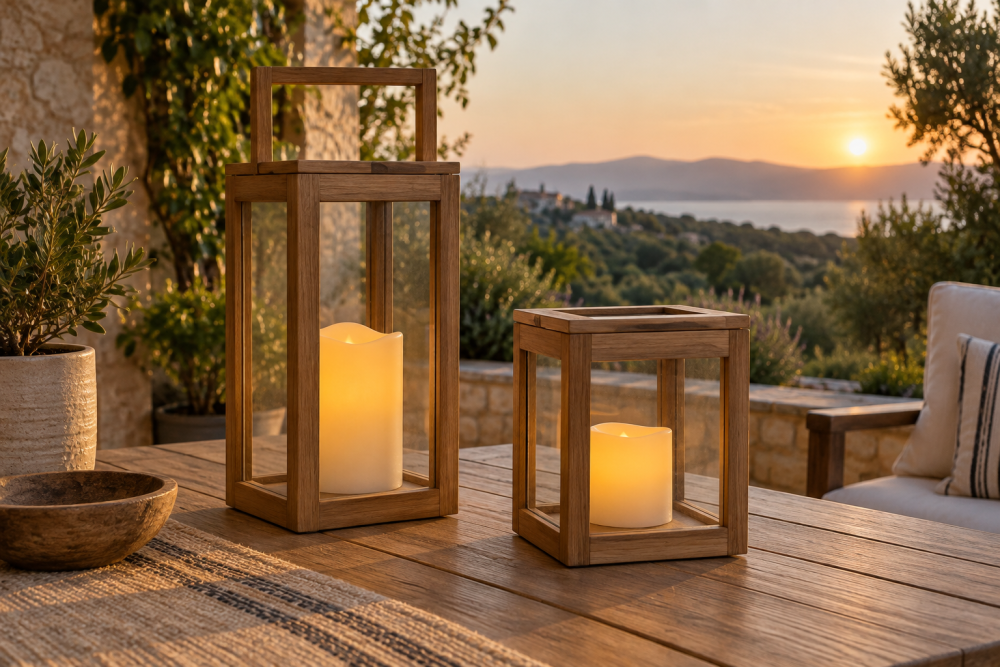
A wooden patio lantern box is a small, open-frame cover for a candle or battery light. The removable base makes it easier to replace the light and clean out rainwater or debris. This plan uses common lumber and simple butt joints; allow an afternoon for the build, plus drying time for the finish.
Contents
Size and design
The example measures about 8 inches square and 12 inches tall, with a 7-inch-square base that slides into the bottom. Adjust the dimensions to suit your light, but leave at least 2 inches of clearance between a real candle’s flame and the wood above it. This design is safest with a battery-powered LED. If you use a flame, keep the lantern on a stable, nonflammable surface, never leave it unattended, and do not treat a wooden box as a candle-safe enclosure.
Use rot-resistant cedar or redwood for outdoor use. Pine costs less and is fine under a covered patio if you seal it regularly, but it can swell, split, or decay faster when exposed to weather. Choose straight, dry stock without large knots, especially for the narrow frame pieces.
Materials and tools
You’ll need one 1×2 board for the four corner posts, about 8 feet long; 1×2 or 1×3 stock for the top rails; and 1/2-inch exterior plywood for the removable base. A 1×2 is usually 3/4 by 1 1/2 inches, so check actual dimensions before cutting. Use exterior-rated screws, exterior wood glue, and a finish intended for outdoor wood.
A miter saw makes repeatable cuts, but a handsaw and a square work too. A drill/driver, tape measure, clamps, and sandpaper are useful. For clean cuts in thin stock, a fine-tooth wood hand saw is a practical low-cost choice; a powered saw is faster if you already own one.
Cut list
Cut four corner posts to 12 inches. Cut four top rails to 6 1/2 inches, measuring between the outside faces of opposing posts to make an 8-inch-wide frame. Cut the plywood base to 7 inches square. That gives roughly 1/2 inch of clearance on each side inside the frame. If your stock or assembly differs, measure the actual opening before cutting the base.
For a more open look, add four narrow vertical slats, each about 9 inches long, between the posts. They are optional; omit them for a simple open-frame lantern. If you add them, keep gaps wide enough to avoid trapping water and dirt.
Build the frame
1. Mark all four posts at the same height. Cut them square and sand away splinters. Uneven posts can make the lantern rock, so check the ends against a square before assembly.
2. Lay two posts parallel on a flat surface. Fit a top rail between them, flush with the post tops and outside edges. Drill pilot holes to reduce splitting, then secure the rail with two exterior screws at each end. Add the opposite rail, then repeat with the other pair of posts.
3. Stand the two sides upright and join them with the remaining rails. Check that the frame is square by measuring diagonally from corner to corner; the two measurements should match within about 1/8 inch. Correct the frame before tightening the screws. A twisted frame may prevent the base from sliding in.
4. If using slats, place them evenly between the posts and attach them with pilot-drilled screws or exterior glue and brads. Keep their lower ends about 1/2 inch above the base so water can drain and the base can be removed.
Exterior screws resist corrosion better than ordinary interior screws. For a small project, standard coated deck screws are adequate; stainless screws are a worthwhile upgrade in persistently damp or coastal conditions, but cost more. Avoid driving screws too close to board ends, where the wood is most likely to split.
Fit the removable base
Set the plywood base inside the frame from below or above, depending on the look you want. For this design, it drops in from below and rests on four small support cleats. Cut four cleats from scrap, each about 1/2 by 1/2 inch and 2 inches long. Screw one to the inside face of each post, with the top of each cleat level and about 1/2 inch above the post bottoms. Keep the screws short enough not to break through the outside face.
Test-fit the base. It should rest firmly on the cleats but lift out without forcing. If it binds, trim or sand the edges in small amounts; an overly tight fit can jam after the wood swells in damp weather. Drill three or four 1/4-inch drainage holes through the plywood. Without drainage, water can collect, stain the wood, and damage a candle or light. Plywood edges are especially vulnerable, so seal them well.
Material choices at a glance
| Choice | Best for | Trade-off |
|---|---|---|
| Cedar or redwood | Uncovered patios and frequent damp weather | Costs more; soft stock dents easily |
| Exterior plywood base | A flat, quick-to-make removable floor | Edges need sealing; may delaminate if neglected |
| Solid-wood base slats | Better drainage and a traditional appearance | More cuts and a less solid resting surface |
A plywood base is the simpler option and works well if the lantern is sheltered and the edges are maintained. For a base that sees frequent rain, use solid slats with small gaps instead, or keep the lantern under cover. A clear exterior wood sealer can slow moisture uptake, but it will not make the lantern waterproof.
Sand and finish
Sand exposed edges with 120-grit paper, then finish with 180 grit if you want a smoother feel. Ease sharp corners lightly; they chip more readily than a small rounded edge. Brush or wipe on the outdoor finish according to its label, including the underside and all plywood edges. Let it dry fully before putting the base and light in place. Thin, even coats are less likely to pool in corners than one heavy coat.
Use and upkeep
Set the lantern on a level surface and check that it does not wobble. Lift out the base after heavy rain and let both pieces dry before storing. Inspect the joints and finish at the start of each outdoor season; touch up bare wood before it darkens or begins to split. If the base sticks, sand its edges slightly rather than hammering it out, which can crack the plywood or loosen the cleats.