What's inside
As an Amazon Associate I earn from qualifying purchases. This post may contain affiliate links at no extra cost to you.
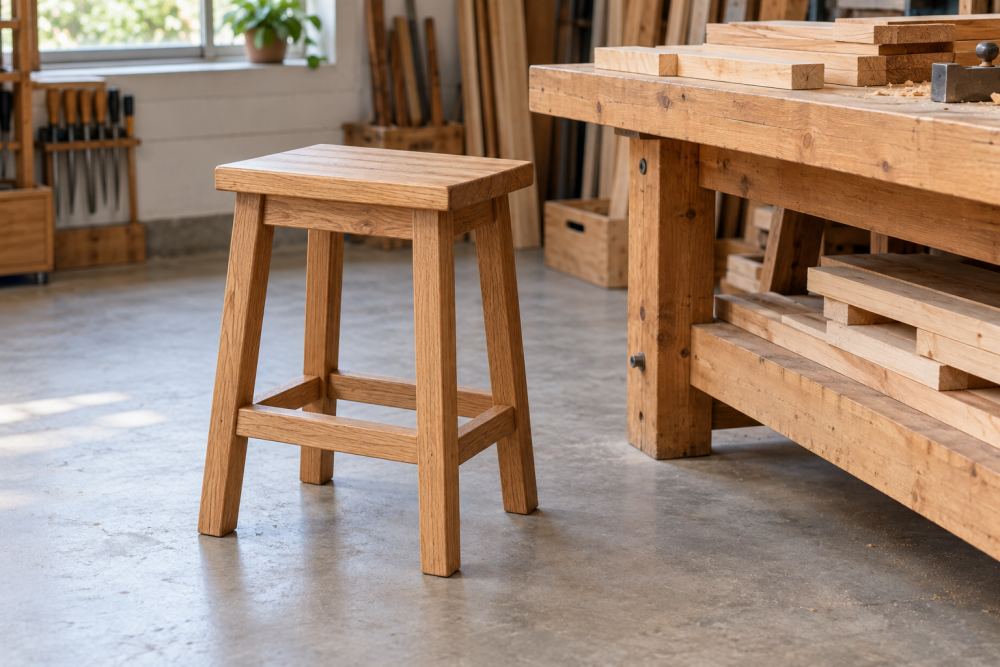
A shop stool needs to stay put when you lean over a workpiece. This design uses a solid-wood seat, four splayed legs, and two pairs of cross-braces to resist racking. It finishes about 24 inches tall, with a 13-inch-square seat—comfortable for many benches around 34 to 36 inches high. Adjust the leg length to suit your bench before cutting.
Contents
Materials and dimensions
Use straight, dry hardwood for the legs and braces. Ash, maple, and beech are good choices; sound construction-grade pine works too, but softwood dents more readily and can split around joints. For the seat, use a 1½-inch-thick glued-up panel or laminated boards. Avoid MDF and particleboard: they are heavy, weak at screw edges, and poorly suited to a stool that gets dragged around.
| Part | Quantity | Starting size | Purpose |
|---|---|---|---|
| Seat | 1 | 13 × 13 × 1½ in. | Top panel; corners may be clipped |
| Legs | 4 | 1¾ × 1¾ × 23½ in. | Splayed supports |
| Long-side braces | 2 | ¾ × 2½ × about 11 in. | Connect legs on opposite sides |
| End braces | 2 | ¾ × 2½ × about 9 in. | Complete the cross-braced frame |
The brace lengths are starting estimates; fit them to your actual leg spread. A combination square makes it easier to mark consistent shoulder lines and check that the parts sit square.
Tools and joint choice
You’ll need a saw, drill, clamps, a square, a tape measure, and a way to cut repeatable angles. A circular saw with a guide is adequate for the seat and braces; a miter saw speeds up repeated leg cuts but is not essential. For joinery, mortise-and-tenon joints are strong and durable, but take more time and careful fitting. A simpler option is half-lap joints where braces cross, secured to the legs with bolts or screws. Use structural screws or bolts long enough to provide solid purchase without breaking through the outer face.
If you’re buying a drill for this project, a basic cordless drill-driver is sufficient; a compact model is easier to handle, while a corded drill is fine if you already own one. Don’t rely on screws driven into end grain as the only support for the braces.
Lay out and cut the legs
Mark each leg so its top splays outward about 5 degrees in both directions. This makes the stool wider at the floor than beneath the seat, improving stability. Set up a test cut on scrap first: small angle errors compound, and mismatched legs make the seat rock. Cut the bottoms so they sit flat on the floor when the legs are held at the planned splay. Trim all four to matching finished height, then mark a level line about 7 inches above the floor for the lower brace positions.
Dry-assemble the legs beneath the seat, leaving an even inset—about 1½ inches from each seat edge is a useful starting point. Check that the footprint is square and wide enough for your intended use. Wider splay improves resistance to tipping but makes the stool occupy more floor space and can interfere with nearby drawers or cabinets.
Fit the cross-braces
Measure between the legs at the brace height rather than cutting to the estimates in the table. Cut the long-side braces to fit between their legs, then mark the end braces to connect the other pair. Where the braces cross, cut half-laps: remove half the thickness from the middle of each piece so they overlap flush. Test the fit before fastening. A deep notch weakens the braces; a loose notch allows the base to twist.
Position the braces roughly 6 to 8 inches above the floor. That leaves room for feet while keeping the base stiff. Predrill near brace ends to reduce splitting, especially in pine. Use two screws or bolts per brace-to-leg connection where the leg width allows, and keep fasteners well away from the edges. If using glue, choose a wood glue rated for indoor furniture and clamp the joints while it cures. Don’t use glue to hide a poor-fitting joint.
| Joint approach | Best for | Trade-off |
|---|---|---|
| Mortise and tenon | Long-term, heavily used stool | Strong, but slower and more demanding to cut |
| Half-lap plus screws or bolts | Home shop and straightforward tools | Good stiffness when fitted closely; visible hardware may remain |
| Butt joint with screws only | Light-duty use or a quick temporary build | More likely to loosen or rack under side loads |
Attach the seat
Set the assembled base on a flat surface and place the seat on top. Confirm the legs meet the underside evenly and the seat overhang is consistent. Predrill and attach it with four to eight screws through the leg tops into the seat, using washers if the screw heads might pull into the wood. For a solid-wood seat, allow for seasonal movement: elongated holes across the grain or figure-eight fasteners let the panel expand and contract. Tight screws in round holes can split the seat over time.
Round the seat edges with a small chamfer or ⅛-inch round-over. Break the sharp edges on the legs and braces with sandpaper. A pair of 24-inch bar clamps is useful while fitting and gluing, but inexpensive clamps are fine if they hold pressure without slipping.
Check, finish, and test
Before applying finish, set the stool on a level floor and press down on each corner. If it rocks, find the high leg and trim its bottom in tiny increments; don’t force the frame flat with screws. Push sideways at seat height. Any noticeable wobble usually points to a loose brace joint, an uneven leg, or a frame assembled out of square. Fix the cause before using the stool.
Sand to 120 or 150 grit and apply a durable shop-friendly finish, such as oil or a hardwax finish. A film finish offers more spill protection but can become slick; avoid coating the top with a glossy finish if you often set parts on the stool. Let the finish cure fully before putting the stool into service. Recheck the fasteners after the first week of use, especially on a softwood build, where screws can settle as the fibers compress.