What's inside
As an Amazon Associate I earn from qualifying purchases. This post may contain affiliate links at no extra cost to you.
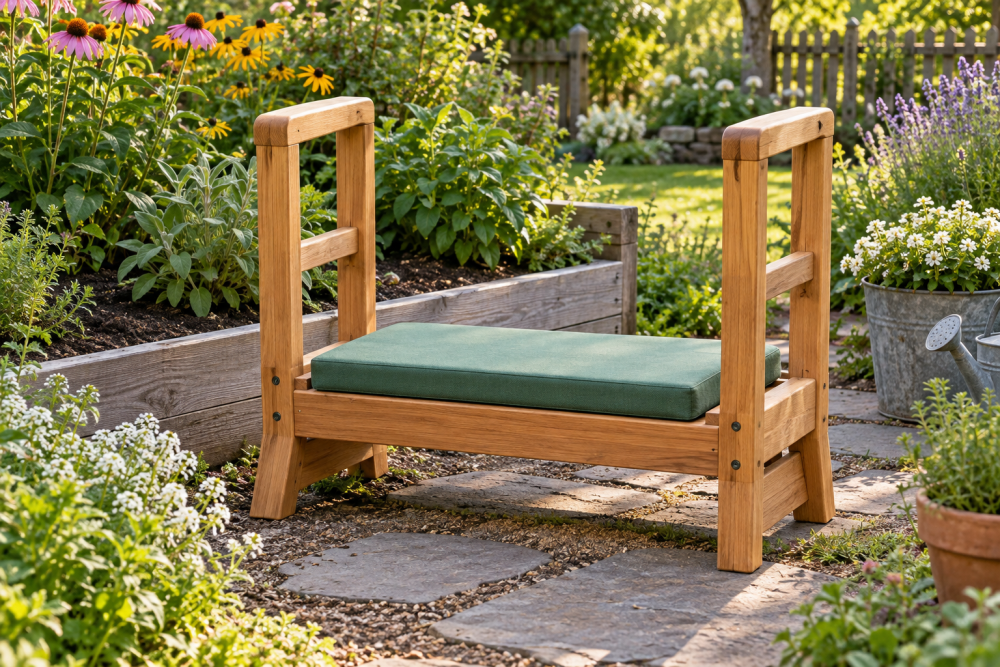
A wooden garden kneeling stool can serve as a low seat, a raised kneeler, and a portable place to rest your tools. This design uses a hinged top with a carry handle cut into one end. Turn it upside down and the padded top sits close to the ground; turn it upright and the legs support you while you kneel. The simple joinery suits a first or second woodworking project, but accurate cuts and rounded edges matter more than fancy hardware.
Contents
Size and design
The finished stool is about 20 inches long, 10 inches wide, and 10 inches high. That footprint gives most adults room to kneel without making the stool awkward to carry. The hinged top opens for storage, while two end frames and side rails carry the load. If you are tall or want a higher seat, add an inch or two to the legs, but keep the stool wide enough to feel stable.
| Choice | Best for | Trade-off |
|---|---|---|
| 1×3 side rails | Lightweight stool and careful use | Less resistance to twisting than wider rails |
| 1×4 side rails | More stiffness and a forgiving build | Slightly heavier; a good default |
| Exterior plywood top | Low cost and outdoor storage | Edges need sealing to prevent water damage |
| Solid wood top | Easy shaping and a traditional look | Can cup or split if left wet |
Materials and tools
Use straight, dry lumber with no large knots where screws or hinges will go. Buy one 1×4 board at least 8 feet long for the rails and legs, plus a 3/4-inch-thick panel about 20 by 10 inches for the lid. Exterior-grade plywood is practical; a piece of clear pine or cedar also works. You will need two small butt hinges, exterior-rated screws, wood glue, sandpaper, and a finish suitable for outdoor use.
A circular saw or handsaw, drill/driver, tape measure, square, and clamps are enough. A jigsaw makes the handle opening easier. For sanding, a random-orbit sander saves time, but a sanding block is fine for a single stool. Add a water-resistant exterior wood finish if the stool will live in a shed or garden. No coating makes wood weatherproof indefinitely; store the stool under cover.
Cut list
From 1×4 stock, cut two side rails 18 inches long and four legs 9 1/4 inches long. The board’s actual width is typically 3 1/2 inches, so the legs will make an end frame roughly 10 inches high once the top is attached. Cut two end braces 8 1/2 inches long from the same stock. Cut the lid to 20 by 10 inches, then trim the corners slightly if you prefer a softer outline.
These dimensions assume a 3/4-inch lid and legs installed beneath it. Check your lumber before cutting: nominal dimensions vary, and a warped board can make the frame rock. Measure each pair of parts together and mark them clearly.
Build the frame
1. Make two end frames by placing a pair of legs parallel, with an 8 1/2-inch brace between them near the lower ends. Leave about 1/2 inch from the bottom of each leg to the brace. Apply glue at the joints, drill pilot holes, and drive two 2 1/2-inch exterior screws through each leg into the brace. Pilot holes reduce splitting, especially near board ends.
2. Stand the end frames upright, 18 inches apart. Fit one side rail along each long side, flush with the top edges of the legs. Clamp the assembly and check that both diagonals measure the same. If they differ, push the longer diagonal inward until the frame is square. Glue and screw each rail to the legs using two screws per joint.
3. Set the frame on a flat surface and test for rocking. A small wobble can be corrected by sanding the long foot or trimming the high leg. Do this before attaching the lid; once the stool is assembled, correcting uneven legs is harder.
Make the handle and lid
Mark a centered handle opening near one short end of the lid, about 4 inches long and 1 inch wide. Keep at least 1 1/2 inches of wood between the opening and the end edge. Drill a starter hole inside the outline, cut the opening with a jigsaw, and round both ends to avoid sharp stress points. Sand the opening smooth. If you would rather avoid a cutout, screw a small wooden or metal pull to the lid; it is simpler, but can snag on clothing.
Round over the lid edges and sand the top through 120- then 180-grit paper. Center the lid on the frame with an even overhang, approximately 1 inch on the long sides and 1/2 inch at each end. Fit two hinges along one long edge. Leave a small gap between lid and frame so seasonal wood movement does not bind the hinge. Predrill all hinge screws; short hinge screws that barely bite into the lid can pull out under a carrying load, so choose screws that engage solid wood without breaking through the top.
Finish and test
Apply two or three thin coats of exterior finish, following the label’s drying times. Pay special attention to the handle opening, cut ends, and underside of the lid, where water can enter. Let the finish cure fully before adding a cushion or using the stool. A removable foam kneeling pad is easier to dry and replace than upholstery fixed permanently to the lid.
Test the stool on level ground before kneeling on it. Press down gradually with your hands, then load it with your weight while holding a stable support nearby. Check for loose screws, creaking joints, hinge movement, or visible flex. If the side rails bow, add a center crosspiece beneath the lid or rebuild with wider rails. Do not use a stool with cracked wood or a loose frame, and do not stand on it: this design is for kneeling and low seating, not as a step ladder.