
What's inside
As an Amazon Associate I earn from qualifying purchases. This post may contain affiliate links at no extra cost to you.
Contents
Why Fall Is a Good Time to Use Reclaimed Boards
Fall is an ideal season for reclaimed-wood projects: outdoor work is more comfortable, holiday furniture deadlines are approaching, and boards from old fences, pallets, barns, and flooring are easy to turn into useful gifts and seasonal storage. Reclaimed lumber is rarely straight or uniform, so the best projects are forgiving. Look for designs that use short parts, visible fasteners, simple joinery, and a little intentional rustic character.
Before cutting, inspect every board for nails, screws, staples, paint, oil, and rot. Run a metal detector over both faces and edges, then remove fasteners with pliers or a nail puller. Do not machine questionable boards until you have checked them carefully. A hidden nail can damage a planer knife, saw blade, or your hands.
As an Amazon Associate we earn from qualifying purchases at no extra cost to you.

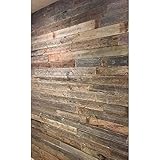
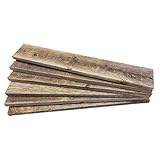

For basic preparation, a woodworking metal detector and nail puller are worth buying. A cheap handheld detector is fine for occasional work, although it may miss deeply buried fasteners. If the wood smells chemical, shows oily staining, or came from an unknown industrial source, choose another board.
Best Projects by Skill Level
| Project | Skill | Typical board length | Build time | Main risk |
|---|---|---|---|---|
| Rustic pumpkin blocks | Beginner | 8 to 14 inches | 1 to 2 hours | Splitting small parts |
| Entryway coat rack | Beginner | 24 to 36 inches | 2 to 4 hours | Weak wall mounting |
| Firewood carrier | Intermediate | 24 to 30 inches | 3 to 5 hours | Handles pulling loose |
| Hall tree bench | Advanced | 36 to 48 inches | 1 to 2 days | Seasonal wood movement |
Beginner Projects: Pumpkin Blocks and Coat Racks
Reclaimed pumpkin blocks are a good first project because they need no precise joinery. Cut three or five blocks between 8 and 14 inches long, keeping their original saw marks or weathering. Sand only enough to remove splinters, then stack or glue the pieces into a rough pumpkin shape. Add a 1-inch dowel or a short branch as the stem. A small amount of orange paint on the front faces leaves the old wood visible; clear finish alone looks better if the boards already have strong color.
Use exterior-rated glue only if the pumpkins will sit outdoors, and drill pilot holes before adding a stem. Small reclaimed pieces split easily, particularly near old nail holes. If a crack extends more than one-third through a block, discard that piece rather than trying to clamp it closed.
A reclaimed coat rack makes better use of a long, attractive board. Cut a board to 24 to 36 inches, flatten only the back if necessary, and round or chamfer the front edges. Space three or four hooks evenly, leaving at least 3 inches from each end. Drill pilot holes and use screws long enough to penetrate the board without emerging from the front. Mount it into studs when possible; drywall anchors are acceptable only for light jackets and hats.
For this project, rustic wall hooks and wood screws are the sensible purchase. Cheap hooks are fine for hats, but heavy coats can bend thin cast metal hooks or pull out weak anchors.
Intermediate Project: Reclaimed-Wood Firewood Carrier
A firewood carrier is useful through the entire heating season and tolerates imperfect boards. Build two side panels about 12 inches high by 24 inches long, then connect them with two rails or dowels. Leave the center open so the carrier can hold split logs without becoming unnecessarily heavy.
Cut the side panels from boards at least 3/4 inch thick. Round the upper corners and cut a hand opening, or attach a pair of hardwood handles between the sides. Drill 1/8-inch pilot holes for screws and use two fasteners at each joint. Test-load the carrier with 40 to 50 pounds of wood before applying finish. If the sides flex or the handles creak, add a lower stretcher.
Do not use punky, badly cracked, or insect-damaged lumber for handles. The carrier is lifted repeatedly, and a failure can drop burning or muddy logs onto your feet. A penetrating exterior oil is adequate for a carrier stored under cover. Film finishes tend to chip when logs are thrown in.
Advanced Project: Fall Entryway Bench or Hall Tree
For a larger weekend build, combine reclaimed boards into an entryway bench with a lower shoe shelf and an upper coat rail. A practical size is 36 to 48 inches wide, 18 inches high, and 14 to 16 inches deep. Use the straightest boards for the seat and reserve warped or heavily marked pieces for the back and shelf.
Mill only what must be flat. Taking 1/8 inch off a board face may erase its character, while leaving a high spot under a seat can make the bench rock. Glue narrow boards into a panel only after allowing them to acclimate indoors for at least a week. Arrange growth-ring direction alternately where practical, and leave small gaps in an outdoor or unheated entryway rather than forcing a perfectly tight panel.
Attach the shelf with screws through cleats, not just end grain. Add a center support if the shelf spans more than 30 inches. For a wall-mounted upper rail, fasten through the back into studs or use a continuous mounting cleat. A pocket-hole jig kit is convenient for hidden bench joints, but ordinary screws through cleats are cheaper and easier to repair.
Preparation, Finish, and Common Failure Modes
Let reclaimed boards reach the room where they will live before final assembly. Indoor lumber should generally sit for 5 to 10 days, stacked with spacers so air can reach both faces. Measure moisture if possible; roughly 8 to 12 percent is suitable for most heated interiors. Boards above 16 percent may shrink enough to open joints after installation.
Start sanding with 80 grit only where needed, then move to 120 or 150 grit. Going much finer can make old wood look unnaturally polished and may reduce finish adhesion. Break sharp edges with one or two light passes. Vacuum thoroughly before finishing, especially around old nail holes.
Water-based polyurethane keeps pale reclaimed wood relatively light and dries quickly, but it can raise the grain. Oil-based finishes deepen color and hide minor sanding differences, though they smell stronger and dry slowly in cool fall weather. For a low-cost decorative project, paste wax or a basic clear coat is enough. The cheaper finish is not fine for a frequently wet bench or outdoor carrier.
Expect some movement, loose knots, and color variation. Those are normal characteristics, not defects to eliminate. The important failures are structural: split screw holes, unsupported shelves, weak handles, and boards contaminated with unknown chemicals. Design around those risks, and reclaimed lumber becomes inexpensive material for durable fall projects rather than a source of avoidable repairs.