
What's inside
As an Amazon Associate I earn from qualifying purchases. This post may contain affiliate links at no extra cost to you.
A wall-mounted guitar pick and accessory rack is a useful first woodworking project: it needs only a few cuts, fits on a small bench, and can be built from inexpensive offcuts. A simple rack can hold picks, a tuner, a capo, and spare strings without taking up space on a music stand. The important parts are sizing the compartments to your gear and fastening the rack securely to the wall.
As an Amazon Associate we earn from qualifying purchases at no extra cost to you.


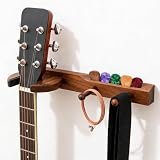
![Bikoney Guitar Wall Mount Hanger with Shelf, Guitar Holder Wall with Pick Holder and 3 Hooks, Guitar Stand Wall for Acoustic, Electric, Bass, Ukulele, Carbonized Black [U.S. Patent]](https://m.media-amazon.com/images/I/51br1JaL-hL._SL160_.jpg)
Contents
Choose a plan that fits your gear
For a first build, make a shallow wooden tray with a row of narrow pick slots and one or two larger compartments. A practical finished size is about 12 inches wide, 5 inches high, and 2½ inches deep. That leaves room for common accessories while keeping the rack light and compact. Measure your own tuner and capo before cutting; bulky clip-on tuners may need a compartment at least 2 inches wide.
Use ½-inch plywood for the back and sides, plus a ¼-inch plywood bottom. Solid pine boards work too, but can split more easily near small slots. If you have scrap material, a rack does not need to be made from matching wood. Avoid MDF for a rack that may be handled often: its edges dent readily, and screws can loosen if they are driven close to an edge.
Materials and tools
Gather a 12-by-6-inch piece of ½-inch plywood for the back, two side pieces roughly 2½ by 5 inches, and a bottom about 12 by 2½ inches. Adjust the back size to suit your layout. You will also need wood glue, small screws, sandpaper, and two screws suitable for the wall material. A drill, ruler, square, saw, and clamps are enough for the basic version.
A small fine-tooth hand saw is adequate for plywood parts; a circular saw with a guide makes straighter cuts on larger sheets. For pick openings, use a drill and jigsaw, or skip cutouts and glue thin dividers into place. The latter is slower to arrange but easier to control if you are new to cutting curves.
Compare the two beginner layouts
| Layout | Best for | Trade-off |
|---|---|---|
| Open tray with dividers | Capos, tuner, spare strings, mixed picks | Fast to build, but small picks can slide between dividers |
| Slotted pick panel above a tray | Keeping picks visible and sorted | More layout work; narrow slots need careful sanding |
The open tray is the safer choice when you are unsure what you will store. For a pick panel, make openings about ⅜ inch wide and 1½ to 2 inches long, then test one with a spare pick before cutting the rest. Picks vary in thickness and shape, so a slot that works for one may be loose for another. Keep at least ½ inch of wood between openings to reduce the chance of breaking the panel.
Build the rack
1. Mark the back, sides, and bottom on your sheet goods. Check each corner with a square, then cut the pieces. Dry-fit them on a flat surface. The side pieces should sit on the back panel, with the bottom joining their lower edges to form a shallow tray.
2. Sand cut edges with 120-grit paper. Plywood edges can splinter, especially around pick slots, so ease them with a few passes rather than rounding them heavily. If you are making slots, draw them with a ruler and drill a hole at each end large enough to start the jigsaw blade. Clamp the panel down and cut slowly. A ragged slot can snag picks; sand until the edges feel smooth.
3. Apply a thin bead of wood glue to the joints and clamp the tray together. Add screws through the sides into the back and bottom, first drilling pilot holes. For ½-inch plywood, use short screws around ¾ inch long so the points do not break through the opposite face. Wipe away squeezed-out glue before it dries. Let the assembly cure according to the glue label; rushing this step can leave joints that shift during mounting.
4. Add dividers from thin plywood or hardwood strips. Glue them in place after testing the compartments with your actual accessories. Leave enough clearance to lift items out without pinching your fingers. A finish is optional. Two thin coats of water-based polyurethane protect the surface, but unfinished plywood is fine indoors if you do not mind scuffs.
Mount it securely
Do not rely on a single small nail or adhesive strip. Even a light rack can pull loose when someone grabs a capo from the front. On drywall, locate a stud and drive a screw into it; a small stud finder helps, though tapping and confirming with a small pilot hole is a useful check. If no stud is available, use drywall anchors rated well above the rack’s loaded weight and follow their instructions.
Two mounting holes spaced about 8 inches apart help keep the rack from twisting. Drill clearance holes in the back panel, level the rack, and mark the wall through those holes. Check that no electrical wiring or plumbing is likely to run where you plan to drill. For masonry walls, use a masonry bit and compatible plugs rather than drywall hardware.
Test and adjust
Load the rack gradually, then pull gently down and outward to check for movement. If it rocks, tighten the fasteners or improve the wall anchors before storing anything valuable. A common failure is a tray bottom glued only at its edge; screws through the sides into the bottom reduce the risk of it sagging under a heavy tuner or spare-string pack. Another is making pick slots too tight after finishing—the coating reduces the opening slightly, so test the fit again once the finish is dry.
For a cheaper build, plain plywood, glue, and screws are enough. Decorative hardwood, routed edges, and a sprayed finish add time and cost but do not make the rack hold accessories better. Spend effort on accurate fit, smooth edges, and solid wall mounting instead.