What's inside
- What a Spokeshave Actually Does
- Flat Sole vs. Curved Sole: Which to Buy First
- Setup Mistakes That Ruin First Cuts
- 5 Beginner Projects Ranked by Difficulty
- Project 1: Turn Square Stock Into Round Handles
- Project 2: Tapered Legs and Stretchers
- Project 3: Shaped Handles, Brackets, and Spoons
- What to Practice Between Projects
- What a Spokeshave Actually Does
- Flat Sole vs. Curved Sole: Which to Buy First
- Setup Mistakes That Ruin First Cuts
- 5 Beginner Projects Ranked by Difficulty
- Project 1: Turn Square Stock Into Round Handles
- Project 2: Tapered Legs and Stretchers
- Project 3: Shaped Handles, Brackets, and Spoons
- What to Practice Between Projects
As an Amazon Associate I earn from qualifying purchases. This post may contain affiliate links at no extra cost to you.
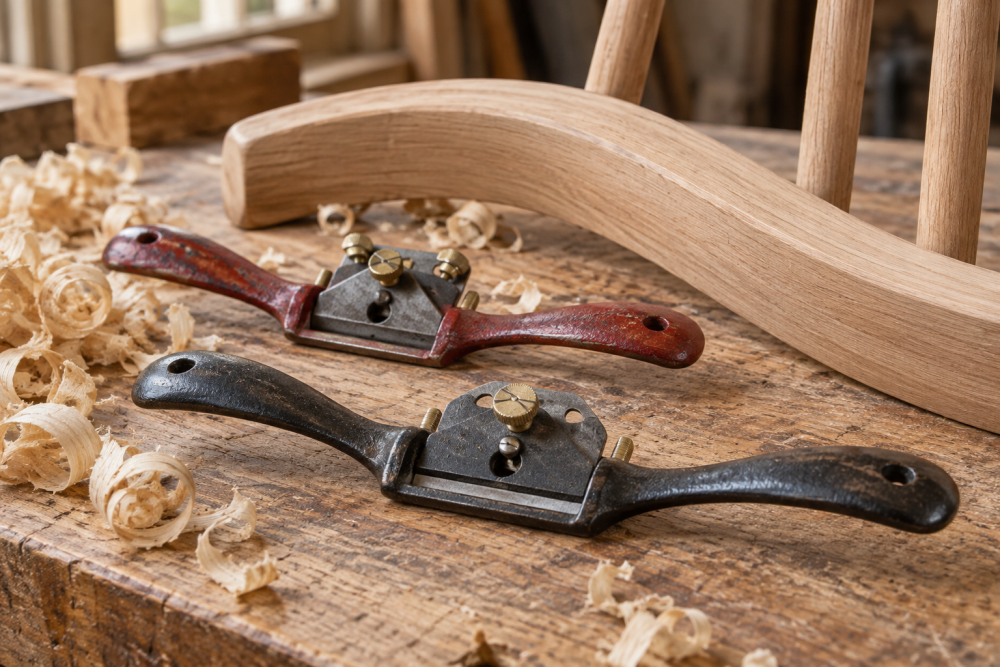
If you can push a block plane, you can use a spokeshave. It is essentially a short-soled plane with handles on the sides, made to shape curves and round over edges where a bench plane cannot follow the wood. For beginners it is one of the fastest ways to go from square stock to a comfortable, hand-shaped part, but it is also easy to get chatter, tearout, and uneven facets if your setup and grain direction are wrong. These projects are chosen because they teach control in stages, use inexpensive wood, and leave you with something useful even if your shavings are not perfect at first.
As an Amazon Associate we earn from qualifying purchases at no extra cost to you.


Contents
- What a Spokeshave Actually Does
- Flat Sole vs. Curved Sole: Which to Buy First
- Setup Mistakes That Ruin First Cuts
- 5 Beginner Projects Ranked by Difficulty
- Project 1: Turn Square Stock Into Round Handles
- Project 2: Tapered Legs and Stretchers
- Project 3: Shaped Handles, Brackets, and Spoons
- What to Practice Between Projects
What a Spokeshave Actually Does
A spokeshave cuts with a single blade held between two handles. Your hands steer the cut while the sole registers against the work. Unlike a drawknife, which can hog off 1/16 inch or more per pass, a well-tuned spokeshave takes a 0.002 to 0.005 inch shaving. That thin cut is why it leaves a cleaner surface than a rasp and why it gives you time to correct.
There are two basic forms. A flat-sole spokeshave rides on convex curves and straight tapers. A curved-sole or round-bottom version sits in concave curves like the inside of a chair seat or a spoon bowl. Beginners do 90 percent of their work with a flat sole. You do not need both to start, and you should learn to set one up correctly before buying the second.
Flat Sole vs. Curved Sole: Which to Buy First
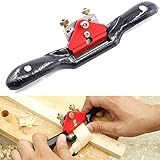
A flat-sole tool with an adjustable mouth and depth screws is the most forgiving to learn on. The mouth controls how much blade is exposed and how much tearout you get in figured grain. Cast iron bodies in the Stanley 151 pattern are stable and heavy enough to damp vibration. Wooden-bodied shaves are lighter and can feel more nimble, but they require more frequent flattening of the sole.
A flat sole spokeshave with screw adjusters will cost 25 to 45 dollars for a usable import, 90 to 150 dollars for a Veritas or Lie-Nielsen. The cheaper option is fine for learning if you are willing to spend 20 minutes flattening the back of the blade and honing it to 25 degrees with a 30 degree micro-bevel. An expensive shave out of the box may be sharper, but it will not teach you any faster if you do not understand grain direction. If you plan to shape spoons or deep hollows later, add a curved sole spokeshave as your second tool.
Setup Mistakes That Ruin First Cuts
Most frustration comes from the blade, not the wood. Three checks matter:
1. Sharpness. If the blade will not pare end grain cleanly by hand, it is not sharp enough. Hone to at least 1000 grit, then strop. A dull blade forces you to push harder, which causes chatter and digging.
2. Projection. Advance the blade until you can just feel it with a fingertip dragged across the sole, then retract until it takes a translucent shaving on a pine scrap. On many 151-style shaves, that is about 1/8 to 1/4 turn past zero. Too much exposure causes the tool to grab, especially at the start of a cut.
3. Lateral alignment. Look down the sole and make sure the blade edge is parallel to the mouth opening. If one side cuts deeper, you will get a stepped surface and the tool will pull to one side.
Workholding is the other half. A spokeshave needs both hands, so the workpiece must be fixed. A vise holds chair legs and hammer handles. A shave horse is ideal for spoons and spindles but a bench with a holdfast and a V-notched board works. If the piece vibrates, you will get washboard chatter marks no matter how sharp you are.
Cut with the grain whenever possible. On a curve, grain direction reverses at the high point. Start at that high point and shave downhill in both directions. If you get tearout that looks like small scoops, you are going uphill. Flip the piece end-for-end.
5 Beginner Projects Ranked by Difficulty
These are ordered so each one adds one new skill. Start with straight grain and gentle curves before you try tight hollows.
| Project | Stock Needed | Core Skill | Time | Why It Helps |
|---|---|---|---|---|
| 1. Chamfered Tool Handles | Square hardwood blank, 1 to 1-1/4 inch square, 12 to 16 inches long | Maintaining a flat facet, rolling to an octagon | 1 hour | Teaches blade control on straight grain; mistakes are easy to sand out |
| 2. Tapered Legs or Spindles | Straight-grained ash, maple, or poplar, 1-1/2 inch square | Following layout lines, downhill cutting on a taper | 1 to 2 hours per leg | Introduces sighting down the piece to keep tapers straight |
| 3. Simple Bow Saw or Frame Saw Handles | Hardwood 8/4, pattern traced from template | Shaping convex curves to a line | 2 to 3 hours | Requires blending facets into a smooth curve |
| 4. Curved Shelf Brackets or Coat Hooks | 4/4 to 8/4 cherry or walnut, 6 to 10 inches long | Working convex and shallow concave curves | 1.5 hours per bracket | Forces grain-direction changes on one piece |
| 5. Spoons or Ladles | Spoon blank, basswood or birch, 1 to 1-1/2 inch thick | Hollowing with a curved sole, edge rounding | 2 to 4 hours | First true hollow work; needs both flat and curved sole technique |
Project 1: Turn Square Stock Into Round Handles
Take a square blank for a chisel handle, file handle, or garden tool handle and draw a centerline on all four faces. Knock the four corners off with the spokeshave to make an octagon. Hold the shave at about 45 degrees to the corner and take light, continuous strokes the full length. Then knock the eight corners off to make sixteen sides. At that point you are close to round and can finish by skewing the spokeshave slightly and blending.
Failure mode: You will get facets that are wider in the middle than at the ends. That means you are applying more pressure mid-stroke. Keep your elbows tucked and move your whole body, not just your wrists. Check your progress by rolling the handle on a flat bench under a strong light. High spots cast shadows.
This is the best place to learn how thin a shaving should be. If you are making dust instead of curls, the blade is too shallow or dull. If the tool stutters and leaves ripple marks, you are taking too thick a cut or your cap iron is loose.
Project 2: Tapered Legs and Stretchers
Lay out a taper with two lines, for example from 1-1/2 inch at the top to 1 inch at the foot over 16 inches. Plane to the lines with the flat-sole shave. Work from the middle toward each end to stay downhill with the grain. Sight down the leg after every four or five strokes. A taper that looks straight up close often shows a bulge when viewed end to end.
Trade-off: A spokeshave versus a block plane here. A block plane is faster on straight tapers, but a spokeshave lets you stop and start the taper anywhere, which you need for stool legs that stay square at the top for a mortise. A drawknife is faster still but will overshoot your lines if you are new to it. For learning, the spokeshave is the safe middle ground.
Use straight-grained stock. Ash and poplar are cheap and forgive a slightly dull edge. Avoid oak with strong ray fleck for your first tapers. It changes grain direction every half inch and will tear no matter what you do.
Project 3: Shaped Handles, Brackets, and Spoons
Once you can hold a line on a straight taper, cut a gentle curve from 8/4 stock. Bandsaw or coping-saw to within 1/16 inch of your line, then bring it to the line with the spokeshave. Skew the tool about 15 to 20 degrees to lower the effective cutting angle on end grain and cross grain around the curve. On inside curves, the sole will only contact at two points, so take shorter strokes and let the blade do the work.
For shelf brackets, cut a classic S-curve about 7 inches tall. Shape the outside convex curve first with a flat sole, then address the inside cove. That inside cove is where a curved-sole shave earns its keep, but you can do a shallow cove with a flat sole by rolling it on its edge. You will know you need the curved version when you cannot keep the tool from rocking and digging at the bottom of the hollow.
Spoons are the final test. Rough out the bowl with a gouge, then refine the outside of the handle and the outside of the bowl with a flat sole. Switch to a curved sole or a spoon carving spokeshave for the inside of the bowl. Take cuts across the grain in the bowl, not along it, and lock your thumbs behind the blade as a depth stop so you do not gouge through thin walls. Basswood at 1-1/4 inch thick is ideal for your first two or three spoons. It cuts easily and shows chatter clearly so you can correct.
Common failure on curves is rounding over your layout line. Leave the line visible until the last pass, then take one final finishing shaving with the mouth closed down tight. If you blow past the line early, you cannot add wood back.
What to Practice Between Projects
Keep a pine 2×4 offcut just for shavings. Before each session, set the blade and make full-length curls that are thin enough to read through. If you cannot get a continuous curl, stop and resharpen instead of forcing the work. Five minutes on a 1000-grit stone and strop saves an hour of sanding tearout later.
Build one extra of each project from the cheapest wood you have and treat it as a test piece. Measure wall thickness on spoons with calipers, check roundness of handles with a 1-inch open-end wrench as a go-no-go gauge, and sight tapers under raking light. Those numbers tell you more than how smooth the piece feels to your hand.