
What's inside
As an Amazon Associate I earn from qualifying purchases. This post may contain affiliate links at no extra cost to you.
Learning to use a router safely is easier when the first projects are small, flat, and forgiving. A router can remove a lot of wood quickly, but it can also grab the workpiece, launch chips, or burn an edge when the bit is too deep, the feed direction is wrong, or the board is not held securely. Start with projects that teach one operation at a time rather than jumping straight to raised-panel doors or complicated joinery.
As an Amazon Associate we earn from qualifying purchases at no extra cost to you.



Contents
Set Up the Router Before Cutting
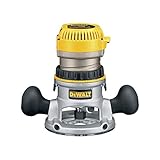
For a beginner, a compact or mid-size router with variable speed is usually easier to control than a large fixed-base machine. A plunge base is useful later for stopped grooves and mortises, but it is not essential for the first projects. A basic fixed-base router is often the cheaper and perfectly adequate choice for edge profiles, rabbets, and shallow grooves.
Use a sharp, carbide-tipped bit with a 1/4-inch shank if your router accepts it. Do not use a 1/4-inch bit in a collet designed only for 1/2-inch shanks, or leave the bit barely inserted. Insert the bit fully, then pull it back about 1/16 inch before tightening the collet. This prevents the bit from bottoming out while still giving the shank plenty of grip.
Wear safety glasses and hearing protection, and use dust collection whenever possible. A router dust collection hood is not a substitute for eye protection, but it keeps the cut line visible and reduces airborne dust. Clamp the work securely, keep both hands on the router, and wait for the bit to stop before setting the tool down.
The Best First Router Projects
| Project | What it teaches | Best beginner bit | Main risk |
|---|---|---|---|
| Practice board | Direction, depth, and feed speed | 1/4-inch round-over or straight bit | Routing unsupported or loose stock |
| Edge-profiled shelf | Controlled edge routing | Round-over bit | Burn marks and end-grain tear-out |
| Serving tray | Template routing and shallow recesses | Flush-trim or straight bit | Cutting too deeply in one pass |
| Picture frame | Rabbets and repeated, consistent cuts | Rabbet bit or straight bit | Wrong feed direction on narrow stock |
| Simple shelf cleat | Stopped or edge grooves | 1/4-inch straight bit | Kickback when starting or stopping |
1. Make a Practice Board First
Use a straight piece of pine or poplar about 3/4 inch thick, 6 inches wide, and 24 inches long. Mark several 6-inch sections and make test cuts before touching a project part. Try a shallow round-over, a straight groove, and a rabbet if you have those bits.
Set the bit height so the first pass removes no more than 1/8 inch. On a round-over, the bearing should contact the edge while the cutter removes only a small amount of material. Make several passes, increasing the depth gradually. This shows how the router feels when it is cutting lightly versus being forced through too much wood.
Practice the correct feed direction. When routing the outside edge of a board with a handheld router, move the router from left to right when the edge is facing you and the bit is on the near side. This is conventional routing, where the rotation of the bit helps push the tool against the work. A climb cut can pull the router away suddenly and should wait until you have more experience.
2. Round Over the Edges of a Small Shelf
A simple wall shelf is a useful first finished project because the joinery can be limited to screws or shelf brackets. Cut a board to roughly 24 by 8 inches, sand it flat, and use a 1/8- or 1/4-inch round-over bit on the exposed edges. The smaller profile is easier to control and looks less dated on thin stock.
Route the end grain first, then the long edges. Any minor tear-out at the end of a cut will be removed when the long-edge pass meets it. Keep the router base flat; tipping it can create a visible dip at the corner. If you see dark burn marks, reduce the depth, clean the bit, or move faster. Do not solve burning by simply pushing harder.
A small 1/4-inch-shank router bit set can be economical here, but avoid large sets containing dozens of novelty profiles. Three or four quality bits are more useful than 30 bits you will not use.
3. Build a Shallow Serving Tray
A tray teaches you to use a template and make shallow, controlled recesses. Glue up or buy a panel about 16 by 12 inches. Make a rectangular template from 1/4-inch plywood, leaving at least 2 inches of material around the outside. Clamp the template firmly and use a straight bit with a bearing, or guide the router against the template with a bushing.
Remove only 1/8 inch per pass. A tray recess 3/8 inch deep should take at least three passes, and four is reasonable in softwood. Stop before the bottom becomes thin enough to flex. If the panel is 3/4 inch thick, leave at least 1/4 inch under the recess.
Use a router guide bushing set only if your router base accepts one. Check that the bushing is centered before cutting; an off-center guide changes the recess dimensions and can make the edge uneven.
4. Cut a Rabbet for a Picture Frame
A picture frame introduces a practical joinery cut without requiring complex geometry. Mill four straight pieces, then cut a 1/4-inch-wide by 3/8-inch-deep rabbet on the back of each. The rabbet holds the glass, artwork, and backing.
Make the cut in two shallow passes rather than one deep pass. Use an edge guide if the frame pieces are too narrow for the router base to sit securely. Support the stock on a sacrificial board so the bit does not strike the bench, and mark the back of every piece before routing. Routing one piece with the wrong face up is an easy, frustrating mistake.
What to Buy and What to Skip
If you are buying a router specifically for these projects, prioritize a comfortable grip, a reliable depth adjustment, a clear base, and a switch you can reach without changing your hand position. Variable speed is useful for larger bits, but it does not make unsafe setups safe. A router edge guide is more useful to a beginner than an elaborate accessory kit.
Do not buy inexpensive unbranded bits with chipped carbide or poor-looking bearings. The cheaper option is fine for a basic round-over if the carbide is intact and the bearing spins smoothly. Replace any bit that is cracked, loose, or visibly damaged. Most beginner failures come from rushing depth changes, poor clamping, or using the wrong feed direction—not from lacking an expensive router.
When to Move to Harder Work
Move on to stopped grooves, mortises, and raised panels only after you can make several clean, repeatable cuts on scrap. You should be able to set a depth, clamp a guide, route without tipping the tool, and recognize when the motor is laboring. Until then, repeat the practice board. Ten minutes of controlled test cuts is cheaper than replacing a project, a bit, or a damaged hand.