What's inside
As an Amazon Associate I earn from qualifying purchases. This post may contain affiliate links at no extra cost to you.
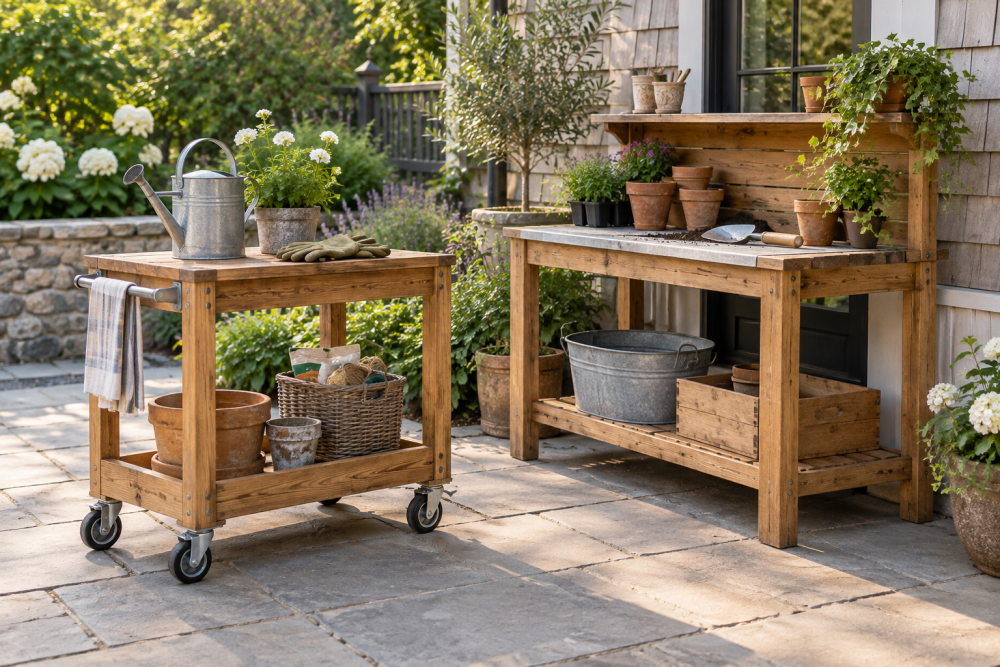
A backyard potting bench needs a work surface at a comfortable height, a lower shelf for bulky supplies, and a finish that can handle wet soil. This design is 48 inches wide, 24 inches deep, and about 36 inches high. It uses common dimensional lumber and straightforward butt joints, so it suits a beginner with a circular saw or handsaw, drill, and square.
Contents
Plan the bench and choose materials
Measure the spot before buying lumber. Leave room to stand in front and, if the bench will sit against a wall, check that the roof overhang or siding won’t interfere. The dimensions below assume a level patio or firm ground. On uneven ground, plan to adjust the feet or use shims after assembly.
Use pressure-treated lumber for a bench exposed to rain and ground moisture; it costs more but resists rot better. Untreated cedar is a naturally rot-resistant alternative, though it may cost more and can still weather. Ordinary untreated pine is cheaper and fine under a covered porch if you keep it off wet soil and maintain the finish. Avoid putting fresh potting mix directly against pressure-treated wood; use a tray or liner if that concerns you.
| Material | Best for | Trade-off |
|---|---|---|
| Pressure-treated pine | Uncovered yards and frequent wetting | Often wet or bowed from the store; let it dry before finishing |
| Cedar | Weather resistance with a lighter build | Higher price; softer wood dents more easily |
| Untreated pine | Covered areas and tight budgets | Needs a sound exterior finish and more upkeep |
For this size, buy four 2×4s for the legs and rails, four 1×4s for the top, and four 1×4s for the lower shelf, plus a few extra feet of 1×4 for cut allowance. Actual lumber is smaller than its nominal size: a 2×4 measures about 1½ by 3½ inches. A box of exterior-rated 2½-inch deck screws is suitable for the frame. Use exterior screws, not drywall screws, which can snap under a loaded bench.
Cut list and tools
Cut four legs to 35¼ inches; the ¾-inch top boards bring the finished height to about 36 inches. Cut two long upper rails to 45 inches and two short upper rails to 21 inches. Repeat those rail lengths for the lower frame. The long rails fit between the legs across the bench; the short rails fit between legs from front to back. Cut eight 1×4 boards to 48 inches for the top and shelf.
Allow about ¼ inch between boards for drainage and soil to fall through. A tape measure, pencil, square, drill/driver, and saw are enough. A basic set of woodworking clamps helps hold the frame square while driving screws, but a helper can do the job instead.
Assemble the frame
Build the upper frame first. Lay two legs flat and position the 45-inch rail between them, with the rail’s top edge flush with the leg tops. The rail ends should meet the inside faces of the legs. Drill pilot holes through each leg into the rail, then drive two screws at each end. Repeat for the other side and connect the sides with the 21-inch rails.
Check that the frame is square by measuring diagonally from corner to corner. If the two measurements differ, push the longer diagonal inward until they match, then add the screws. Repeat this process for the lower frame, positioning its rails about 8 inches above the leg bottoms. That gives roughly 7 inches of clearance beneath the shelf boards and keeps storage from sitting directly on damp ground.
Attach the lower frame to the legs with its top edges level all around. Confirm that the bench does not rock on a flat surface. If it does, check for a twisted frame before trimming a leg; a diagonal brace or one uneven cut may be the cause.
Install the top and lower shelf
Set four 48-inch boards across the upper frame, running from front to back. Space them evenly and leave about ¼ inch between each. Drill pilot holes near both ends of every board and fasten each end to the long rails with one exterior screw. Keep the boards flush with the sides, or let them overhang by up to ½ inch for a slightly wider working surface.
Install the four shelf boards the same way on the lower frame. If you expect to store heavy bags of compost, add a center support beneath the shelf boards: screw a 21-inch 2×4 between the long rails, centered across the width, with its wide face horizontal. Without that support, long shelf boards can sag under concentrated loads. The open gaps make cleanup and drainage easier, but small tools and loose soil may fall through; add a removable tray if you need a solid surface.
Sand, finish, and weatherproof
Ease sharp edges with 80- to 120-grit sandpaper and round over corners that could catch clothing. Remove dust before applying an exterior finish. A penetrating exterior oil is easy to refresh, while exterior paint gives more color and surface coverage but can peel if water gets beneath a crack. Follow the product’s drying instructions, and don’t coat wet pressure-treated lumber: trapped moisture can lead to a poor finish. If the boards are damp, let them dry in a ventilated spot first.
Set the bench on pavers or another firm surface rather than bare soil. Check screw tightness and finish once or twice a year, especially after winter. Replace boards that stay soft or split around fasteners. This simple frame is repairable: the top and shelf boards can be unscrewed and replaced without rebuilding the legs.
Useful adjustments and safe work
For a shorter gardener, reduce the leg length; for taller users, raise it, but keep the bench stable and brace it if it becomes top-heavy. A backsplash can stop pots rolling off, but it adds parts and may trap moisture against a wall. Add one only if you need it, and leave a small gap behind the bench for airflow.
Wear eye protection when cutting or drilling, support lumber so it cannot roll, and keep hands clear of the blade path. Pressure-treated sawdust should not be inhaled; cut outdoors and wear a suitable dust mask. Check the finished bench for wobble before loading it, then distribute heavy containers across the frame rather than stacking them at one end.