What's inside
As an Amazon Associate I earn from qualifying purchases. This post may contain affiliate links at no extra cost to you.
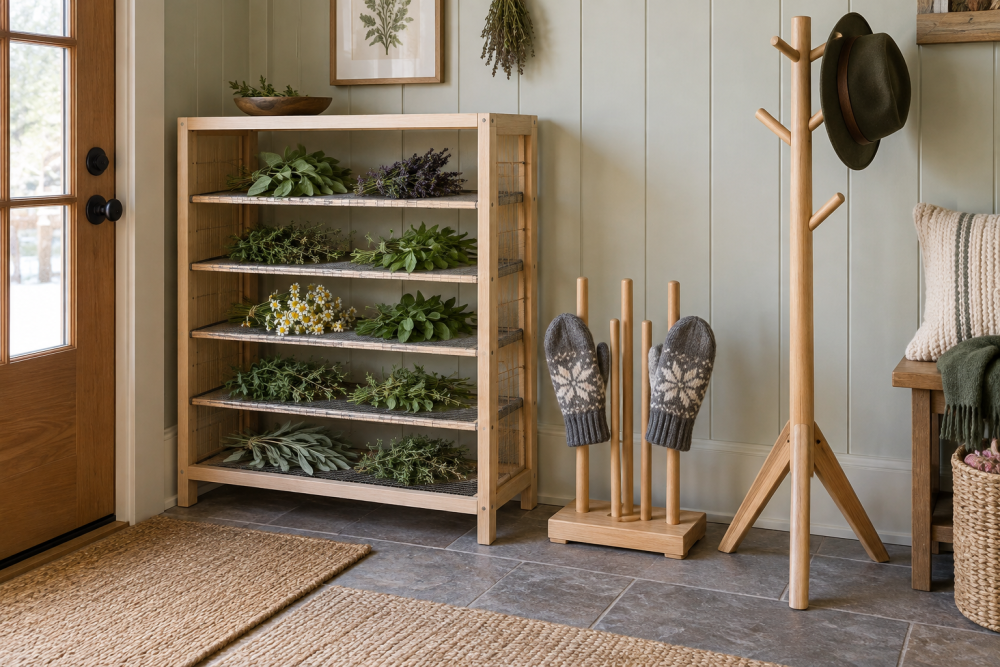
A cedar herb-drying rack is a simple weekend project: a shallow frame holds removable mesh trays where herbs can dry in moving air. Cedar is light and easy to work, but its aroma can transfer to delicate leaves. Keep the wood unfinished, let it air out before use, and dry herbs on food-safe mesh rather than directly on the boards.
Contents
Choose a size and a spot
This plan makes a wall-mounted rack about 24 inches wide, 18 inches tall, and 4 inches deep, with two removable trays. It fits a sunny kitchen wall, though the herbs should dry in a shaded, ventilated spot; direct sun can fade color and drive off flavor. Pick a location away from the stove, sink, and steam from a kettle. If the kitchen stays humid, use a breezier room instead.
Before cutting, check the wall for studs and confirm the rack will not block cabinets or a window. A loaded rack can weigh several pounds, so plan to fasten it to studs or use suitable hollow-wall anchors. Do not rely on a small picture hook.
Materials and tools
- One cedar board, 1-by-4 inches by 8 feet, for the outer frame and tray rails
- Four cedar strips, 1-by-2 inches by 24 inches, for tray frames
- Two pieces of food-safe, washable mesh, about 20 by 14 inches each
- Wood screws: 1¼-inch for the frame and ¾-inch for the tray frames
- Two sturdy hanging brackets or screws suited to your wall
- Hand saw or miter saw, drill, tape measure, square, clamps, and sandpaper
A food-safe washable mesh is the key purchase. Plastic garden netting can be inexpensive, but it may sag, be hard to clean, or have an unknown coating. If you already have clean stainless-steel mesh with openings around ⅛ inch, it can work well; very fine fabric slows airflow.
A cedar 1-by-4 board is convenient, but inspect it for twists and loose knots. A straight, untreated pine board is a cheaper alternative and works just as well for a dry indoor rack. Avoid pressure-treated lumber, stain, and scented finishes near herbs.
Cut list and layout
Cut two 24-inch uprights and two 18-inch crosspieces for the outer frame. Cut four tray rails 22 inches long and four 12-inch end rails. These make two tray frames with a finished outside size of about 22 by 12 inches. The trays sit inside the rack, with roughly 1 inch of clearance on each side.
For a different rack width, keep each tray at least 1 inch narrower than the inside frame opening. Leave 2 to 3 inches between trays so air can pass through. A deep, tightly packed rack looks efficient but dries unevenly.
Build the outer frame
Lay the uprights parallel on a flat surface. Position the crosspieces between them, one at the top and one at the bottom, then check for square by measuring both diagonals. If they match within ⅛ inch, drill pilot holes and fasten each corner with two 1¼-inch screws. Pilot holes matter in cedar: screws driven near an edge can split the soft wood.
Fasten the four tray rails inside the uprights, two at each tray height. Set the lower pair about 5 inches above the bottom and the upper pair about 11 inches above it. Keep each pair level and parallel; a tray that tilts will slide or collect loose leaves. Test with a scrap board before driving the screws fully home.
Make the removable trays
For each tray, arrange two 22-inch rails and two 12-inch rails into a rectangle. Check the corners with a square, drill pilot holes, and use two ¾-inch screws at each joint. Sand the edges and corners smooth so the mesh will not snag.
Cut the mesh about 1 inch larger than each tray opening. Pull it taut across the underside and staple it every 1 to 1½ inches, working from the center of each side toward the corners. Too little tension makes a sagging pocket; excessive tension can tear the mesh or twist the frame. Trim sharp excess and cover staple points with thin wood strips if they could catch fingers or herbs.
Slide the trays onto their rails. They should come out without binding. If a tray sticks, sand the contact points rather than forcing it; cedar dents easily and a forced tray can loosen its mesh.
Sand, mount, and test
Sand exposed surfaces with 120-grit paper, followed by 180-grit. Wipe off dust with a dry cloth. Leave the rack unfinished: oils and varnishes can smell for weeks and may contact herbs if they drip or rub off. Cedar’s natural scent usually fades with ventilation, but if it remains strong after several days, let the rack air outdoors in shade before loading it.
Mount the rack level, using screws into two studs where possible. If studs do not line up, choose wall anchors rated well above the expected loaded weight and follow their installation instructions. Put a tray in each set of rails and test the rack with a few pounds of evenly distributed weight before adding herbs.
Mesh choices at a glance
| Tray surface | Advantages | Trade-offs |
|---|---|---|
| Washable food-safe mesh | Good airflow, reusable, easy to remove and clean | Costs more than scrap fabric; must be stretched evenly |
| Stainless-steel mesh | Durable and resists sagging | Can be harder to cut and may have sharp edges |
| Clean cotton cloth | Cheap and easy to find | Dries more slowly and needs careful washing between batches |
Dry herbs safely and maintain the rack
Rinse herbs only when needed and dry surface water thoroughly before placing them on the trays. Spread stems or leaves in a single layer, with space between pieces. Turn or rearrange them daily. Most leafy herbs take several days, but time depends on humidity, leaf size, and airflow. They are ready when leaves crumble readily and stems snap rather than bend. If leaves feel leathery or smell musty, discard them; a crowded tray or damp room may be the cause.
Remove crumbs after each batch and wash mesh with mild soap, then dry it completely before reuse. Check the frame screws seasonally and tighten any that loosen. Cedar is naturally resistant to decay, but it is not a substitute for keeping the rack dry. If the frame warps or the mesh tears, replace the affected part rather than trying to dry herbs on a sagging surface.