What's inside
As an Amazon Associate I earn from qualifying purchases. This post may contain affiliate links at no extra cost to you.
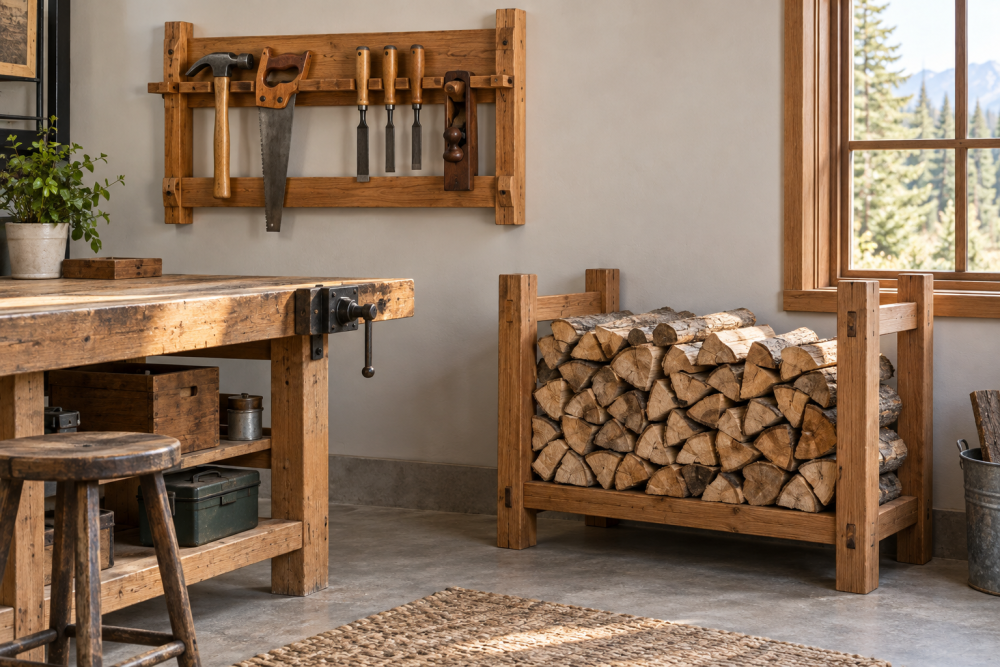
A wooden firewood rack keeps logs off wet ground, improves airflow, and makes a woodpile easier to measure and manage. This design holds roughly one-third to one-half cord, depending on its width and how tightly you stack it. It has a simple sloped roof that sheds rain and snow without requiring advanced joinery.
Contents
Choose the Size and Materials
The plan below is 6 feet wide, 18 inches deep, and about 5 feet tall at the front roof edge. The storage area is approximately 6 feet wide by 4 feet high by 16 inches deep. That is enough for several days or weeks of regular burning, but it is not a full-season wood shelter for most homes.
| Part | Recommended material | Quantity |
|---|---|---|
| Posts | 4×4 pressure-treated lumber, 6 feet long | 4 |
| Base runners | 4×4 pressure-treated lumber, 6 feet long | 2 |
| Floor slats | 2×4 pressure-treated lumber, 18 inches long | 5 or 6 |
| Side and rear rails | 2×4 lumber | 6 to 8 pieces |
| Roof rafters | 2×4 lumber | 4 |
| Roof sheathing | 1/2-inch exterior plywood or corrugated panels | About 6 by 3 feet |
| Fasteners | 3-inch exterior structural screws and 1 5/8-inch exterior screws | As needed |
Use pressure-treated lumber for anything close to the ground. Untreated cedar is a good longer-lasting alternative, but it costs more. Standard untreated construction lumber can work for the upper framing if it is kept under a roof, though it will weather faster. For the roof, corrugated polycarbonate roofing panels are light and easy to install. Metal roofing is tougher but can have sharp edges and makes more noise in rain.
Prepare the Site
Pick a level or gently sloping location with good drainage. Keep the rack at least 6 feet from the house, sheds, fences, and other combustible materials where local fire-safety rules require it. Do not place it directly beneath roof runoff or in a low spot where melting snow collects.
Remove grass and loose soil from an area about 7 feet wide by 3 feet deep. Add 2 to 4 inches of compacted gravel. The gravel is not decorative: it keeps the runners from sitting in mud and helps prevent the rack from settling unevenly. A cheap hand tamp is sufficient for this small footprint.
Build the Raised Base
Set the two 4×4 runners parallel to each other, 16 to 18 inches apart, and square them by measuring diagonally between opposite corners. The two diagonal measurements should match. A base that is out of square makes the roof and side rails harder to fit.
Cut five or six 2×4 floor slats to 18 inches. Lay them across the runners with 2 to 3 inches between each slat. These gaps let air move under the wood and allow small pieces of bark and dirt to fall through. Fasten each slat to both runners with two exterior screws per connection. Predrill near the ends to reduce splitting.
Install the Posts and Rails
Stand a 4×4 post at each corner of the base. Make the front posts 48 inches above the top of the runners and the rear posts 42 inches high. This 6-inch difference creates a roof slope. If you want more snow-shedding ability, raise the front posts to 54 inches, but a taller rack is more likely to sway when loaded.
Clamp each post in place and check it with a level. Drive two 3-inch structural screws through each post into the runner. For a rack in a high-wind area, add metal angle brackets or through-bolts at these connections.
Attach a 2×4 rail across the front and rear at the top of the posts. Add another pair about 8 to 10 inches above the floor. The lower rails keep logs from rolling out; the upper rails stiffen the frame. Add side rails at the same levels. Leave the back mostly open or use three horizontal rails rather than solid panels. A completely enclosed back holds moisture against the wood.
Frame and Cover the Roof
Cut four 2×4 rafters to span from the front top rail to the rear top rail, allowing 6 inches of roof overhang at the front and back. Position them across the rack, spaced about 20 inches apart. Screw them to the top rails with exterior structural screws.
Fasten 1/2-inch exterior plywood over the rafters, or install corrugated roofing directly on purlins according to the panel instructions. A plywood roof can be covered with roofing felt and shingles, but that adds weight and labor. For this project, corrugated panels are usually the better trade-off.
Make the roof at least 6 inches wider than the rack on each side and 8 to 12 inches deeper front to back. Those overhangs keep rain from blowing directly onto the top layer of firewood. Use roofing screws with sealing washers for metal or plastic panels. Do not overtighten them; crushed washers and cracked panels are common failure points.
Protect the Rack
Round sharp corners with sandpaper and brush off sawdust. Apply an exterior wood preservative or penetrating stain to untreated portions, especially end grain. Do not seal freshly pressure-treated lumber until it has dried enough to accept the finish; this can take several weeks.
Keep the rack open on all sides where possible. Firewood needs ventilation more than it needs a watertight box. Stack logs bark-side up when practical, keep the stack below the rails, and leave a small air gap behind it. Overloading the rack above its designed height can push the side rails outward and make the posts lean.
Tools and Buying Choices
You can build this rack with a circular saw, drill, tape measure, square, level, clamps, and a socket or driver bit. A box of exterior structural screws is worth buying instead of relying on ordinary drywall screws, which rust and snap outdoors.
If you have only a few logs to store, substitute 2×4 posts for the 4x4s and reduce the width to 4 feet. That cheaper version is fine on a sheltered, level site. Use the heavier 4×4 frame for a full rack, deep snow, or a location exposed to wind. Inspect the rack each spring: tighten loose screws, replace split rails, and correct any runner that has sunk into the soil.