What's inside
As an Amazon Associate I earn from qualifying purchases. This post may contain affiliate links at no extra cost to you.
Contents
Materials and Cut List
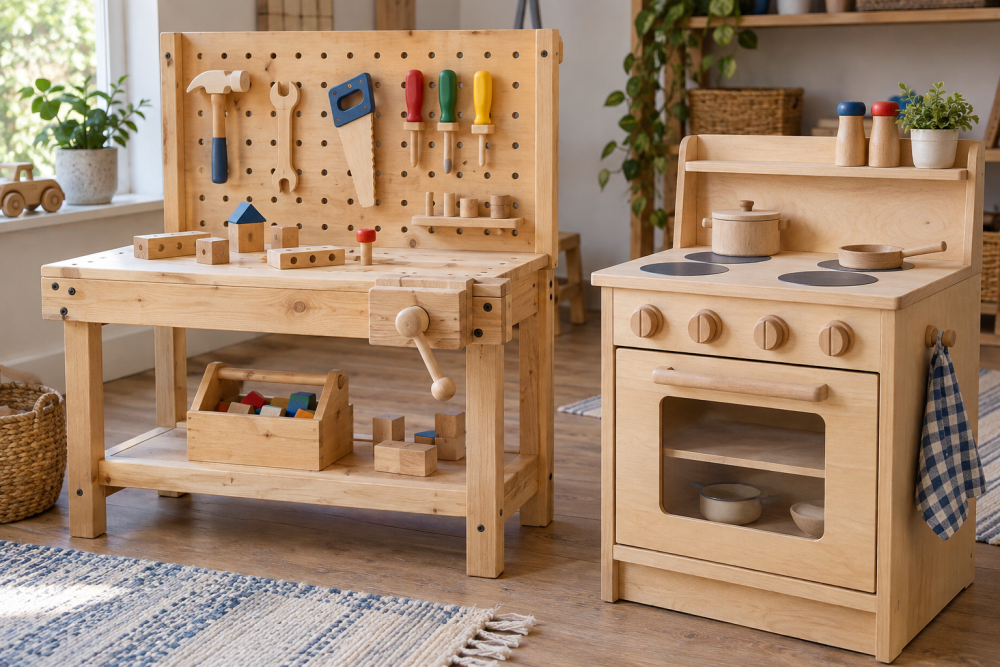
A toy workbench takes abuse. Kids hammer on it, stand on it, and over-tighten the vise. Build it like real shop furniture, just smaller. Overall dimensions that work well are 36″ wide x 20″ deep x 24″ tall to the top. That height lets most 3 to 6-year-olds work without reaching over their shoulders. Add a pegboard back and it reaches about 42″ tall total.
For wood, don’t overthink it. Construction-grade pine is fine if you choose straight boards and remove sharp grain. Poplar is harder and takes paint better but costs more. Avoid MDF for the top – it crumbles when kids drive screws and it swells if it gets wet.
| Material | Cost | Durability for Kids | Best For |
|---|---|---|---|
| SPF / White Pine (1x and 2x) | Low | Moderate, dents easily | Budget build, painted finish |
| Poplar | Medium | Good, harder, holds screws well | Natural or clear finish, longer life |
| 3/4″ Baltic Birch Plywood | Medium-High | Very good, stable, no splitting | Top, shelf, and back panel |
| Hard Maple / Beech | High | Excellent | Vise jaws and wear parts only |
Cut list for a 36″ bench:
Legs: 4 at 23-1/4″ (2×2 or laminated 2×4). Long stretchers (front/back): 4 at 33″. Short stretchers (sides): 4 at 17″. Top: 1 at 36″ x 20″ from 3/4″ plywood, doubled to 1-1/2″ thick if you want a real vise. Lower shelf: 1 at 33″ x 17″ from 3/4″ plywood. Pegboard uprights: 2 at 18″ (1×3). Pegboard header: 1 at 36″ (1×3). Back panel: 1 piece 1/4″ pegboard at 36″ x 18″. Vise chop: 1 at 8″ x 4″ from hardwood.
Tools You’ll Actually Need
You don’t need a shop full of tools. A miter saw or circular saw with a straight edge, a drill/driver, a random orbit sander, and a jigsaw or hand saw will do everything here. A pocket hole jig speeds up the frame but is not required. If you don’t have one, use 2″ wood screws with pre-drilled pilots and glue.
For hardware, get 1-1/4″ and 2″ wood screws, wood glue, 120 and 180-grit sandpaper, and four 2-1/2″ screws or bolts for the top. For the pegboard, get 3/4″ spacers or furring strips. For the vise, a wooden toy vise screw kit is safer and lighter than a full metal vise. If you want a working metal vise that actually holds, a small 4″ cast iron vise bolted through the doubled top is the other honest option.
Building the Frame So It Doesn’t Rack
The failure mode on every wobbly toy bench is the same: legs splayed after a month because the stretchers were only butt-jointed with short screws. Fix it with two things: stretchers set 3″ up from the floor and 1-1/2″ down from the top, and glue plus screws.
Cut all legs to identical length. A 1/16″ difference will make it rock. Dry-fit the two side assemblies first: one leg, two short stretchers, second leg. Check for square by measuring diagonals before you drive screws. Then connect the sides with the long front and back stretchers to form a box. Add the lower shelf now – it acts as a diagonal brace. Set the 33″ x 17″ plywood shelf into the cavity and screw through the stretchers into its edge with 1-1/4″ screws every 6″.
If you are using pocket holes, drill two per joint on the inside faces of the stretchers. If screwing through the legs, pre-drill with a 7/64″ bit for softwood to avoid splitting. Use glue on every joint. Let it cure at least an hour before loading the top.
Making a Top That Holds Up
A single 3/4″ plywood top flexes when kids lean on it and it strips out when they screw into it. Laminate two pieces of 3/4″ plywood to make a 1-1/2″ top, or add a 1-1/2″ solid wood edge frame under a single sheet. Both work. The laminated top is faster and heavier, which is good – weight equals stability.
Glue and screw the two plywood layers together with 1-1/4″ screws from the bottom, keeping screws 2″ from edges. Trim flush with a flush-trim saw or sand smooth. Round over all top edges with 1/4″ roundover or heavy sanding. Ease every edge to 1/8″ minimum – sharp plywood edges cut small hands.
Attach the top to the leg frame with 2-1/2″ screws driven up through the top stretchers. Do not glue the top on. You will want to replace it in a few years. Drill oversized 1/4″ holes in the stretchers so the top can expand and contract without cracking.
Adding the Pegboard Back
The pegboard is not just decoration. It gets the hammers and wrenches off the work surface and gives you a vertical storage plane that doesn’t tip the bench over. The key is spacing it off the back.
Screw the two 18″ uprights vertically to the back legs, flush with the outside. Screw the 36″ header across the top of the uprights. Then mount a 3/4″ thick spacer frame (scrap plywood strips work) around the perimeter of the back. Staple or screw the 1/4″ pegboard to that frame. Without the 3/4″ gap behind, standard pegboard hooks will not seat and will fall out every time a kid grabs a tool.
Use 1/4″ pegboard, not 1/8″ hardboard. The thinner board blows out when hooks are yanked. Secure it every 6″ around the edges with 3/4″ screws and washers. If you want it to last, paint both sides with acrylic paint to slow moisture warping. Keep the pegboard 1″ above the benchtop so sawdust doesn’t jam the holes.
Trade-off: A full 36″ wide pegboard is great for storage but acts like a sail if the bench is lightweight. If your bench is pine and light, screw the back legs to the wall with an L-bracket or add 20 lbs of sandbag weight to the lower shelf.
Installing a Kid-Proof Vise
This is where most toy benches fail. A plastic play vise strips in a week. A heavy metal vise can pinch fingers badly and makes the bench top-heavy.
For ages 3-5, use a wooden screw vise kit. You bore a 1″ to 1-1/8″ hole through the front edge of the top and through the hardwood chop, then thread the wooden screw through. Mount a guide dowel or two 3/8″ steel rods on either side of the screw so the chop doesn’t spin. Wax the screw with paste wax so it turns easily. The clamping force is low, which is the point – it holds a pine offcut for sawing with a toy saw but won’t crush fingers.
For ages 6+ who want to do real work, a small 3″ or 4″ small bench vise through-bolted with 5/16″ carriage bolts, washers, and nylock nuts is better. Recess the bolt heads flush under the top and cover them with wood plugs. Add leather or cork to the jaws to reduce pinching and protect workpieces. Position the vise on the left front corner for a right-handed child, or right front for left-handed, so long boards can extend past the leg without hitting it.
Whichever you choose, keep the vise over a leg, not mid-span. Mid-span vises flex the top and loosen fasteners. Predrill everything. And check that the handle cannot spin freely and whack a chin – wooden vises with a fixed tommy bar are safer than metal T-handles that spin.
Finishing, Safety, and Maintenance
Sand everything to 180 grit, then break every edge and hole. Vacuum thoroughly. Finish with a hard-wearing, low-VOC water-based polyurethane or a simple beeswax and mineral oil blend. Avoid film finishes on the vise screw threads – wax only. If you paint, use acrylic enamel and let it cure 5-7 days before heavy use or it will stay tacky and transfer.
Anchor the bench if it can tip. A 24″ tall bench with a loaded pegboard is top-heavy. If it’s freestanding, keep the heaviest tools low on the shelf. Round the vise chop corners to 1/2″ radius. Add self-adhesive felt pads under the legs to keep it from sliding on hard floors.
Expect maintenance. Tighten all screws after the first two weeks of use – wood shrinks and screws loosen. Replace the sacrificial top layer when it gets chewed up. Keep real cutting tools separate from toy tools until you can supervise, and teach clamping: wood in the vise, hands on the handle, not near the jaws.