What's inside
As an Amazon Associate I earn from qualifying purchases. This post may contain affiliate links at no extra cost to you.
Contents
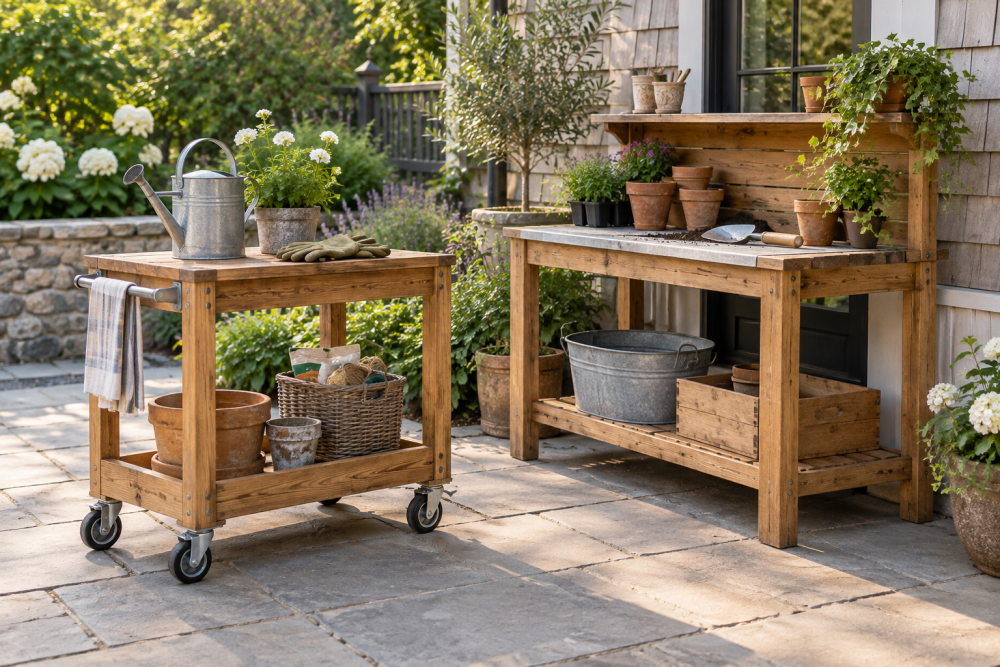
A Simple Watering Station for a Patio
A wooden watering station gives you one place to fill a can, mix fertilizer, and park the hose or spray wand. This version is sized for a small patio and built from pressure-treated lumber or cedar. It has a slatted work surface, a lower shelf for supplies, and a shallow catch tray that directs spills away from the wall.
The finished station is about 30 inches wide, 18 inches deep, and 36 inches high. That is tall enough to fill most watering cans without bending, but narrow enough for a balcony or compact patio. Plan on half a day for cutting and assembly, plus time for the finish to dry.
Materials and Tools
Use exterior-rated materials throughout. A basic build needs:
- Two 2×4 boards, 8 feet long, for the legs and frame
- One 1×6 cedar or pressure-treated board, 8 feet long, for the top slats and lower shelf slats
- One 1×4 board, 6 feet long, for the tray sides and shelf cleats
- Exterior deck screws, 2 1/2 inches long
- Exterior wood glue rated for outdoor use
- Four rubber or plastic feet, or two 3-inch exterior casters if mobility matters
- Exterior paint, stain, or penetrating water-repellent finish
You will also need a tape measure, square, pencil, drill/driver, 1/8-inch drill bit, countersink bit, circular saw, and 80- and 120-grit sandpaper. A box of exterior deck screws is worth buying rather than substituting interior drywall screws, which rust quickly and have brittle heads.
Choose the Right Wood
| Material | Advantages | Drawbacks | Best use |
|---|---|---|---|
| Cedar | Light, naturally decay-resistant, easy to cut | More expensive; dents more easily | Uncovered patios and a cleaner appearance |
| Pressure-treated pine | Cheapest common exterior option; widely available | Heavy, often wet, can twist as it dries | Budget builds and covered patios |
| Composite decking scraps | Does not rot; little finishing required | Harder to screw near edges; not as stiff | Top slats or shelf surfaces |
The cheaper pressure-treated option is fine for this project, especially if the station sits under an awning. Buy straight boards and avoid pieces with deep end splits. If the lumber feels damp, let it sit outdoors under cover for several days before applying a tight-fitting frame. Wet treated boards commonly shrink, opening joints after assembly.
Cut List and Layout
Cut the 2x4s into four legs, each 36 inches long. Cut four frame rails to 27 inches: two for the top and two for the lower shelf. Cut three top slats at 30 inches and four shelf slats at 27 inches. Finally, cut two 1×4 tray sides at 30 inches and two end pieces at 15 inches.
The three top slats will span the 18-inch depth. Leave a 1/4-inch gap between them so water drains instead of pooling. The shelf slats run front to back or side to side; either direction works, but keep at least 1/4 inch between boards. These gaps also allow dirt and spilled water to escape.
Build the Frame
Set two legs on a flat surface and position the upper and lower rails between them. The top rail should finish flush with the top of each leg. Place the lower rail so its top edge is 10 inches above the ground. Check that the rails are square to the legs, drill pilot holes, and drive two screws through each rail end. Repeat for the second side.
Connect the two sides with the remaining top and lower rails. Before fully tightening the screws, measure diagonally from corner to corner. Adjust the frame until both diagonal measurements are within 1/8 inch. A square frame makes the slatted surfaces easier to install and keeps the station from rocking.
For a station holding large ceramic pots, add a center support under the top. Cut a 2×4 to fit between the front and back rails and screw it in place. Without this support, three top slats can sag under a full watering can or a heavy tray.
Install the Top, Shelf, and Tray
Lay the top slats across the frame, centered so the edges overhang evenly by about 1 1/2 inches on each side. Drill two pilot holes at each end of every slat, then fasten them to the rails with exterior screws. Do not glue the slats together; seasonal movement needs somewhere to go.
Install the lower shelf slats on the lower rails. Keep them flush with the front and back edges, or allow a small overhang if you prefer. The shelf should hold fertilizer, gloves, and a small plastic watering can without becoming a water trap.
Build the shallow catch tray on top of the slats. Screw the two long 1×4 sides and two end pieces together, then center the tray on the station. Leave a 1/2-inch gap between the tray and the top edges of the slats so wet wood can dry. For better drainage, drill several 3/8-inch holes through the tray bottom or use a removable plastic plant saucer inside it.
Sand, Finish, and Protect It
Round sharp corners with 80-grit sandpaper, then smooth exposed surfaces with 120 grit. Pay special attention to the tray edges and the front of the top, where wet hands will regularly make contact. Remove dust before finishing.
Use an exterior penetrating stain or water-repellent finish. Paint gives the most color coverage but can peel if applied to damp pressure-treated wood. For cedar, a penetrating finish is simpler and makes future maintenance easier. Apply finish to all cut ends, especially the bottom of the legs. End grain absorbs water rapidly and is usually the first place rot starts.
If you use pressure-treated lumber, wear a dust mask while cutting and wash your hands afterward. Never burn the offcuts.
Make It Stable and Keep It Working
Place the station on a level surface and keep it at least 2 inches away from a siding wall so air can circulate. Add rubber feet for a stationary build. If you need to move it frequently, use locking casters, but expect less stability on uneven pavers. A set of locking swivel casters is useful only when the patio is reasonably flat.
Do not leave standing water in the tray. Empty it after watering and lift any plastic saucer occasionally so the wood can dry. Inspect the screw joints and finish each spring. Recoat when the surface looks gray, fuzzy, or absorbs water immediately. If a leg begins to split, stop using the station until you replace or reinforce it; a loaded watering can can push an already loose frame out of square.
For winter storage, move the station under cover if possible. Freezing water inside cracks accelerates splitting, and snow sitting on the top adds unnecessary weight. A few minutes of seasonal care will extend the life of this otherwise simple project far more than a costly finish or decorative hardware.