What's inside
As an Amazon Associate I earn from qualifying purchases. This post may contain affiliate links at no extra cost to you.
Contents
Plan the bracket around the load
A wooden bracket is a straightforward weekend project, but a hanging basket puts more strain on it than its dry weight suggests. A 10-inch basket with damp potting mix can weigh 20 to 30 pounds; a larger basket may weigh more. Wind and movement add extra force, especially when the bracket projects far from the porch post.
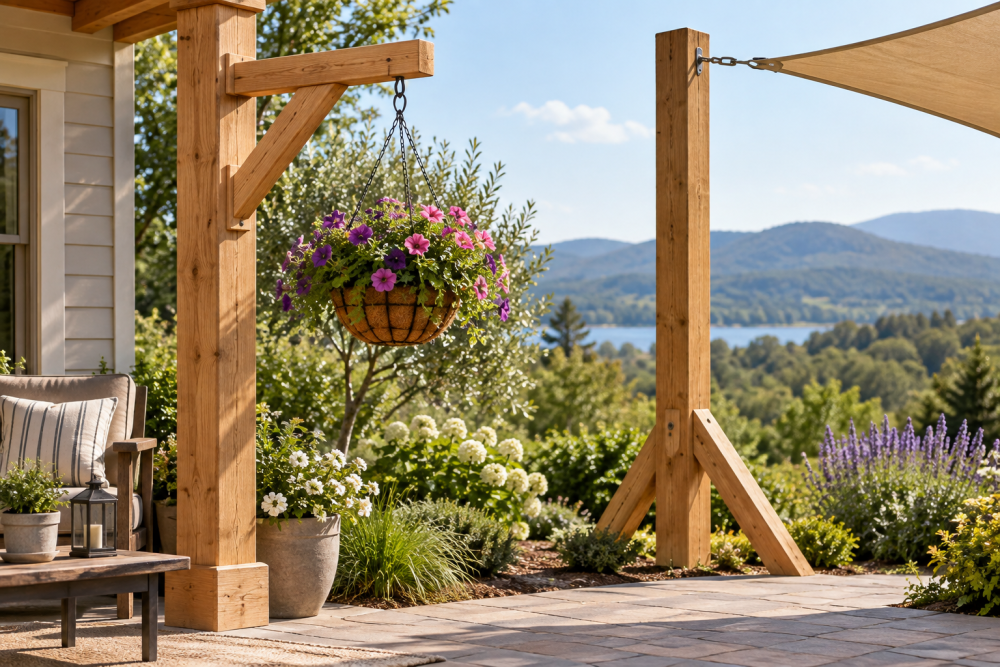
This plan uses a 2-by-4-inch arm and a diagonal brace, with about 12 inches of projection. It suits a modest basket attached to a sound, solid porch post. Keep the arm short: doubling the projection increases leverage on the fasteners. Do not attach the bracket to thin trim, siding, or a hollow decorative column. If you cannot confirm that there is solid framing behind the mounting surface, find the post’s structure or choose a freestanding hook.
Materials and tools
For one bracket, get a straight, untreated 2-by-4, roughly 24 inches long, and an exterior-grade piece of 1-by-6 for the wall plate, roughly 16 inches long. Use exterior-rated structural screws for the bracket and fasteners suited to the post for installation. Avoid drywall screws and ordinary interior screws; they can snap or corrode outdoors. A box of exterior structural wood screws is more appropriate than a general-purpose screw assortment.
You will also need a drill, a bit for pilot holes, a saw, a tape measure, a square, sandpaper, and exterior paint or sealer. A handsaw works for this small project; a circular saw makes repeated straight cuts quicker but is not essential. Wear eye protection, and clamp the stock before cutting or drilling.
Choose wood and finish
Use sound lumber without large knots, checks, or a pronounced twist, particularly in the diagonal brace. Pressure-treated lumber handles wet exposure well, but it may be damp when sold and can shrink or warp as it dries. Cedar is lighter and naturally durable, but often costs more and is softer around screw holes. For a painted bracket under a porch roof, dry, straight construction lumber can be a reasonable budget choice if all faces and cut ends receive an exterior finish.
| Material | Good fit | Trade-off |
|---|---|---|
| Dry, paint-grade lumber | Covered porch; lowest-cost build | Needs thorough sealing; quality varies |
| Cedar | Lighter bracket with natural weather resistance | Costs more and dents more easily |
| Pressure-treated lumber | More exposed locations | Can twist while drying; finish may need to wait |
Follow the finish maker’s instructions, especially for pressure-treated wood. Do not paint damp lumber. Seal the end grain, where water enters readily, and plan to inspect the bracket each spring.
Cut the pieces
Cut the 2-by-4 into an arm 12 inches long and a brace about 12 inches long. Cut the wall plate to 16 inches. These measurements make a compact bracket; a longer arm is not a simple upgrade because it increases the pull on the wall fasteners.
For the brace, make a 45-degree cut at each end so it can sit between the arm and the wall plate. Exact fit matters more than the nominal length. Hold the pieces in a triangle against a flat surface, mark the actual contact points, and trim as needed. The finished brace should bear firmly against both parts rather than rely on screws to pull a loose joint together. Sand sharp corners and check that the arm is level when the plate is vertical.
Assemble the bracket
Position the arm near the top of the wall plate, projecting straight out. Fit the brace beneath the arm, with its lower end against the plate. Drill pilot holes to suit the screw diameter and wood; pilot holes reduce splitting near ends, particularly in dry or hard stock. Drive two exterior structural screws through the plate into the arm, and two through the brace into the arm. Add two through the brace into the plate. Use screws long enough to get solid purchase without protruding through the far side.
Check the assembly for square and press down on the arm by hand. If a joint opens or the arm rocks, correct the fit before hanging anything. A screw driven close to a board edge can split it; move the hole inward or use a smaller pilot bit only if the screw maker’s guidance calls for it. Do not substitute a single large screw for several properly placed fasteners.
Mount and test it safely
Hold the plate against the post and mark at least four mounting holes, spaced vertically and away from the plate edges. Drill pilot holes into the post, then use exterior-rated structural screws long enough to penetrate solid framing—not just the post’s trim. The correct length depends on the plate thickness and post construction; avoid guessing if the column is boxed or layered. Keep fasteners clear of wiring or other services that may run through the porch structure.
After tightening, pull down firmly on the arm while standing clear of its path. Hang the empty basket first, then add soil and water gradually while watching the plate and joints for movement. Stop if the post flexes, the screws loosen, or the wood cracks. Do not stand beneath a loaded basket during our research. A bracket that passes a hand test is not certified for a particular load, so keep the basket modest and inspect it after storms and freeze-thaw weather.
Maintain or adjust
Touch up chipped finish promptly and replace any screw showing rust. If the bracket will be exposed to driving rain, a metal bracket or a freestanding shepherd’s hook may need less upkeep. A wooden design is easy to customize and can match porch trim, but it depends on sound joinery, a solid mounting point, and periodic finish maintenance. If you want a longer projection or a heavy basket, buy a bracket rated for that use rather than extending this design.