What's inside
As an Amazon Associate I earn from qualifying purchases. This post may contain affiliate links at no extra cost to you.
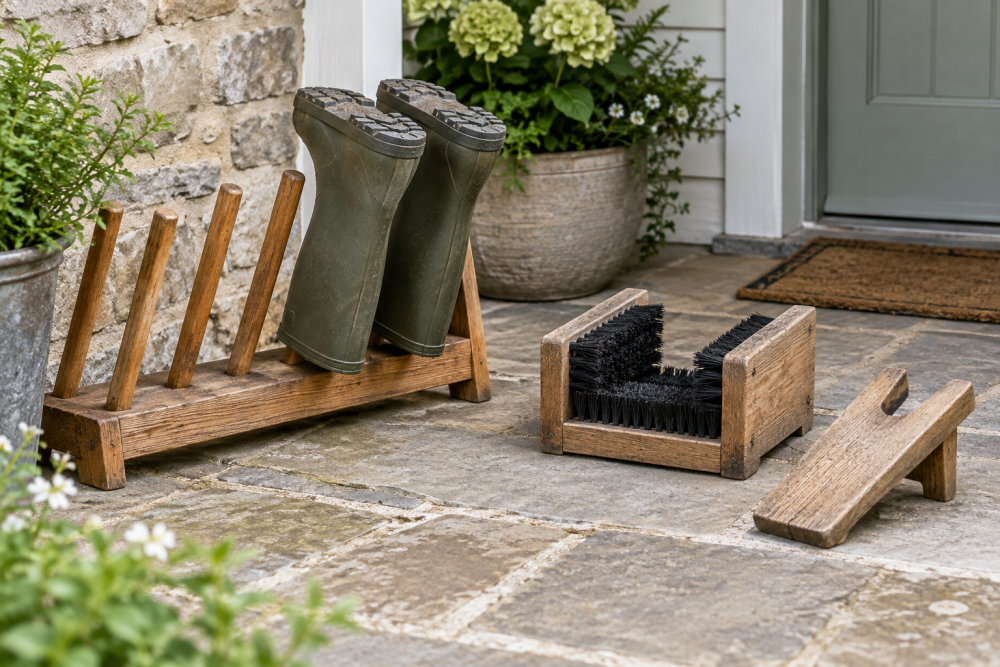
A porch boot scraper needs to do two things well: hold steady while you work mud out of a tread, and let you replace worn brushes without rebuilding the frame. This beginner plan uses a low wooden base, two side rails, and a pair of screw-mounted brushes. It suits a covered porch and takes a few hours with basic tools.
Contents
Plan at a glance
Build a base about 16 inches long, 12 inches wide, and 3 inches high. These dimensions fit most adult boots while leaving room to plant a foot. The scraper has two parallel brushes, each about 10 inches long, set roughly 3 inches apart. Adjust the spacing to match the brushes you can buy; replacement availability matters more than a precise measurement.
Use rot-resistant wood such as cedar or pressure-treated lumber. Cedar is easier to cut and handle; treated lumber costs less and tolerates wet conditions, but wear gloves when cutting it and keep scraps out of household fires. Avoid untreated pine if the scraper will sit in rain or snow.
Materials and tools
For the frame, get one 1-by-12 board, at least 16 inches long, and two pieces of 1-by-3 stock, each about 10 inches long. “One-by” lumber is actually about ¾ inch thick. You will also need two replaceable stiff-bristle brushes, exterior-rated screws, and a weather-resistant finish. Check brush length and mounting-hole position before cutting the rails.
A circular saw or handsaw, drill, countersink bit, tape measure, square, and sandpaper are enough. A clamp helps hold the work, but you can build without one by securing the board to a workbench. If buying a brush, look for a replaceable boot-scraper brush with stiff bristles and accessible mounting screws. A cheap brush is fine if its block is solid and its holes are easy to reach.
Choose a brush mount
Brushes are consumable parts, so do not glue them into the frame. The simplest arrangement is to screw each brush block directly to a cross rail. You can then remove the screws from above when the bristles flatten. If the brush holes are countersunk, use screws that sit flush and do not split the block.
| Mounting method | Advantages | Trade-offs |
|---|---|---|
| Direct screws through brush block | Simple, inexpensive, quick to replace | Requires brushes with usable mounting holes |
| Removable backing strip | Can adapt brushes with different hole positions | More parts; can loosen if screws are too short |
| Glue or permanent nails | Fast initial assembly | Replacement is difficult and may damage the frame |
For a first build, use direct screws if the brush design allows it. If the brush has no mounting holes, choose another brush rather than improvising a permanent attachment. A stiff nylon scrub brush with a wooden block can work, but confirm it is intended for outdoor use and that its block can accept screws.
Cut and assemble the frame
Cut the base to 16 by 12 inches. Cut two side rails to 10 inches long. Set the rails across the base, one near each end, with their long edges parallel and about 3 inches of clear space between them. The brushes will mount on top of these rails, with bristles facing inward toward the gap.
Before fastening, place the brushes on the rails and check the spacing. Leave enough room for a boot tread to press against both brushes without the boot wedging tightly. Mark the brush screw holes, then remove the brushes. Drill pilot holes through the rails and into the base. For typical exterior screws around 1½ inches long, a pilot hole reduces splitting; avoid driving screws through the underside.
Fasten each rail to the base with two or three exterior screws. Countersink the heads slightly so they do not snag shoes. Reposition the brushes and attach them with screws long enough to hold securely but short enough not to poke through the rail. Tighten until snug; overtightening can crush a wooden brush block or strip the hole.
Add grip and weather protection
A scraper that slides is a safety problem. Set the finished frame on the porch and test it with a boot before relying on it. If it shifts, add four rubber feet or a nonslip mat underneath, or secure it to the porch with suitable screws if you are comfortable making permanent holes. Do not count on the scraper’s weight alone on smooth, wet decking.
Ease sharp corners with sandpaper and apply an exterior oil or water-repellent finish to the wood, following the label’s drying instructions. Keep finish off the bristles. Do not seal wet lumber: trapped moisture can encourage rot, and finish applied too early may peel. A basic exterior wood sealer is adequate for a covered porch; an expensive marine coating is usually unnecessary unless the scraper is exposed to frequent rain.
Test and maintain
Stand on the base with one foot and scrape the other boot gently from side to side. Check that the frame stays put, the rails do not flex, and the bristles reach the tread. If the boot catches, increase the gap or brush angle rather than forcing it. A scraper that tips or slides should be fixed before use, not “broken in.”
After use, knock off packed mud and let the brushes dry. Wet soil left between bristles can hold moisture against the wood and loosen screws. Inspect the fasteners monthly during wet seasons. Replace a brush when the bristles stay bent, shed heavily, or no longer reach into tread grooves. Since the brushes are screwed on, replacement should take only a screwdriver and a few minutes.
For a sheltered porch and occasional use, this straightforward frame is enough. If the scraper will sit in direct weather, prioritize rot-resistant stock, drainage, and a finish you are willing to renew; no coating makes wood maintenance-free.