What's inside
As an Amazon Associate I earn from qualifying purchases. This post may contain affiliate links at no extra cost to you.
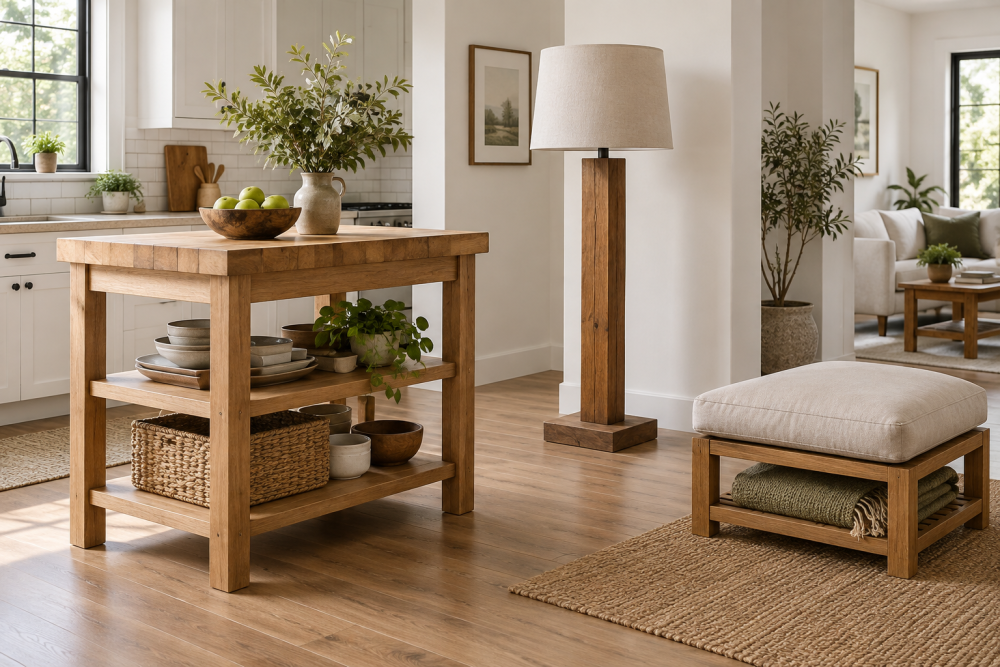
This kitchen island plan is built for a standard 36-inch counter height with a solid wood base and a 1-1/2 inch thick butcher block top. It’s sized to fit most kitchens without crowding walkways, but large enough to actually work on. Expect 20-30 hours of shop time if you have a table saw, drill, and sander, and can cut accurate 90-degree crosscuts. If you can’t yet mill rough lumber flat and square, buy S4S lumber or a pre-made top to keep this project in the intermediate range.
Contents
Dimensions and layout
The core footprint here is 48 inches long x 27 inches deep x 36 inches tall, including the top. That gives you a 25-1/2 inch deep cabinet box plus a 1-1/2 inch overhang on the front and sides. If you want seating, add 12 inches of overhang on one long side, which stretches the top to 60 x 39 inches. Anything over 12 inches of unsupported overhang needs brackets or a steel support plate underneath, or it will sag and eventually crack at the glue line.
Leave at least 42 inches of clearance on all working sides, 48 inches if your dishwasher or oven doors swing into that aisle. For the base, plan for two deep lower shelves or one shelf plus a drawer. Drawers add half a day per drawer for an intermediate builder, and they require exact openings. Open shelving is faster, cheaper, and more forgiving if your floor isn’t level.
Materials and cut list
Use hard maple, white oak, or beech for the top if you will cut directly on it. For the base, you can use the same hardwood, or save money with clear soft maple, poplar with a durable paint, or even construction-grade Douglas fir if you want a rustic look and don’t mind more denting. Avoid red oak for a food-prep top if you dislike open grain that traps crumbs, and avoid pine for the top entirely, it gouges too easily.
For the 48×27 base with open shelving, you need: 4 legs at 2-3/4 x 2-3/4 x 34-1/2 inches, 4 long aprons/rails at 3-1/2 x 3/4 x 42 inches, 4 short aprons at 3-1/2 x 3/4 x 20 inches, 1 lower shelf frame with slats or a 3/4-inch plywood panel at roughly 44 x 22 inches, and 1 butcher block top at 50 x 28-1/2 x 1-1/2 inches before final trimming. Add 2-3 extra board feet to your lumber order for test cuts and grain matching. For fasteners and glue, budget one quart of PVA wood glue, 1-1/4 inch pocket screws, and 2-inch wood screws for the top cleats.
Buy vs. build the top
Building a butcher block top from 8/4 hard maple is rewarding, but it is the highest-risk part of this project. You need a jointer and planer, or perfectly straight S4S stock, and enough parallel bar clamps to close every joint without bowing the panel. A panel this size moves 1/8 to 1/4 inch seasonally across its width in most climates, so you cannot glue or screw it solid to the base.
Buying a pre-made edge-grain or end-grain top skips the milling and glue-up and usually costs less than buying 8/4 hardwood retail once you factor in waste. The cheaper option is fine here unless you specifically want a custom size, species, or end-grain pattern.
| Option | Cost for 50×28 inch Top | Tools Required | Best For |
|---|---|---|---|
| Pre-made edge-grain maple (1-1/2 in.) | $250 – $450 | Sander, saw for trimming | Most builders; fastest, most stable |
| Pre-made end-grain maple/walnut | $500 – $900 | Sander, saw for trimming | Heavy chopping, premium look |
| Shop-built edge-grain from 8/4 maple | $200 – $350 in lumber | Jointer, planer, 6-8 clamps, router | Custom size or wood you already have |
If you build the top, rip strips to 1-3/4 inch wide, alternate grain direction to reduce warping, and do a dry clamp-up first. Any joint that won’t close with light hand pressure needs to be re-jointed. Glue in sections of 3-4 boards, then glue the sections together. This is slower but prevents a 28-inch panel from slipping while the glue is open.
Tools and joinery
You don’t need dominoes or mortise-and-tenon to build a strong island. Pocket screws with glue are strong enough for the base if the aprons are 3/4 inch thick and you add corner blocks or a 3/4-inch plywood shelf that locks the legs from racking. Traditional mortise-and-tenon is stronger and looks better without screws, but it triples the layout time and punishes sloppy fit.
Essential tools: table saw or track saw with a straight-edge guide, miter saw or crosscut sled, drill/driver, random orbit sander, tape measure, and four to six clamps that span at least 50 inches. A pocket hole jig kit is the most efficient way to assemble the aprons to the legs if you aren’t cutting tenons. A router with a chamfer or roundover bit cleans up leg edges and eases the top edge so it doesn’t chip.
Failure mode to avoid: racking. A four-legged island without a back panel or fixed shelf will wobble after a few months. The lower shelf frame is structural, not just storage. Glue and screw it, or install corner braces at all four corners. Check for square by measuring diagonals before the glue sets. If the diagonals are more than 1/16 inch off, the drawers will never fit right.
Step-by-step build
1. Mill and cut legs to final length. Gang them together and sand to 120-grit before assembly. Any twist in a leg now becomes a rocking island later. If a leg rocks on a flat saw table, remake it.
2. Build the two short end frames first. Attach the short aprons between the legs with pocket screws and glue, 6 inches up from the floor for the lower rail and flush with the top of the legs for the upper rail. Use a spacer block to keep both ends identical.
3. Connect the end frames with the long aprons. This is easiest on its side on a flat floor. Clamp, check diagonals, then drive screws. Add corner blocks or 3-inch steel corner braces inside each top corner.
4. Install the lower shelf. If using slats, space them 1/4 inch apart for wood movement. If using plywood, drill elongated holes where it screws to the rails so the frame can move seasonally without cracking.
5. Mount the top with figure-eight fasteners or shop-made wood cleats with slotted screw holes. Do not screw the top solidly to the aprons. The top must be allowed to expand and contract across its width. Set the top so it overhangs the base by 1 to 1-1/2 inches on three sides, or 12 inches on the seating side.
6. Sand the entire base to 180-grit, break all sharp edges with a 1/8 inch roundover, and finish before final top attachment if you are using different finishes for base and top.
Finishing for food contact
The base and the top get different finishes. For the base, water-based polyurethane is durable, low odor, and resists kitchen spills better than oil alone. Two to three coats, sanding lightly with 220-grit between coats, is enough.
For the butcher block, use only a food-safe finish if you will cut on it. A simple mix of mineral oil and beeswax is cheap, repairable, and never peels, but it needs reapplication. Flood the top with food-safe butcher block oil, let it soak 20 minutes, wipe dry, repeat the next day, then apply a wax topcoat. Polyurethane on the top is more water-resistant but will show knife cuts and is harder to repair without stripping.
Failure mode: black rings from standing water. End grain and any unsealed underside absorb water fast. Seal all six sides of the top with oil, including the bottom, and keep the island out of direct standing water. If you place a sink in the island, switch to a marine-grade varnish and accept that you shouldn’t cut directly on that area.
Common mistakes and fixes
Top cupped after a week: you finished only the top face, or you stored the panel flat without airflow underneath. Stickering the panel on spacers and finishing both faces equally usually brings it back. If the cup is over 1/16 inch, rip and re-glue is faster than trying to force it flat with screws, which will just split the base.
Island rocks: floor is uneven, not the island. Add adjustable levelers to the bottom of each leg, 3/8-16 threaded inserts with steel feet cost a few dollars and save hours of shimming. Set levelers before you mark drawer openings.
Drawer binds in summer: you built tight in winter when humidity was low. Leave 1/16 inch clearance per side for solid wood drawers, and seal drawer parts on all sides. For beginners, consider a single bank of drawers on full-extension slides instead of wood-on-wood runners, which are faster to install and tolerant of small errors.