What's inside
As an Amazon Associate I earn from qualifying purchases. This post may contain affiliate links at no extra cost to you.
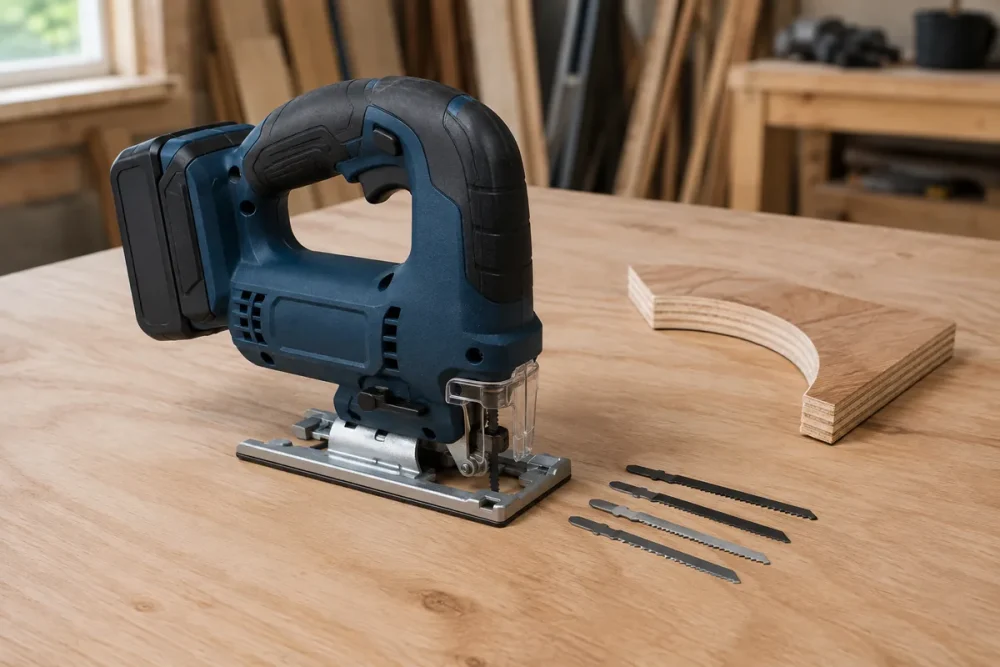
Small projects make good jigsaw practice because you can concentrate on the cut instead of wrestling a large sheet. Start with broad, gradual curves, then work toward tighter turns. The key is not forcing the blade around a line: a jigsaw blade bends under sideways pressure, leaving a cut that looks square on top but wanders or leans underneath.
As an Amazon Associate we earn from qualifying purchases at no extra cost to you.


Contents
Choose a first project
A simple template and scrap of 1/2- or 3/4-inch plywood are enough to get started. Pick material that is flat and free of loose veneer. Construction plywood is cheap, but voids and splintery faces can make it harder to judge whether a rough edge came from your technique or the material. For a first attempt, a small piece of decent sanded plywood is often worth the modest extra cost.
Draw curves with a compass, a flexible curve, or a household object. A soup bowl makes a useful rounded corner; a jar lid can mark a series of consistent small arcs. Avoid starting with a pattern full of sharp inside corners. A jigsaw cuts curves best when the blade has room to turn.
Projects by difficulty
| Project | Suggested material | Curve practice | Difficulty |
|---|---|---|---|
| Rounded-edge coaster | 1/4- to 1/2-inch plywood | Wide corners and repeated outlines | Easy |
| Painted plant marker or garden stake | 1/2-inch solid wood or plywood | Long convex curves | Easy |
| Small wall hook backer | 3/4-inch plywood | Outside curves and a shallow notch | Moderate |
| Simple animal silhouette | 1/2-inch plywood | Convex curves and gentle inside turns | Moderate |
Project 1: Rounded-edge coaster set
Cut four squares about 4 inches across, then mark rounded corners with a bowl or lid. Clamp one blank securely to a bench or work surface, keeping the offcut free to fall away. Follow the line at a steady pace, turning the work or guiding the saw without twisting the blade. Make the first cut slightly outside the line; sanding can remove a small amount, but a cut that wanders inside the outline cannot be put back.
This project is useful for learning repeatability. After cutting the first coaster, check its shape and use it as a template for the others. If the corners are lopsided, slow down before the turn rather than trying to correct the curve halfway through. Sand the edges with a sanding block so you can feel high spots without rounding the face excessively.
Project 2: A garden marker with a curved top
Make a 2-inch-wide marker from a scrap roughly 10 to 12 inches long. Draw a straight-sided stake and finish it with a rounded or shallow pointed top. This gives you a long, forgiving curve and a narrow end that teaches control. Keep the narrow tip short and blunt; a very thin point is prone to splitting and may break when pushed into firm soil.
Use exterior paint or a suitable outdoor finish after sanding. Plywood edges can absorb moisture, so seal them carefully. This is a seasonal project that works well in spring, but the cutting exercise is just as useful when made as an indoor label or workshop tag.
Project 3: A small wall-hook backer
Cut a backer about 5 inches wide and 8 inches tall, with rounded top corners and a gently arched bottom. The broad outline is approachable, while the holes for mounting and hooks add a reason to keep the shape consistent. Drill the holes before cutting the outline if the board is large enough to hold safely; clamp it and use a backing board to reduce tear-out when drilling through.
Do not cut a narrow notch by turning the jigsaw sharply in place. For an inside corner, drill a relief hole large enough for the blade to fit, then cut into it from the outside. If the design needs a sharp internal corner, finish that corner with a handsaw or file instead of levering the blade sideways. A jigsaw is fast on curves, but it is not the best tool for every detail.
Project 4: A simple silhouette
Choose an uncomplicated outline, such as a fish, bird, or whale, with a few broad curves and no fragile legs or tails. Keep the overall piece at least 6 inches long and avoid thin projections narrower than about 3/4 inch. Print or draw the shape at full size, attach it with painter’s tape or a light spray adhesive, and cut just outside the line.
Use this project to practise changing direction gradually. If the blade starts to lag behind the marked curve, stop, let it come to a complete stop, and back out along the cut without twisting. Then make a relief cut from the waste edge toward the curve. Removing a wedge of waste gives the blade more room and reduces the chance of pinching.
Blade choice and setup
A general-purpose wood-cutting blade is fine for plywood and softwood practice. A narrower, fine-tooth blade can follow tighter turns, but it may cut more slowly and can burn if pushed through thick material. For 3/4-inch stock, use a blade with enough cutting length to extend below the work throughout the stroke. If clean top edges matter, a down-cut blade can reduce top-surface tear-out, though it may leave more tear-out underneath and can be harder to control on a rough cut.
If you need to buy blades, compare a jigsaw wood-blade assortment by shank type and intended cut, not by the number of blades in the pack. A basic corded or cordless jigsaw is sufficient for these projects. A variable-speed tool is helpful, but a beginner can learn on a simpler saw by feeding slowly and keeping the base flat. A pair of woodworking clamps is often a more useful upgrade than a premium saw because secure stock makes steering safer and more predictable.
How to get cleaner curves
Draw a clear line and support the work close to the cut. Keep the saw’s base plate flat against the surface, and look a few inches ahead rather than staring at the blade. Feed at a pace that lets the teeth cut without forcing them; a harsh vibration, burning smell, or blade that repeatedly deflects is a sign to slow down or use a more suitable blade.
Wear eye protection and hearing protection, and keep both hands away from the blade path. Unplug a corded saw or remove the battery before changing blades. After each cut, inspect the edge from the side. If the face is square but the underside slopes, the blade likely flexed: reduce feed pressure, use a sharper or longer blade, or practise on thinner stock before trying again.