Key takeaways
- A step-by-step diagnostic for an orbital sander that spits dust everywhere, from misaligned pad holes to clogged filters and static-choked hoses.
What's inside
- Quick Diagnosis: Match the Symptom to the Cause
- Step 1: Align the Abrasive Holes With the Pad Holes
- Step 2: Empty the Bag or Canister at Half Full
- Step 3: Get a Real Seal Between Sander and Hose
- Step 4: Solve the Static Problem
- Step 5: Replace the Pad and Rethink Your Grits
- Step 6: Confirm the Vacuum End Is Not the Bottleneck
- Common Mistakes That Undo the Fix
- Frequently Asked Questions
- Quick Diagnosis: Match the Symptom to the Cause
- Step 1: Align the Abrasive Holes With the Pad Holes
- Step 2: Empty the Bag or Canister at Half Full
- Step 3: Get a Real Seal Between Sander and Hose
- Step 4: Solve the Static Problem
- Step 5: Replace the Pad and Rethink Your Grits
- Step 6: Confirm the Vacuum End Is Not the Bottleneck
- Common Mistakes That Undo the Fix
- Frequently Asked Questions
As an Amazon Associate I earn from qualifying purchases. This post may contain affiliate links at no extra cost to you.
If your orbital sander not collecting dust has turned your shop into a snow globe, the sander itself is usually innocent. Dust extraction on a random orbit sander depends on a chain of five things working together: the holes in the abrasive, the holes in the pad, the port geometry, the hose, and whatever is pulling air at the far end. Break one link and the dust goes on the floor, on the workpiece, and into the scratch pattern you just spent twenty minutes refining.
This is a diagnostic walkthrough, in order, from the cheapest fix to the most involved. Work through it in sequence rather than jumping to the end, because roughly half of all poor extraction complaints are solved in step one and cost nothing. Along the way I will flag the mistakes that cause repeat failures, since a sander that clogs once usually clogs again for the same reason.
As an Amazon Associate we earn from qualifying purchases at no extra cost to you. Product prices and availability are accurate as of the date shown and are subject to change.




Quick Diagnosis: Match the Symptom to the Cause
Before you take anything apart, look at where the dust is landing. The pattern tells you a lot.
| Symptom | Most likely cause | First thing to check |
|---|---|---|
| Fine dust ring around the pad | Abrasive holes not aligned with pad holes | Peel the disc and re-seat it |
| Dust blowing out the port side | Bag or canister full past half | Empty at 1/2, not 3/4 |
| Suction fades after 10 minutes | Loaded abrasive or clogged filter | Look at the disc face for glazing |
| Almost no airflow at the pad | Hose blockage or wrong adapter | Disconnect hose, feel for suction |
| Dust clings to workpiece | Static charge in a plastic hose | Non-conductive hose, dry shop air |
| Swirl marks plus poor pickup | Worn pad, collapsed hook-and-loop | Press pad edge, check for crumbling |
Step 1: Align the Abrasive Holes With the Pad Holes
This is the single most common reason for an orbital sander not collecting dust, and it is invisible unless you look for it. A 5-inch random orbit pad typically has 5 or 8 holes; a 6-inch pad usually has 6 or 8. Discs are punched to match specific patterns, and an 8-hole disc on a 5-hole pad seals off most of the extraction path.
1. Peel the disc off and hold it against the pad. Every hole in the disc should sit over a hole in the pad. Rotate the disc until they line up. If they never line up, you bought the wrong hole pattern, not a defective sander.
2. Check for a multi-hole pattern. Some abrasives use a dense pattern of small holes that works with several pad layouts. These are a good default if you own more than one sander.
3. Look through the pad from the disc side. Hold it to a light. Compressed dust plugs pad holes solid over time, and a plugged hole looks identical to an aligned one from the outside. Clear plugs with a small nail or a stiff bristle.
Why this matters: a random orbit sander creates suction by pulling air down through the abrasive face, not around it. Air that cannot get through the disc simply does not move dust. Blocking half the holes does not cut extraction in half, it usually cuts it much further because the remaining holes choke.
Step 2: Empty the Bag or Canister at Half Full
Onboard dust bags and cyclone canisters lose efficiency long before they look full. The mesh or filter cartridge is doing the filtration work, and packed dust against the media collapses airflow. Treat half full as the empty point.
1. Empty into a trash can outdoors or into a lined bin. Fine sanding dust becomes airborne instantly when you dump it, which defeats the point of collecting it.
2. Clean the mesh, not just the chamber. Turn a cloth bag inside out and brush it. On a canister, tap the pleated filter and vacuum the pleats. Do not wash paper or pleated cellulose filters unless the manufacturer says they are washable, and let any washable filter dry fully before reinstalling.
3. Inspect the gasket where the bag meets the port. A hardened or missing rubber gasket leaks air, and the sander preferentially pulls from the leak instead of the pad.
Common mistake: running an onboard bag for finish sanding at 180 to 320 grit. Bags are a compromise designed for portability. If you are chasing a clean surface for film finish, hook the sander to a vacuum instead.
Random Orbit Sander With Vacuum-Ready Port
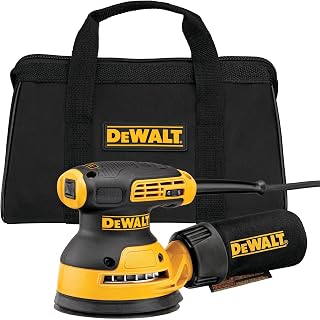
If your current sander has a port that no hose fits properly, replacing it is often cheaper than adapter roulette. Look for a 5-inch model with a hose port molded to a standard vacuum size, variable speed, and a brake on the pad. Cordless platforms like DeWalt XR, Milwaukee FUEL and Makita LXT all offer sanders that behave well on a vacuum, but corded models still tend to be the value pick for extraction because they run longer and hold speed under load.
Step 3: Get a Real Seal Between Sander and Hose
Adapters are where extraction quietly dies. Shop vacuum hoses commonly come in 1-1/4 inch, 1-7/8 inch and 2-1/2 inch sizes, while sander ports are frequently metric, around 27 mm or 35 mm. A hose that is merely resting inside a port leaks around the joint and pops off mid-pass.
1. Test the joint by hand. With the vacuum running and the sander off, cover the pad face with your palm. The vacuum motor should audibly load up. If it does not change tone, air is coming from somewhere other than the pad.
2. Choose a friction fit over tape. A stepped adapter sized to your specific port is the durable fix. Tape works for an afternoon and then gums up the port.
3. Size the hose down, not up. A 1-1/4 inch or smaller hose gives higher air velocity at the pad than a 2-1/2 inch hose at the same vacuum. Sanding dust needs velocity, not bulk volume. Big hoses belong on table saws and planers.
4. Keep the run short and straight. Every coil adds resistance. A 10-foot hose in a lazy arc beats a 25-foot hose spiraled around a bench leg.
Step 4: Solve the Static Problem
If dust visibly jumps back onto the workpiece, or the hose zaps you, static is fighting your extraction. Smooth plastic hose plus dry indoor air generates a charge that holds fine particles to every surface.
- ✔ Antistatic hose stops dust clinging to the board and hose walls
- ✔ A short length of bare copper wire spiraled along the hose and grounded at the vacuum bleeds charge cheaply
- ✔ Raising shop humidity above roughly 40 percent reduces charge buildup noticeably
- ✔ Wiping the outside of the hose with a dilute fabric softener solution is a temporary but real fix
- ✘ Antistatic hose costs meaningfully more than standard hose
- ✘ Grounding wire mods are not manufacturer sanctioned and take some fiddling
- ✘ Humidity control is impractical in an unconditioned garage in winter
- ✘ Static fixes do nothing if your pad holes are still blocked
Step 5: Replace the Pad and Rethink Your Grits
Hook-and-loop pads wear out. The tiny hooks flatten, the disc no longer sits flat, and the gap that opens between disc and pad becomes an air leak. Press the pad edge with your thumb: if the foam crumbles, has torn holes, or the disc slides sideways under hand pressure, replace it. Pads are consumables, not lifetime parts.
Grit and technique also drive dust load. Working through 80, 120, 150, then 180 grit removes material efficiently and produces coarse chips the extraction can move. Skipping from 80 straight to 180 forces the fine abrasive to do heavy cutting, which loads the disc face with a glazed pack of dust and resin that no vacuum can pull through.
1. Set variable speed to medium for finish grits. Full speed at 220 grit generates heat, and heat plus softwood resin equals a clogged disc within a minute.
2. Let the sander float. Downward pressure beyond the weight of the tool plus a light guiding hand closes the gap the air needs and stalls the orbit.
3. Move at roughly one inch per second. Slower is not better. Lingering builds heat and dust concentration in one spot.
4. Clean loaded discs with a rubber abrasive cleaning stick. On resinous pine and on sealed or painted surfaces, this doubles usable disc life and restores airflow.
Hook-and-Loop Sanding Discs, Multi-Hole
Buy discs in a grit assortment covering 80 through 220 and confirm the hole count matches your pad before ordering a bulk pack. Multi-hole patterns are worth a small premium if you own sanders from different brands. Cheap discs with poorly punched holes are the hidden cause of a lot of extraction complaints, because the punch leaves a partial membrane over the hole.
Step 6: Confirm the Vacuum End Is Not the Bottleneck
A shop vacuum with a dust-caked filter pulls a fraction of its rated airflow. Pull the filter and hold it to a light. If light does not pass through the pleats, clean or replace it.
A pleated filter plus a cyclone separator or a bag insert keeps sanding dust off the filter media in the first place, which matters more for sanding than for any other shop task because sanding dust is small enough to blind a filter fast. Also confirm the vacuum is not running in blower mode and that nothing is lodged where the hose meets the tank.
If you sand often, an extractor with automatic filter cleaning and tool-triggered start solves this category of problem permanently. It is a real expense, so treat it as an upgrade rather than a repair, and only after the free fixes above are done.
Common Mistakes That Undo the Fix
Reusing a disc after the holes tear. Torn hole edges peel and flap over adjacent holes.
Leaving the bag on while connected to a vacuum. Some sanders require removing the bag entirely; others use a separate outlet. Check which port is actually live.
Sanding drywall compound or MDF with a woodworking setup. Both produce extremely fine dust that blinds filters in minutes and belongs on a dedicated bag setup with a HEPA-rated filter.
Blaming the tool before checking the chain. Extraction is a system. Test one link at a time.
Frequently Asked Questions
Why does my sander collect dust fine for five minutes and then stop? That pattern almost always means loading, not a mechanical failure. The abrasive face packs with dust and resin, airflow through the holes drops, and everything downstream starves. Lower the speed, ease off the pressure, and clean the disc with a rubber cleaning stick. If the canister is also warm and half full, empty it.
Can I use a household vacuum instead of a shop vac? It will work briefly and then damage the vacuum. Household units are built around bags and filters sized for household debris, and fine sanding dust passes into the motor housing or blinds the filter. Use a shop vacuum with a fine dust filter, ideally with a separator ahead of it.
Do I need matching hole counts, or will any disc work? Hole count and spacing both matter. An 8-hole disc on a 6-hole pad leaves holes open to the air on the disc side, which lets the sander pull room air instead of pulling dust from the surface. Either buy discs that match your pad exactly or buy a multi-hole pattern designed to cover several layouts.
Work the six steps in order and the vast majority of extraction problems resolve without buying anything. When the fix does require a purchase, it is usually the cheap end of the chain: correct discs, a properly sized adapter, a fresh pad, or a clean filter.
Check prices on Amazon →