What's inside
As an Amazon Associate I earn from qualifying purchases. This post may contain affiliate links at no extra cost to you.
Contents
Best Router Planer Jigs at a Glance
A router planer jig is the most reliable way to flatten slabs and boards wider than your planer can handle — and the best one for you depends mainly on flattening width, rail rigidity, and whether you want a bolt-together kit or a shop-built sled. For most hobbyist shops in 2026, a mid-size aluminum-extrusion kit in the 24–36 inch class covers nearly every live-edge slab you’ll realistically bring home, while a full-size bridge mill only earns its cost if you’re flattening tabletops regularly.
Below is how the main designs compare, followed by picks by situation and a setup walkthrough that applies whether you call it a router planer jig, a planer jig for a router, or a router sled.
As an Amazon Associate we earn from qualifying purchases at no extra cost to you.


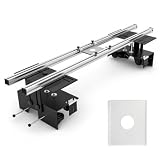
How Router Planer Jig Designs Differ
Every router jig planer does the same job — it holds your router on a flat, rigid plane above the workpiece — but they differ in structure:
- Bridge-style sleds slide a carriage across two rails that rest on the workbench or on reference strips beside the slab. Cheapest to build, but width is limited by carriage length.
- Rail-and-carriage kits (like the Woodpeckers Slab Flattening Mill and SpeTool’s aluminum sleds) use extruded aluminum rails and a gantry that travels the full length of the bench. These scale to 48+ inches and stay flat over the whole span.
- Shop-built beam jigs use MDF or plywood rails and a plywood carriage with a router insert plate. Capable of excellent results, but only if your rails are dead flat to begin with.
The key spec most buyers overlook isn’t width — it’s rail deflection. A 36-inch unsupported MDF rail can sag 1/16 inch under a 6-pound plunge router, and that sag gets machined directly into your slab.
Spec Comparison: Popular Kits in 2026
| Jig | Type | Max Flattening Width | Rail Material | Weight | Router Fit | Typical Price Range |
|---|---|---|---|---|---|---|
| Woodpeckers Slab Flattening Mill (Basic) | Gantry on extruded rails | ~38 in | Anodized aluminum extrusion | ~50 lbs (kit) | Most 2.25–3.25 HP plunge routers via universal plate | $400–$600 |
| SpeTool Router Sled Kit | Bridge sled on aluminum rails | ~28–32 in | Aluminum profile | ~15 lbs | Fixed-pattern router plates; check bolt circle | $100–$200 |
| VEVOR Router Sled | Bridge sled, adjustable rails | ~28 in | Steel/aluminum mix | ~12 lbs | Generic mounting holes, some drilling often needed | $80–$150 |
| DIY MDF/plywood sled | Bridge sled | Whatever you build (commonly 24–36 in) | Baltic birch or MDF | 10–25 lbs | Any router you mount to the baseplate | $30–$80 in materials |
Which One Matches Your Situation
| Your situation | Best choice | Why |
|---|---|---|
| First slab project, occasional use, tight budget | DIY plywood sled | Under $80, teaches you the fundamentals; replaceable if it warps |
| A few slabs per year, boards under 30 in | SpeTool or VEVOR-class kit | Storable, quick setup, adequate rigidity at this width |
| Regular slab work, epoxy river tables, 36–48 in widths | Woodpeckers-style gantry mill | Rails ride the bench, not the bench edge; no sag across the span |
| Small shop, no dedicated bench | Narrow bridge sled | Breaks down to rail + carriage; a gantry mill needs 6+ ft of bench |
| Compact/trim router only | Lightweight sled or DIY | Heavy gantries can overwhelm a 1.25 HP router and its 1/2-inch bits |
Router Compatibility and Bit Math
A planer jig for a router works with almost any plunge or fixed-base machine, but fit the bit to the router: a 1-1/2 inch surfacing bit in a trim router will stall and burn. Practical pairings:
- 1.25 HP compact routers: 1-inch surfacing bit max, 1/16-inch depth passes
- 2.25 HP combo kits: 1-1/2-inch bit, 1/8-inch passes — the sweet spot for most kits
- 3+ HP routers: 2-inch+ spoilboard bits; watch carriage weight limits on lighter sleds
A worked example for time: flattening a 30 × 60 inch walnut slab (1,800 sq in) with a 1.5-inch bit at a 50% stepover means roughly 2,400 linear inches of travel per pass. At a safe 100 in/min feed, that’s ~24 minutes of cut time per face — plus two or three light passes if the slab has more than 1/4 inch of twist. Budget an hour per face for a big slab either way.
Setup Steps for Reliable Results
- Shim the slab, don’t clamp it flat. Wedge under rocking corners until it can’t move — forcing a twisted board flat under clamps just machines the twist back in when you release it.
- Level the rails, not the slab. Check both rails with a straightedge and shim to within 1/32 inch of each other; everything references off these.
- Set bit depth to just touch the high point, then drop 1/16–1/8 inch for the first pass.
- Use climb-milling passes with a 50% stepover in the long direction; raster (lawnmower) patterns leave fewer ridges than spiral passes.
- Flatten one face fully, flip, then flatten the second — never alternate faces pass by pass or you’ll chase thickness unevenly.
Ownership Realities
What wears first: surfacing bits (a carbide 1.5-inch bit lasts maybe 10–20 slab faces in dense hardwood before edge quality drops — budget $40–$80 per replacement), plastic carriage runners, and the reference strips under your rails. MDF-based jigs absorb humidity and need re-tramming each season; aluminum extrusions don’t move but the bolts loosen — re-check carriage fasteners before every session. The most common mistake isn’t the jig at all: it’s skipping the shim-the-slab step and machining a perfectly flat board that’s still twisted when the clamps come off.
FAQ
Can I use a router jig planer without a plunge router?
Yes — set depth once on a fixed-base router and keep it there. A plunge base just makes depth adjustments faster between passes.
What flattening width do I actually need?
Measure the widest slab you realistically expect, then add 2 inches for bit overhang. Most live-edge slabs under 36 inches fit a mid-size kit; going bigger than your projects wastes bench length and money.
Do I need a dust port?
Strongly recommended. Surfacing bits throw enormous chip volume, and a 4-inch hose near the carriage keeps the cutting path visible and the air breathable.