What's inside
As an Amazon Associate I earn from qualifying purchases. This post may contain affiliate links at no extra cost to you.
Contents
Best Straight Edge Jigs for Table Saws: Shop and Buyer’s Guide
For most shops, the best straight edge jig for a table saw is a shop-made carrier that holds a rough board against a straight reference edge; choose a commercial clamping jig instead if you need quick setup, repeatable results, or an easy way to handle several board lengths. The right choice depends less on brand than on board length, how the work is held, setup time, and whether the jig can travel safely alongside your fence.
Choose by the job, not the label
A table saw straight edge jig supports a board with one rough or irregular edge so the saw can cut a straight, parallel edge. It is not the same as a table saw edge-jointing jig, which may guide a board with a straight edge against the fence to trim the opposite edge. Neither jig replaces a jointer for producing two flat, square faces.
As an Amazon Associate we earn from qualifying purchases at no extra cost to you.

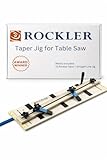
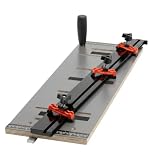

Before buying or building, measure the longest board you expect to straighten and check the usable distance between your saw’s front and rear fence rails. The jig must stay supported through the whole cut, and its reference edge needs to remain clear of the blade. Never assume a jig will fit a fence simply because it is described as “universal.”
| Jig style | Typical working length | Workholding | Setup time | Fence compatibility |
|---|---|---|---|---|
| Shop-made plywood carrier | 24–48 in. (61–122 cm); can be built longer | Toggle clamps, screws in waste, or clamps outside the cut path | 10–25 minutes to position and secure each board | Usually rides beside a standard rip fence; verify clearance and keep the carrier from contacting the blade |
| Commercial extrusion or rail jig | Commonly about 24–50 in. (61–127 cm), depending on model | Sliding clamps or adjustable hold-downs | About 2–8 minutes after initial adjustment | Depends on the design: some reference the fence, others require an unobstructed tabletop or a specific fence arrangement |
| Long shop-built sled with a straight reference edge | 48–96 in. (122–244 cm), sized to the stock | Clamps or a dedicated hold-down system | 15–30 minutes, plus space to position the work | Requires adequate infeed and outfeed support; may not suit a small contractor saw or cramped shop |
These are practical planning ranges, not specifications for every product. Commercial models vary, so confirm the manufacturer’s stated capacity, clamp travel, and fence requirements before purchase. A longer jig does not automatically mean it can safely handle a longer board: the board also needs stable support and control before and after the blade.
Which style suits your shop?
| Your situation | Best fit | Why |
|---|---|---|
| Occasional rough lumber, tight budget | Shop-made plywood carrier | Low material cost and easy to resize for a particular board |
| Several boards per session or frequent milling | Commercial adjustable clamping jig | Faster repositioning and repeatable hold-downs save setup time |
| Long boards and a dedicated milling area | Long carrier with outfeed support | Provides a longer reference, provided the saw and shop can support it safely |
| Small saw or unusual fence profile | Compact, fence-independent carrier | Avoids relying on a fence attachment that may not fit or may interfere with travel |
Best value: a shop-made carrier
A simple carrier can be made from stable, flat plywood or another sheet material, with a straight edge that registers against the rip fence. Fasten the rough board so it cannot shift; keep screws, clamps, and hardware well away from the blade path. This is often the most adaptable straight edge table saw jig because you can make it only as long as your stock and saw layout require.
Its trade-off is setup. A board that is tapered, bowed, or twisted may need more than two hold-down points to stay seated. Check that the carrier itself is flat and that the board cannot rock before cutting. If you use screws through the waste, plan the cut so the blade cannot reach them.
Best for repeat work: an adjustable commercial jig
Commercial rail-style jigs are appealing when you straighten boards often, because adjustable clamps can be repositioned more quickly than improvised blocks or screws. They also make it easier to accommodate different board widths. The key compatibility question is how the jig references the saw: a fence-mounted design must match your fence dimensions and leave the fence able to move freely, while a tabletop-guided design needs a reliably straight guide surface.
Check the usable clamping range rather than the overall length. A long rail may still be unsuitable for a wide board if its clamps cannot reach the stock, or if the clamping points obstruct the cut. For a one-off project, the higher general market cost of a commercial jig may not be worthwhile; for repeated work, reduced setup time can justify it.
Best for long stock: a purpose-sized carrier
Long boards need support at both ends, not merely a long jig. If the stock sags, twists, or catches as it enters or leaves the cut, the reference edge can drift and the board can bind. A long carrier is a good choice only when there is enough infeed and outfeed room, plus stable supports aligned with the saw table. In a small shop, taking the boards to a jointer or asking a lumber supplier to mill them may be safer and more practical.
Check fence fit and cut geometry before buying
For any straight edge jig for table saw use, assess these points before committing:
- Fence shape and travel: Measure the fence body and check whether the jig rides against it, attaches to it, or bypasses it. Make sure the fence can lock without contacting clamps or knobs.
- Blade clearance: Mark the blade path on the carrier and workpiece. Clamps and fasteners must remain outside that path, including when the board is shifted for a second cut.
- Capacity: Compare the stated maximum stock length and width with your actual rough boards. Leave room for secure clamping at both ends.
- Support: Confirm the board and carrier stay level through the cut. Add aligned infeed or outfeed support when needed; a roller set too high or low can steer the work.
- Reference edge: Check it for straightness. A carrier with a bowed reference edge reproduces the bow in the cut.
Setup that improves accuracy and control
- Inspect the stock. Remove loose bark and check for nails, screws, or other metal. Choose which edge to straighten and identify the waste side.
- Position the board. Place the rough edge beyond the carrier’s straight reference so the blade removes a continuous strip. Avoid a cut so heavy that it forces the stock against the blade.
- Secure it. Use enough clamps to prevent shifting or rocking, but keep them clear of the blade, fence, and saw controls. Push and pull the board gently by hand to check for movement before starting.
- Set the fence and blade. Use the carrier’s reference edge to guide the cut, and set the fence so the jig travels without pinching the offcut. Keep the blade only as high as needed for the cut.
- Make a controlled pass. Use a push stick or other appropriate push aid when your hands would approach the blade. Keep the work supported and do not reach over the blade to retrieve offcuts.
- Verify the result. Check the new edge with a straightedge. If it is not straight, find whether the cause is a shifting board, a bowed carrier, or poor support before making another pass.
Follow your saw’s manual and the jig maker’s instructions. If the jig, fence, or workpiece arrangement prevents the blade guard or riving knife from being used as intended, stop and choose a safer setup rather than improvising around the safety equipment.
Ownership: what wears and what to maintain
On a shop-made jig, the reference edge is the part most likely to lose accuracy through bumps, moisture, or repeated use. Store the carrier flat, keep it dry, and recheck the edge with a reliable straightedge before important work. Replace a damaged or warped carrier rather than trying to compensate by moving the fence.
On an adjustable jig, clamps, knobs, and sliding tracks are the wear points. Sawdust can make sliders stiff and prevent clamps from seating consistently, so brush or vacuum the mechanism after use. Tighten loose fasteners, inspect pads for damage, and avoid overtightening against thin or soft stock. A small, repeatable setup routine is more valuable than a feature-heavy jig that is difficult to align.
Bottom line
Choose a shop-made carrier for low-cost, occasional work; a commercial adjustable jig for repeated setup; and a long, well-supported carrier only when your saw and workspace can handle long stock. The best straight edge for table saw work is the one that fits your fence arrangement, holds the board securely, clears the blade, and supports the full cut without forcing the stock.