What's inside
As an Amazon Associate I earn from qualifying purchases. This post may contain affiliate links at no extra cost to you.
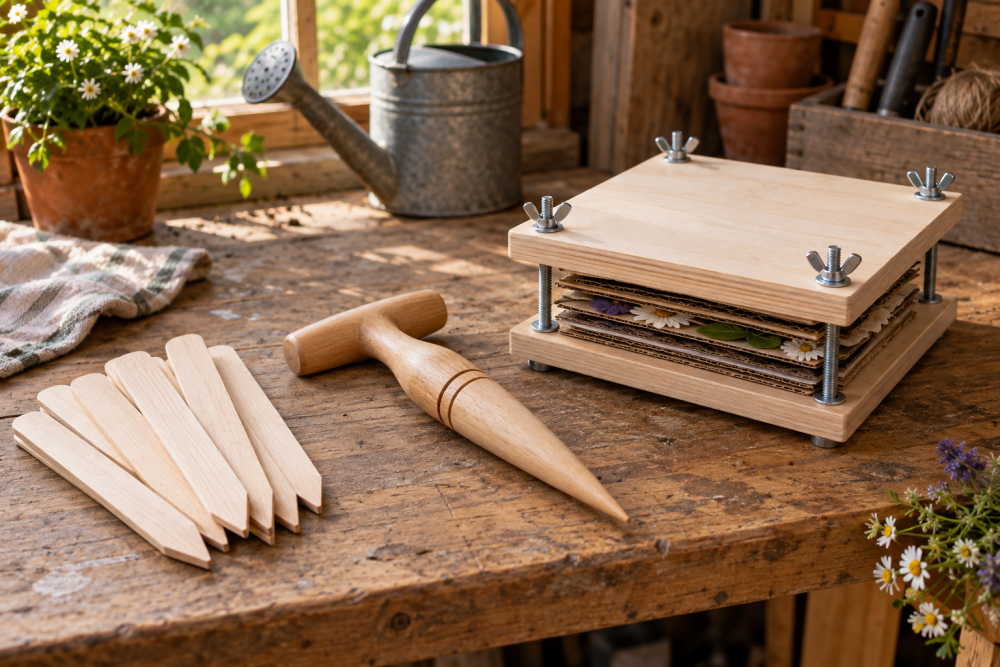
A wooden dibber makes consistent planting holes, while a matching set of seed markers keeps rows easy to identify. Both are quick projects for a beginner, use small offcuts, and can be built indoors during winter for spring planting. The finished tools should be comfortable, smooth, and strong enough for firm soil without using sharp metal points.
Contents
Tools and Materials
Use a straight-grained hardwood if possible. Beech, ash, maple, birch, and oak all work well. A softwood such as pine is easier to shape and perfectly adequate for seed markers, but its dibber point will wear faster in dry or stony beds.
- One hardwood offcut, approximately 25 mm thick, 50 mm wide, and 300 mm long
- Several hardwood scraps for markers, each about 20 mm wide, 10 mm thick, and 100–150 mm long
- Hand saw or bandsaw
- Rasp, spokeshave, or coarse sanding block
- Drill and 6–8 mm drill bit
- Clamps, pencil, ruler, and combination square
- 80-, 120-, and 240-grit sandpaper
- Food-safe finish, such as raw linseed oil or a garden-tool oil
- Optional: wood-burner, outdoor paint, or permanent marker
A hardwood offcut pack is useful if you do not have suitable scraps, but do not buy expensive furniture-grade boards for this project. Straight, dry stock matters more than a flawless appearance.
Choose the Design
The simplest dibber is a tapered wooden peg with a handle. Make the shaft about 25 mm in diameter at the shoulder and 180–220 mm long. A longer point is useful for bulbs and deep planting, but it is less comfortable for small seed holes. A rounded or flattened handle gives better control than a thin dowel.
| Design | Best use | Advantages | Drawbacks |
|---|---|---|---|
| Single-point dibber | General vegetable planting | Fast to make and easy to sharpen | One hole at a time |
| Depth-marked dibber | Mixed seed sizes | Improves consistent planting depth | Marks can wear or become muddy |
| Multi-point board | Large rows of identical seedlings | Creates several holes at once | Needs accurate spacing and more material |
For a first build, make a single dibber and six to ten separate markers. This combination handles most raised beds without committing you to one spacing pattern.
Make the Wooden Dibber
1. Mark the blank. Draw a centerline along the length of the hardwood. Mark a 200 mm shaft and leave 80–100 mm for the handle. If your stock is wider than 50 mm, round the corners of the handle with a cup or jar as a guide.
2. Cut the outline. Saw the blank to length. Round the handle corners, but leave the shaft square for now. Check the grain direction: the point should run with the grain rather than across a weak diagonal section. Avoid knots near the tip.
3. Shape the shaft. Clamp the blank and remove the corners with a rasp or spokeshave. Work gradually until the shaft is roughly octagonal, then smooth it into a round or gently tapered form. Keep the shoulder under the handle fairly full; reducing it too much creates a break point.
Shape the last 60–80 mm into a blunt cone. Do not make a needle point. A tip around 6–8 mm wide opens soil cleanly while resisting splitting. A very sharp point is more likely to snap and can compact the sides of a hole instead of making a useful planting pocket.
4. Add depth marks. Measure from the tip and score shallow rings at 25, 50, and 75 mm. These cover common depths for lettuce, carrots, beans, and bulbs. You can cut the rings with a saw kerf, burn them with a wood-burning tool, or paint them in contrasting colors. Keep the marks shallow so they do not weaken the shaft.
5. Sand the handle. Start with 80 grit to remove tool marks, then use 120 and 240 grit. Ease every edge, especially where your palm presses against the handle. Stop when the surface feels smooth but not glossy enough to become slippery.
Make the Seed Markers
Cut marker blanks between 100 and 150 mm long. A 120 mm marker is easy to read and long enough to push into loose soil. Cut one end square or bevel it slightly. A pointed marker enters hard soil more easily, but a square end is safer around children and does not split as readily.
Drill a 6–8 mm hanging hole near the top if you want to store the markers on a peg or tie them together. Leave at least 12 mm of wood above the hole. Drilling too close to the end is a common failure mode and can break the marker when it is pushed into the ground.
Round the long edges and sand all faces through 240 grit. Write crop names with a permanent outdoor marker, burn them into the surface, or paint a small label panel. Wood burning lasts well, while marker ink is faster and easier to change. If you use paint, allow it to cure fully before putting the labels in damp soil.
A basic wood-burning tool is worthwhile for a permanent set, but it is not necessary. For seasonal crops, a paint pen or marker is the cheaper, more flexible option.
Finish and Protect the Wood
Brush on a thin coat of food-safe wood finish, wipe off the excess after 10–15 minutes, and let the parts dry according to the label. Apply a second coat to end grain, especially the dibber point and the bottom edges of the markers. Do not leave a thick film; it can peel after repeated wetting.
Raw wood is also acceptable if you store the tools indoors and let them dry after use. Avoid ordinary interior varnish unless the product specifically suits outdoor exposure. A cracked or flaking finish is harder to maintain than an oiled surface.
Test and Use the Set
Test the dibber in a tray of damp compost before using it in the garden. The hole should open cleanly without pulling a large plug of soil out. If the sides are polished and collapsing, roughen the point lightly with 120-grit paper. If the point catches, round the transition between the cone and shaft.
Use the depth rings rather than guessing. Push the tool to the required mark, twist once, withdraw it, and drop in the seed. In hard ground, water the bed first and wait until the soil is workable; forcing the dibber into dry clay can split the handle or strain your wrist. Clean off soil after each session and store the set dry.
For a neat layout, mark rows with a board or string before planting. Label the crop, variety, and sowing date when useful. This small habit prevents the most common marker failure: a well-made label that says only “carrots” when several sowings are growing at once.