What's inside
As an Amazon Associate I earn from qualifying purchases. This post may contain affiliate links at no extra cost to you.
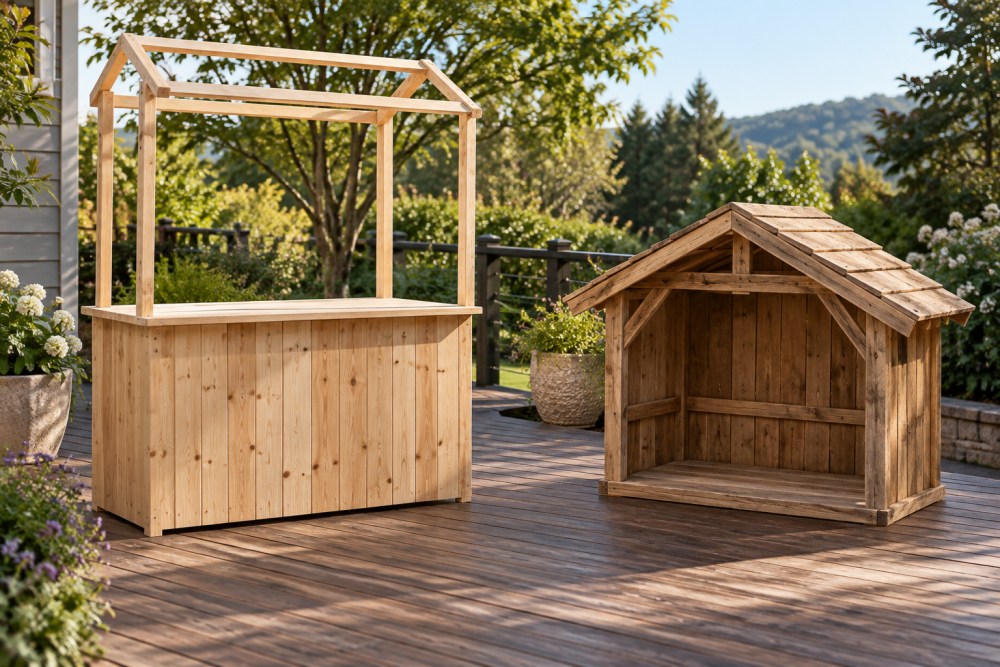
This plan builds a freestanding wooden lemonade stand with a lightweight canopy frame. The counter is about 48 inches wide, 24 inches deep and 36 inches high—room for a drink dispenser, cups and a small cash box. The canopy sits roughly 6 feet above the ground. It provides shade, not storm protection: take the fabric off in strong wind or rain.
Contents
Materials and tools
Use straight, dry construction lumber. Cedar is lighter and naturally resists rot, but untreated pine costs less and is fine if the stand stays under cover between uses. Avoid pressure-treated lumber for surfaces that will contact food or hands. A box of 2-inch exterior wood screws suits most of the frame joints; use 3-inch screws where long rails meet the legs.
Gather two 4-by-4-foot sheets of 1/2-inch exterior plywood, three 2-by-4s that are 8 feet long, four 2-by-2s that are 8 feet long, and one 1-by-2 for trim. You will also need exterior paint or sealer, four bolts with washers and nuts for the canopy uprights, and a rectangle of outdoor fabric about 54 by 72 inches. Tools: tape measure, pencil, saw, drill/driver, square, clamps and sandpaper. A circular saw is quicker; a handsaw works if you can keep cuts square.
| Canopy approach | What to buy | Trade-off |
|---|---|---|
| Fixed fabric | Outdoor fabric and screws or staples | Cheapest and simplest; remove it before transport or bad weather. |
| Removable fabric | Fabric plus hook-and-loop straps or ties | Easier to wash and take down, but ties need checking in wind. |
| Rigid roof | Light corrugated plastic roofing | Better rain cover, but heavier and more wind-catching; brace the frame well. |
Cut list and layout
Cut four 2-by-4 legs to 34 1/2 inches. Cut two 2-by-4 counter rails to 45 inches and two to 21 inches. Cut two lower side stretchers to 21 inches and one lower front stretcher to 45 inches. These dimensions make a frame about 48 by 24 inches after the plywood top is added. Cut the top from plywood to 48 by 24 inches, and cut a lower shelf to about 44 by 20 inches.
For the canopy, cut four 2-by-2 uprights to 30 inches and two crosspieces to 52 inches. Two 2-by-2 side rails, cut to 28 inches, link the uprights. Check all measurements against your actual lumber: nominal 2-by-4 stock is usually about 1 1/2 by 3 1/2 inches, not 2 by 4.
Build the counter base
Lay two legs on a flat surface and fasten a 45-inch rail between them, with the rail’s top edges 34 1/2 inches from the floor. Put the rail’s ends flush with the outside edges of the legs. Pre-drill near board ends to reduce splitting, then use two 3-inch screws at each joint. Repeat for the other side. Join the two side frames with the 21-inch rails at the front and back to form a rectangle.
Fit the lower stretchers about 8 inches above the floor: one across the front and one on each side. Keep the back open for access. Screw the shelf on top of these supports, leaving a small, even gap around it so it does not bind if the wood swells. Check the frame for square by measuring diagonally from corner to corner. If the two measurements differ, push the longer diagonal inward before adding the top.
Attach and finish the countertop
Center the 48-by-24-inch plywood top over the base, leaving roughly 1 1/2 inches of overhang on each side. Drive 1 1/4-inch exterior screws through the top into the rails, spaced about 8 inches apart. Countersink them slightly so the heads do not catch on a tablecloth. Sand the edges and corners, especially the customer-facing edge. Seal or paint every face and edge; unsealed plywood edges soak up spills and can delaminate. For food service, place a washable tray or food-safe surface over the painted top rather than preparing food directly on it.
Assemble the canopy frame
Set one upright at each corner, outside the counter rails. Attach each to a leg with two 1/4-inch bolts, washers and nuts. Bolts resist wobble better than screws when the stand is moved. Leave the uprights extending about 24 inches above the counter. Fasten the 52-inch crosspieces between the front pair and rear pair, then connect the sides with the 28-inch rails. Keep the top rectangle level and square before tightening all fasteners.
Stretch the fabric across the frame with about 3 inches of overhang on each side. For a removable top, use ties or straps around the rails; for a fixed top, fasten fabric with staples on the underside, spaced every 4 inches. Do not pull thin fabric drum-tight: it can tear at the fasteners. A piece of outdoor canopy fabric is a practical choice; a bedsheet is cheaper but fades quickly and holds water.
Check stability and safety
Place the stand on level ground and push gently from each side. If it racks, add diagonal braces between the uprights and counter legs using 2-by-2 offcuts. Do not rely on the canopy fabric to stabilize the frame. A 48-inch-wide stand can tip if someone leans hard on the counter, so keep heavy drink containers centered and low. When outdoors, remove the canopy in gusty conditions; even a small roof catches wind. Smooth splinters, cover sharp screw tips, and inspect bolts and fabric ties before each use.
For a seasonal stand, store it dry and off the ground. If you expect to carry it often, use removable canopy bolts and leave the counter frame assembled. That saves setup time without making the countertop less rigid.