What's inside
As an Amazon Associate I earn from qualifying purchases. This post may contain affiliate links at no extra cost to you.
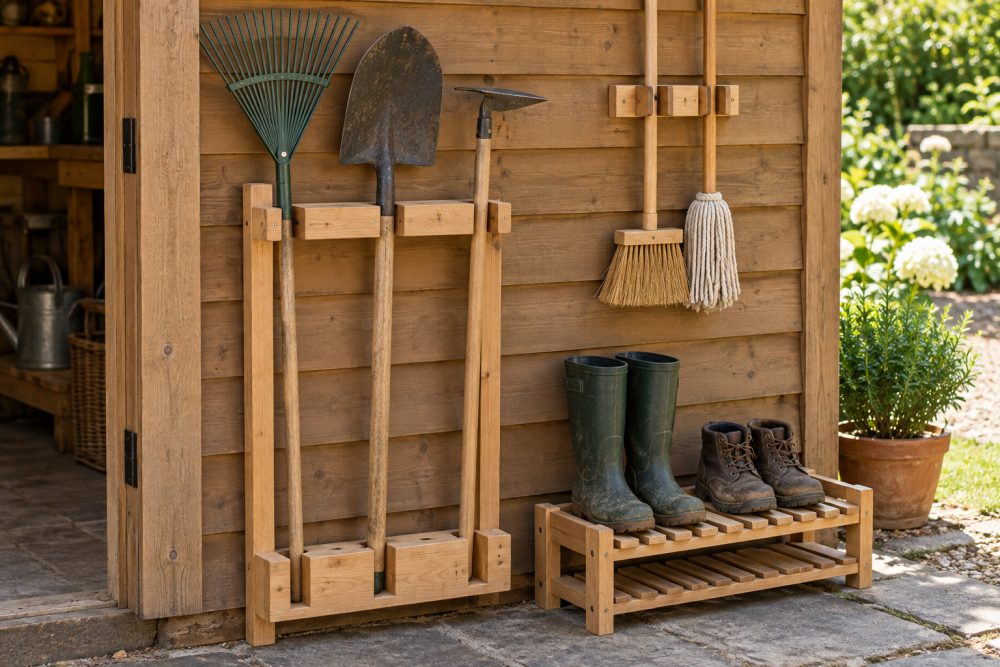
A wooden tool handle drying rack gives wet shovels, rakes, hoes, and garden tools a place to dry without leaning against a wall or sitting in a muddy corner. The rack is simple: a slatted frame holds handles vertically or at a slight angle, while open gaps let air circulate around the wood. Build it from scrap lumber in an afternoon, then mount it where rain and ground moisture cannot reach it.
Contents
Choose the Rack Size
Before cutting, count the long-handled tools you actually own. A useful shed rack holds six to eight tools in a frame about 30 inches wide, 36 inches high, and 10 to 12 inches deep. Leave at least 4 inches between tool handles. Crowded handles rub together, trap moisture, and make it difficult to remove one tool without knocking over the others.
| Rack capacity | Recommended width | Best use |
|---|---|---|
| 4 tools | 18 to 22 inches | Small shed or occasional garden use |
| 6 to 8 tools | 28 to 34 inches | Most home gardens |
| 10 or more tools | 40 inches or wider | Large shed, workshop, or shared storage |
Vertical storage uses less floor space, but the rack must be mounted securely and have enough height for your longest handle. An angled rack is easier to load and works better under a low shed roof, though it projects farther into the room.
Materials and Tools
For a rack holding six to eight tools, gather two 1-by-4 boards for the side rails, one 1-by-6 board for the lower rail, and two or three 1-by-2 boards for the upper retaining strip and dividers. Use exterior-rated screws, wood glue rated for outdoor use, and two heavy-duty wall brackets or structural screws for mounting.
Common pine is the least expensive option and is fine for a dry, enclosed shed. Cedar resists moisture better but costs more and is softer, so screw holes can strip if overtightened. Pressure-treated lumber works outdoors but is usually unnecessary inside a shed; it is also heavier and can be wet when purchased.
You will also need a tape measure, square, pencil, drill, screwdriver bit, 1/8-inch drill bit, sandpaper, and a saw. A wood hole saw set is useful if you want round openings for handles, but simple notches made with a jigsaw are faster and cheaper.
Cut List and Layout
Cut the following pieces for a rack approximately 32 inches wide:
- Two side rails, 36 inches long, from 1-by-4 lumber
- One lower rail, 32 inches long, from 1-by-6 lumber
- One upper retaining strip, 32 inches long, from 1-by-2 lumber
- Six dividers, 8 inches long, from 1-by-2 lumber
Mark the lower rail every 5 inches, starting 2 inches from each end. These marks show where the tools will sit. If your tools have unusually thick handles, increase the spacing to 6 inches. Check the thickest handle before cutting all the dividers; a shovel handle may be nearly 1-1/2 inches across near the grip.
Cut the Handle Openings
Lay the lower rail flat and mark six U-shaped openings. Each opening should be about 1-3/4 inches wide and 2 inches deep. Drill a 1-1/2-inch hole at the bottom of each opening, then cut from the top edge down to the hole with a jigsaw. The round bottom prevents sharp inside corners from splitting the rail.
Sand every opening thoroughly, especially the edges that contact tool handles. A rough cut can scrape paint, raise splinters, and hold water against the wood. If your handles are much larger than 1-1/2 inches, enlarge the openings rather than forcing the tools into them.
Assemble the Frame
Set the two side rails parallel on a flat surface. Position the lower rail between them, with its bottom edge about 4 inches above the bottom of the side rails. Apply glue to the joints, drill pilot holes, and drive two 1-1/4-inch exterior screws through each side rail into the lower rail.
Position the upper retaining strip between the side rails about 30 inches above the lower rail. This strip keeps handles from tipping forward. For a vertical rack, place it 2 to 3 inches below the top ends of the side rails. For an angled rack, keep the strip closer to the lower rail so the handles cannot slide out.
Install the short dividers between the lower rail and the retaining strip. Center each divider between the handle openings. These pieces are not structural; they keep tools separated and stop one heavy tool from pushing its neighbor out of position. One screw through each end is enough after drilling pilot holes.
Mount and Finish the Rack
Sand the complete rack with 120-grit paper, then break all exposed corners with a few passes of 80- or 120-grit paper. Apply one or two coats of exterior paint, penetrating oil, or water-based polyurethane. In a dry shed, leaving the rack unfinished is acceptable, but a finish slows moisture absorption and makes mud easier to wipe off.
Mount the rack into wall studs whenever possible. Two 3-inch structural screws through each side rail provide a solid connection. If studs do not line up, use a backer board screwed to two studs, then attach the rack to that board. Do not rely on drywall anchors for a rack carrying wet tools; a loaded shovel can create a surprisingly strong pull on the fasteners.
A box of exterior wood screws is worth buying if your scrap hardware is rusty or intended for indoor furniture. For a rack mounted to concrete or masonry, use appropriate masonry fasteners instead of trying to drive wood screws directly into the wall.
Use It Without Creating New Problems
Shake off soil before placing a tool in the rack. Hang tools with the working end down whenever possible so water runs away from the handle joint. Leave at least 2 inches below the lower rail for airflow and to prevent a wet blade from sitting on the shed floor.
Inspect the rack after the first week. If the lower rail bends, the openings are too wide, the lumber is undersized, or the rack is holding more weight than planned. Add a center support or a second mounting screw rather than simply tightening the existing screws. Check the handles seasonally for cracks, raised grain, and loose heads.
If you prefer a ready-made storage solution, compare it with a wall-mounted garden tool holder. The purchased option saves cutting time, while this rack costs less when you have scrap lumber and can be sized around your actual tools.