What's inside
As an Amazon Associate I earn from qualifying purchases. This post may contain affiliate links at no extra cost to you.
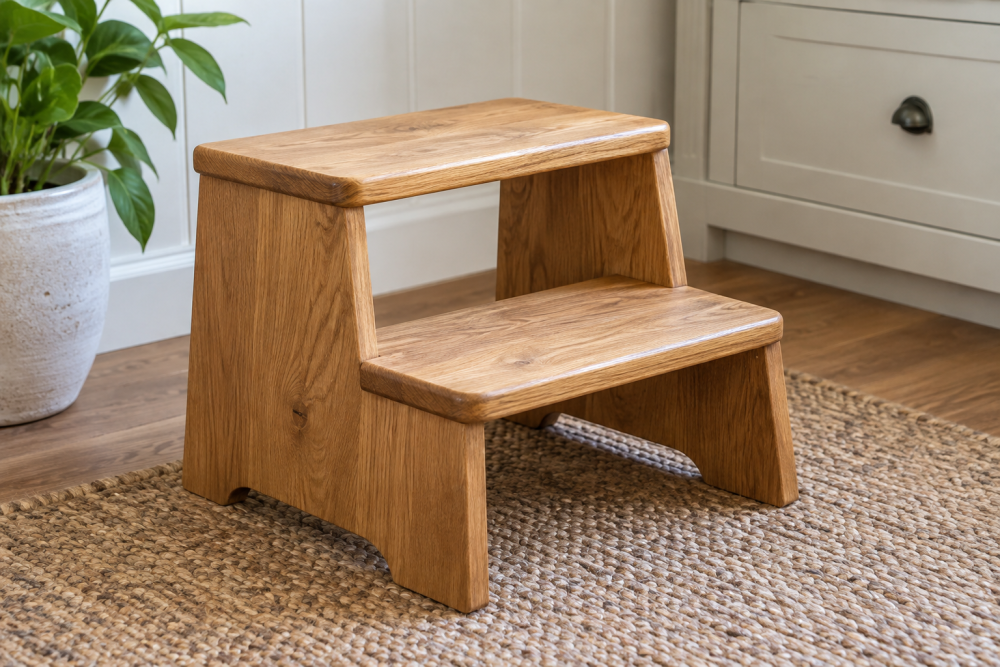
A small wooden step stool is a useful weekend project: it gives children a safer boost, reaches low shelves, and can be carried from room to room with one hand. This version has two steps, angled side panels, and a cutout handle in the upper platform. It is sturdy enough for ordinary household use when built carefully, but it is not a substitute for a certified ladder or work platform.
Contents
Project overview
The finished stool is approximately 18 inches high, 16 inches wide, and 14 inches deep. The lower step sits about 8 inches above the floor, while the top step is the full-height standing surface. Adjust the dimensions if you need a different height, but keep the base wide enough to resist tipping.
| Part | Suggested material | Finished size |
|---|---|---|
| Top platform | 3/4-inch plywood or hardwood | 16 x 12 inches |
| Lower step | 3/4-inch plywood or hardwood | 14 x 10 inches |
| Side panels | 3/4-inch plywood | 18 x 14 inches, cut to profile |
| Stretchers | 1 x 2 or 1 x 3 lumber | Cut to fit between sides |
For a painted stool, cabinet-grade plywood is the practical choice. It is dimensionally stable and less likely than solid pine to split around the handle. For a clear finish, choose straight-grained hardwood such as maple, beech, or oak. Avoid construction lumber with knots near screw locations.
Tools and materials
You will need a saw, drill, 1-inch and 3/8-inch drill bits, a jigsaw, clamps, a square, a tape measure, and sandpaper. A circular saw with a guide makes the panels easier to cut accurately, but a jigsaw and careful layout will also work. A woodworking clamps set is more useful here than a large collection of specialty tools.
Use 1 1/4-inch or 1 1/2-inch wood screws, wood glue, and finish. If the stool will be used on smooth floors, add rubber feet or strips of non-skid material to the bottom edges. A rubber furniture feet can reduce sliding, although they should not be treated as a cure for a poorly proportioned stool.
Cut the side panels
Mark two identical side panels, each 18 inches tall and 14 inches deep. The bottom edge remains flat. The top edge supports the upper platform, and the front edge can be vertical or angled slightly backward. A simple profile is a rectangle with the front upper corner trimmed at a 10-degree angle.
Lay out both panels together and clamp them before cutting so their profiles match. If using a jigsaw, cut just outside the line, then clamp the pieces together and sand the edges until they are identical. Mismatched sides cause the steps to sit out of square and can make the stool rock.
Mark the lower step at 8 inches above the floor. The step should project slightly beyond the side panels, with about 1 inch of overhang at the front. Mark the top platform at the upper edges of the panels. Before drilling, place the parts together dry and check that the stool sits flat.
Make the carrying handle
The handle is a rounded rectangular opening in the top platform. Center an opening about 6 inches long and 1 1/2 inches wide, leaving at least 2 1/2 inches of wood between the opening and the front and back edges. Leave at least 2 inches at each end. These margins prevent the platform from splitting or flexing when the stool is carried.
Mark the opening with a square and round the corners with a cup or compass. Drill a 3/8-inch hole inside each corner, keeping the bit away from the layout line. Insert the jigsaw blade through one hole and cut between the holes. Sand the inside edges thoroughly, first with 80-grit paper and then with 120- or 150-grit. The handle is a high-contact area; any sharp edge will be noticed immediately.
A wood roundover router bit can soften the outside edges, but a sanding block is perfectly adequate. Do not make the handle opening so large that the platform becomes a narrow frame.
Assemble the stool
Start by attaching the lower step between the side panels. Apply glue to the mating edges, clamp the assembly, and check both diagonals or use a square to confirm that the sides are parallel. Drive two screws through each side panel into the step. Drill pilot holes first, especially in plywood edges or near corners.
Attach the top platform next. Apply glue to the top edges of the side panels, position the platform, and clamp it before driving screws down through the platform into the side panels. Use four screws, positioned at least 1 inch from the edges. Plug or countersink the screw heads if you want a cleaner finish.
Add a front and rear stretcher below the top platform if the stool flexes or the side panels feel loose. A 1 x 2 stretcher between the panels, secured with glue and screws, usually provides enough lateral support. Keep stretchers clear of the lower step so they do not reduce foot room.
Sand and finish
Break every exposed corner with 120-grit sandpaper. Follow with 180-grit on visible surfaces. Pay special attention to the handle, step fronts, and bottom edges. Dust the stool thoroughly before applying finish.
Paint is the easiest finish for mixed plywood and solid wood. Two thin coats of durable trim or floor paint are better than one heavy coat, which can remain soft on step surfaces. For natural wood, use a water-based polyurethane or hard-wearing varnish. Lightly sand between coats and allow the finish to cure according to the label before use.
Test before regular use
Set the stool on a hard, level floor and push it from the front, sides, and back. It should not rock or slide. If it rocks, find the high corner and sand it carefully rather than adding a random shim. Place at least 200 pounds of evenly distributed weight on the top for a cautious home test, then inspect for movement, cracks, or loose screws.
The cheaper material is fine when the stool is painted and used occasionally, but do not economize on thin panels, short screws, or poor joinery. Recheck the screws after the first week and periodically afterward. Never stand on the handle edge, use the stool on stairs, or climb onto it while carrying a heavy object.