What's inside
As an Amazon Associate I earn from qualifying purchases. This post may contain affiliate links at no extra cost to you.
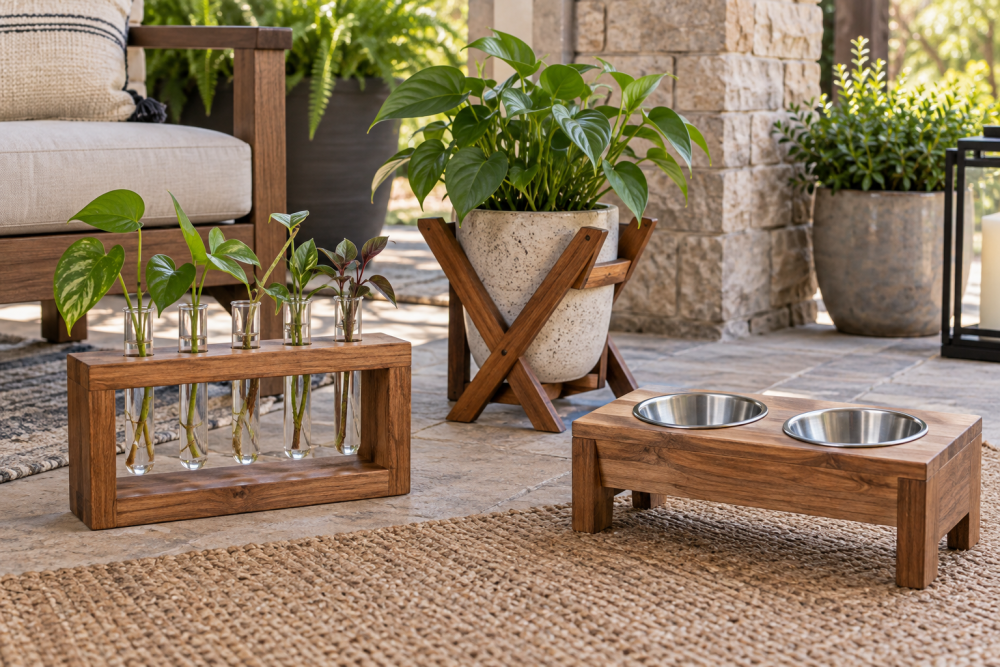
A raised feeding station keeps bowls from sliding across the floor and can make mealtimes more comfortable for some older or large dogs. It also gives you a compact place to hide a mat and catch spilled water. This version is a simple open-top box made from one-by-twelve boards, sized for two stainless-steel bowls. It is a forgiving beginner woodworking project that can be completed in an afternoon.
Contents
Choose the Size and Height
Measure the outside diameter of your bowls before cutting anything. The bowl openings need to fit through the top, while the bowl rims must rest on the wood. For common 6- to 7-inch bowls, make two openings about 1/4 inch larger than the bowl body. A 24-inch-wide station with a 12-inch depth works well for two medium bowls.
Height is more personal than many plans suggest. A practical starting point is to put the bowl rim around your pet’s lower chest, not at shoulder height. Small dogs may need a 4- to 6-inch stand; medium dogs often suit 8 to 12 inches; large dogs may need 12 to 16 inches. Ask your veterinarian before raising bowls for a dog with a condition affected by feeding posture. A raised station is not automatically healthier.
| Pet size | Typical stand height | Approximate station width |
|---|---|---|
| Small dog or cat | 4–6 inches | 16–20 inches |
| Medium dog | 8–12 inches | 20–24 inches |
| Large dog | 12–16 inches | 24–30 inches |
Materials and Tools
Use a 1-by-12 board for the top and sides, plus a 1-by-4 board for the front and back rails. Actual 1-by lumber is about 3/4 inch thick, so account for that when calculating the finished height. Pine is inexpensive and easy to work, but it dents readily. Poplar paints well, while hardwood costs more and is unnecessary unless the station will see heavy abuse.
You will need a tape measure, pencil, square, drill, jigsaw, clamps, sandpaper, and a screwdriver or drill-driver. A hole saw set for wood can make bowl openings, but a jigsaw is more flexible if your bowls are unusually sized. Add wood glue, 1 1/4-inch screws, and a pet-safe finish. A stainless-steel bowl set with rubber bottoms is usually easier to clean than painted or ceramic bowls.
Cut List for a Two-Bowl Station
These dimensions produce a station about 24 inches wide, 12 inches deep, and 10 1/2 inches tall. Adjust the opening sizes and height to suit your bowls and pet.
- Top: 24 by 12 inches, one piece
- Side panels: 10 1/2 by 12 inches, two pieces
- Front and back rails: 22 1/2 by 4 inches, two pieces
- Optional bottom shelf: 22 1/2 by 10 1/2 inches, one piece
The 22 1/2-inch rail length fits between the two 3/4-inch side panels. If you change the overall width, subtract 1 1/2 inches from that width for the rail length. Use a mixed-grit sanding set to smooth cut edges before assembly.
Cut the Bowl Openings
Set the bowls upside down on the top and center them from left to right. Leave at least 2 inches between the openings and about 2 inches from each outside edge. Trace around the bowl body, not the rim. Then draw a second line 1/8 to 1/4 inch outside that trace. The bowl should drop in easily but stop at its rim.
Drill a starter hole inside each circle, keeping the bit away from the final cut line. A 3/8-inch or 1/2-inch bit is large enough for a jigsaw blade. Cut slowly and support the top so the waste does not tear out as the blade exits. Test-fit each bowl immediately. If it sticks, enlarge the opening a little at a time; an oversized hole lets the bowl wobble and makes spills more likely.
Assemble the Box
Sand the top and all cut edges with 120-grit paper, then finish with 180 grit. Apply glue to the ends of the front and back rails, position them between the sides, and clamp the box square. Predrill two holes at each joint to reduce splitting, then drive the screws. Check the diagonals before the glue sets: if both measurements match, the box is square.
Attach the top from underneath if possible, using screws short enough that they cannot break through the surface. Four screws along each side are adequate. If you want storage underneath, install the optional shelf about 2 inches above the floor. Leave it out if your pet will push food or toys underneath; inaccessible crumbs attract insects and are difficult to clean.
Finish for Spills
Round exposed corners lightly with sandpaper. Apply two or three thin coats of a water-based polyurethane labeled for interior furniture, sanding lightly between coats. Keep the finish off the areas where bowls sit if the bowls cover the wood completely, but seal those surfaces anyway because water will eventually get underneath.
Do not rely on finish to make the station dishwasher-safe. The wooden frame should be wiped with a damp cloth and dried promptly. Place a removable silicone or rubber mat under the bowls. A cheap mat is fine if it has a raised edge and can be washed; it will do more to protect the floor than an expensive finish.
Test for Stability and Common Problems
Put the station on the floor and push it from each side. It should not rock or slide. Uneven legs can be corrected with adhesive rubber feet, thin furniture pads, or a small amount of sanding. Avoid adding permanent feet until you know the station sits level on your actual floor.
Watch one full meal. If your pet nudges the bowls, add rubber pads under the bowls rather than permanently gluing them in. If water collects around the openings, remove the bowls, dry the wood, and inspect the finish. Cracks, swollen fibers, or a sour smell indicate that the wood is staying wet and needs sanding, resealing, or replacement.
Clean the bowls daily and wipe the station whenever food or water spills. Inspect screw heads and finish every few weeks. With ordinary pine, careful sealing, and a washable mat, this simple feeder should last for years without making the project more complicated than it needs to be.