What's inside
As an Amazon Associate I earn from qualifying purchases. This post may contain affiliate links at no extra cost to you.
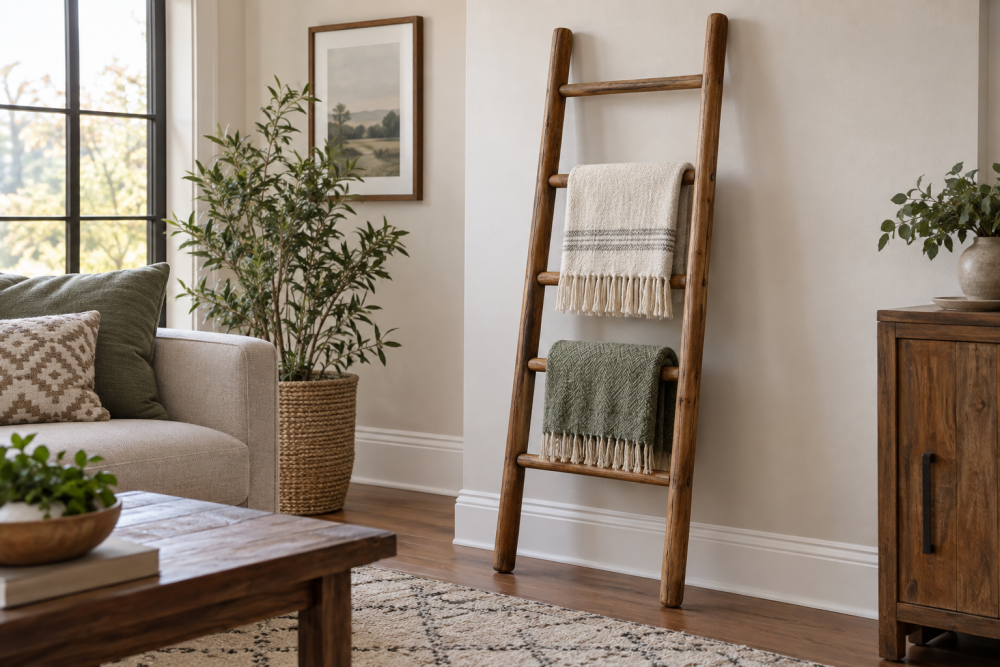
A quilt ladder is a simple leaning ladder with 4 to 5 rungs, used to display quilts, blankets, or towels. The tapered side rails — wider at the bottom, narrower at the top — are what keep it from looking like a pair of 2x4s nailed together. The taper also shifts the visual weight down and reduces top-heaviness when it’s loaded. This build takes about 3-4 hours plus finish time and requires only straight cuts and drilled holes. No joinery beyond dowels or screws is necessary.
Contents
Dimensions and Materials
Standard finished size is 72 inches tall by 20 inches wide at the top rungs, widening slightly if you splay the rails. Side rails are 1-3/4″ to 2″ thick tops tapering from about 3-1/2″ wide at the bottom to 2-1/2″ wide at the top. Rungs are 1-1/4″ diameter dowels or 1-1/4″ square stock with eased edges, spaced 12 to 14 inches apart on center. Five rungs is the most common layout: bottom rung 12 inches from the floor, top rung 4 to 6 inches down from the rail ends.
For wood, use 8/4 stock for the rails if you can find it, or laminate two pieces of 4/4 hardwood. A single 8-foot 1×6 (actual 3/4″ x 5-1/2″) is not thick enough on its own — it will flex and the dowel holes will blow out. If you must use 4/4, glue two boards face-to-face to get 1-1/2″ thickness, then plane flat. You need one 6-foot board for the two rails and a 4-foot dowel or square stock for rungs.
For hardware, you need wood glue, 2-inch dowel centers or brad point bits for clean holes, and four small felt pads for the feet and wall contact points. Finish with a hardwax oil or water-based polyurethane if the ladder will get daily use; quilts will snag on any rough or soft oil finish that hasn’t fully cured.
Choosing Wood: Cost vs. Stability
Any hardwood works, but weight and dent resistance matter because blankets get pulled on and off constantly. Softer woods dent at the rung holes over time.
| Species | Cost (8/4, per BF) | Weight | Pros | Cons |
|---|---|---|---|---|
| Poplar | $4 – $6 | Light | Cheap, easy to cut and drill, paints well | Dents easily, green/gray streaks if stained |
| Red Oak | $6 – $9 | Medium | Strong, widely available, holds dowels well | Open grain shows under light finishes |
| Maple (Soft) | $7 – $10 | Medium-Heavy | Hard, clean look, good for natural finish | Burns when drilling if bits are dull |
| Walnut | $12 – $18 | Medium | Beautiful with no stain, very stable | Expensive, dark color hides quilt colors |
For most people, poplar is fine if you plan to paint, and red oak or soft maple is the best value if you want a natural wood look. Walnut looks great but doubles the material cost for no structural gain.
Cutting the Tapered Side Rails
Start by milling your rail blanks to final thickness (1-3/4″) and cutting them to 72 inches long by 3-1/2″ wide. Do all layout before you cut the taper. Mark the taper on one rail: at the bottom end, keep full 3-1/2″ width; at the top end, measure in 1 inch from one edge and mark 2-1/2″ width. Draw a straight line between the marks. This gives you a 1-inch taper over 72 inches — subtle, but very visible when the ladder is standing.
You can cut the taper three ways. A table saw with a taper jig for table saw is the most accurate and repeatable. Clamp the rail to the jig, set the jig to follow your line, and rip. A circular saw with a straightedge works if you don’t have a table saw, but clamp well and cut slightly proud of the line, then clean up with a hand plane. A bandsaw is the safest for this long taper, though you’ll need to plane or sand the sawn edge fair.
After cutting, stack both rails together and plane or sand the tapered edges flush so they match exactly. Any mismatch will telegraph when the ladder is viewed from the side. Ease all edges with a 1/8″ roundover or a few passes with sandpaper to prevent splinters from catching fabric.
Layout and Drilling the Rung Holes
Lay both rails side-by-side with the tapers mirrored (tapered edges facing the same direction) and mark rung centers on the inside faces. For a 72-inch ladder: first hole at 14 inches from the bottom, then at 28, 42, 56, and 68 inches from the bottom. Use a square to transfer marks across both rails at once so holes align. Misaligned holes by even 1/16″ will rack the ladder and make it rock.
Drill 1-1/4″ holes, 3/4″ to 7/8″ deep. Do not drill through. Use a brad point drill bit or Forstner bit in a drill press for perpendicular holes. If you only have a hand drill, clamp a scrap block with a pre-drilled 1-1/4″ hole to the rail as a drilling guide. Freehand drilling at an angle is the most common failure on this project — the rung won’t seat and glue surface drops by half. Drill at 800-1000 RPM in hardwood and clear chips often to avoid burning.
Cut your rungs to 18-1/2″ long if you want 15-1/2″ between rails with 3/4″ insertion per side, plus a little extra for glue. Test-fit every rung dry. It should push in with firm hand pressure. If you need a mallet, it’s too tight and will split the rail when humidity changes. Sand rungs to 180 grit before assembly; it’s much harder after.
Assembly
Dry-assemble the whole ladder first. Insert all rungs into one rail, then align the second rail and work rungs in one at a time from top to bottom. Check for square by measuring diagonals between opposite rungs — they should be within 1/8″. If the ladder racks, one hole is off. Find it now, not after glue.
For glue-up, work on a flat floor. Apply glue inside the holes, not on the dowel ends, to avoid hydraulic lock that prevents full seating. A light chamfer on the rung ends helps. Use 36 inch bar clamps across the rails at the top and bottom, with cauls to protect the tapered edges. You only need light pressure — enough to seat the rungs fully. Too much pressure bows the rails inward. Check that the ladder is flat and not twisted by sighting down the rails before the glue sets. Let cure 24 hours.
If you want mechanical reinforcement, drill a 3/16″ pilot through the outside of each rail into the end of each rung and drive a 1-1/4″ trim screw, then plug with a 3/8″ dowel plug. This is optional for light blanket loads but recommended if the ladder will hold heavy quilts or be moved often. Screws alone without plugs look unfinished and snag fabric.
Finishing and Safe Use
Sand the entire ladder to 180 or 220 grit. Break all sharp edges. Apply two coats of finish, sanding lightly between coats with 320 grit. Water-based poly is the most quilt-safe — it cures hard, doesn’t yellow, and won’t transfer oil to fabric. Let it cure a full 72 hours before hanging quilts, even if it feels dry in 24. Soft or tacky finish will imprint fabric texture permanently.
Lean the ladder at 10 to 15 degrees from vertical, with feet 12 to 16 inches out from the wall. Add felt pads to the feet and to the top ends where they touch the wall to prevent floor scratches and wall scuffs. Never lean it steeper than 10 degrees — it becomes easy to pull over when you tug a blanket from a middle rung. If you have kids or pets, anchor the top rail to the wall with a small L-bracket or anti-tip furniture strap hidden behind the top rung. The ladder is not designed to climb on; even hardwood dowels will snap under body weight.
For storage, keep quilts folded over the rungs, not bunched. Bunching holds moisture and puts uneven pressure on one side of the rung joints. With proper drilling depth and glue coverage, this ladder will hold 15 to 20 pounds of textiles without loosening for years.