What's inside
As an Amazon Associate I earn from qualifying purchases. This post may contain affiliate links at no extra cost to you.
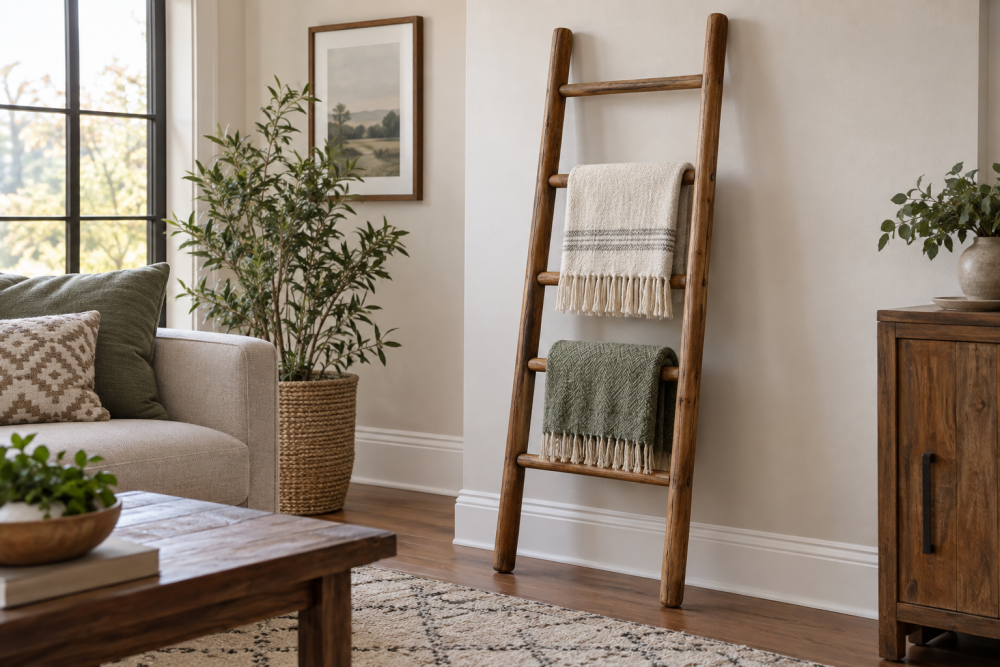
A wooden blanket ladder is a useful intermediate project because it combines accurate joinery, controlled bending, and finish work that remains visible from every angle. This plan makes a ladder about 68 inches tall, 18 inches wide, and fitted with four rungs. The side rails have softened, rounded outer edges rather than sharp square stock.
Contents
Plan overview and materials
The ladder is sized for throws and light quilts, not for climbing. Cut both side rails from 2-by-4 lumber, then round their edges with a router or substantial sanding. Use 1-inch dowel for the rungs. Select straight, dry boards with no large knots near the rung locations.
| Part | Finished size | Quantity |
|---|---|---|
| Side rails | 1½ by 3½ by 68 inches | 2 |
| Rungs | 1-inch diameter by 15½ inches | 4 |
| Dowels or screws | 3/8-inch dowel plugs or suitable fasteners | As needed |
Construction lumber is the cheaper option and works well if you allow it to acclimate indoors for at least a week. Select boards at the store, but expect to remove some twist and cup. Clear pine or poplar costs more but saves time during layout and produces a cleaner painted surface. For a stained ladder, poplar is usually a poor choice because its color can look uneven; pine, ash, or oak is easier to finish attractively.
You will need a drill press or drill guide, a 1-inch Forstner bit, a circular saw or miter saw, clamps, a router with a 1/4-inch round-over bit, and a random-orbit sander. A 1-inch Forstner bit makes cleaner rung sockets than a spade bit.
Layout and cutting
Cut the rails to 70 inches first, leaving extra length for checking the ends and trimming them square. Mark the centerline of each rail face. Starting 8 inches up from the bottom, mark rung centers at 8, 24, 40, and 56 inches. This leaves approximately 12 inches above the top rung, giving blankets enough support without making the ladder look top-heavy.
Keep the marks identical on both rails. The easiest method is to clamp the rails together with their inside faces touching, establish a square reference line across both boards, and transfer every mark at once. Label the inside faces clearly. Reversing one rail during drilling is a common failure that produces rungs that do not sit parallel.
Drill the rung sockets 1/2 inch deep into the inside face of each rail. A 1-inch hole for a 1-inch dowel is normally too tight once glue is added, so test on scrap. Aim for a snug fit that allows the rung to seat with firm hand pressure. Use a drill press if possible. If using a hand drill, clamp a square block beside the bit as a visual guide and check the angle from both directions.
Rounding the side rails
Round the two long outside edges of each rail with a 1/4-inch round-over bit. Round the inside edges lightly as well, but do not remove so much material that the rung sockets become thin-walled. A router gives a consistent profile, while a block plane and sandpaper work if you prefer a quieter, slower approach.
Ease the four end corners with several sanding passes. Do not leave sharp corners at the floor or top; they catch fabric and are more likely to chip. A 1/4-inch radius is enough to feel finished without making the rails look toy-like.
If your boards have minor bowing, orient both rails so the bow is in the same direction before assembly. Opposing bows can twist the ladder. Severe twist is not worth correcting in this project; return the board or replace it. For accurate edge shaping, a 1/4-inch round-over router bit is inexpensive and more reliable than trying to create matching curves by hand.
Dry-fitting and assembly
Before applying glue, insert all four rungs and lay the ladder on a flat surface. Measure diagonally from the bottom of one rail to the top of the opposite rail, then compare that measurement with the other diagonal. If they differ by more than 1/8 inch, adjust the rail position before gluing.
Apply wood glue inside each socket and on the ends of the rungs. Do not flood the holes; excess glue can hydraulically prevent the rung from seating fully. Assemble one rail first, then bring the second rail into position. Use two long clamps, one near each end, and check that every rung is square to the rails.
For a stronger hidden joint, drill a 3/8-inch hole through the outside of each rail into the rung after assembly. Insert glued 3/8-inch dowel plugs, let them dry, and trim them flush. This is more work than relying on glue alone, but it reduces the chance of a rung loosening as the wood moves through seasonal humidity changes. If the ladder will hold only lightweight blankets, glued sockets are generally adequate.
Sanding and finishing
Sand the rails through 120, 150, and 180 grit. Stop at 180; finer sanding can make pine resist stain and can leave a slick surface under paint. Break every edge with a light hand-sanding pass, especially around the rung sockets.
For a painted ladder, use a stain-blocking primer if knots bleed through pine, then apply two thin coats of interior enamel. For a natural finish, use a clear water-based polyurethane for low odor and fast recoating, or an oil-based finish for warmer color and longer working time. Wipe away finish that collects inside the sockets before assembly if you plan to finish parts separately.
Allow the finish to cure fully before placing blankets on the ladder. “Dry” and “cured” are different: many finishes feel dry overnight but remain vulnerable to pressure marks for several days.
Placement and practical limits
Set the ladder on a level floor and lean it against a wall with the rails contacting the wall evenly. Add clear rubber bumpers to the back if painted walls are a concern. This ladder is decorative storage, not a step stool. Keep it away from play areas, and anchor it to a wall if children, pets, or heavy quilts could pull it forward.
In damp summer conditions, recheck the joints and finish before storing the ladder in a cool basement. In dry winter air, small hairline gaps are normal, but a visibly loose rung is not. Remove the blankets, inspect the joint, and repair it before the ladder is used again.