What's inside
- Why these five projects work for skill building
- Which project teaches what
- 1. Edge-grain cutting board – perfect glue-line rips
- 2. Small dadoed bookcase – mastering width and depth
- 3. Mitered box with continuous grain – dead-on 45s
- 4. Tapered-leg side table – controlled angled rips
- 5. Frame-and-panel cabinet door – grooves and stub tenons
- Setup habits that save all five projects
- Why these five projects work for skill building
- Which project teaches what
- 1. Edge-grain cutting board – perfect glue-line rips
- 2. Small dadoed bookcase – mastering width and depth
- 3. Mitered box with continuous grain – dead-on 45s
- 4. Tapered-leg side table – controlled angled rips
- 5. Frame-and-panel cabinet door – grooves and stub tenons
- Setup habits that save all five projects
As an Amazon Associate I earn from qualifying purchases. This post may contain affiliate links at no extra cost to you.
If you can rip a straight line and crosscut to length without burning or binding, you are past the beginner stage. The next step is learning to control the table saw for joinery, not just dimensioning. These five intermediate projects each isolate a specific cut type that trips people up. Build them in this order and you will have both usable furniture and the muscle memory for accurate, repeatable setups.
As an Amazon Associate we earn from qualifying purchases at no extra cost to you.


Contents
- Why these five projects work for skill building
- Which project teaches what
- 1. Edge-grain cutting board – perfect glue-line rips
- 2. Small dadoed bookcase – mastering width and depth
- 3. Mitered box with continuous grain – dead-on 45s
- 4. Tapered-leg side table – controlled angled rips
- 5. Frame-and-panel cabinet door – grooves and stub tenons
- Setup habits that save all five projects
Why these five projects work for skill building
Beginner projects let you get away with a little error. Intermediate joinery does not. A 1/64 inch gap in a butt joint disappears with filler, but the same error in a dado or miter opens up and telegraphs across the whole piece. The projects below force you to dial in blade height, fence position, and workpiece control, while also teaching you when to use jigs to make the saw safer and more accurate. You do not need a cabinet saw to do any of them. A solid jobsite or contractor saw with a flat top, a decent fence that locks without deflection, and a sharp 40-tooth to 50-tooth combination blade is enough.
Which project teaches what
| Project | Primary Cuts to Master | Key Jig or Setup | Common Failure Mode |
|---|---|---|---|
| Edge-Grain Cutting Board | Rip to width, crosscut to length, glue-line rip | Featherboard + tuned fence | Bow after glue-up from uneven pressure or boards not jointed |
| Dadoed Bookcase | Flat-bottom dados and rabbets | dado blade set or single-blade multiple passes | Shelves fit loose or tight due to plywood thickness variation |
| Mitered Box with Continuous Grain | 45-degree miters across wide boards | Crosscut sled with miter fence, stop block | Miters open at tips from fence deflection or blade not 90 degrees to table |
| Tapered-Leg Side Table | Angled rip cuts (tapering jig) | Taper jig / straight-line jig | Legs of different width from inconsistent jig reference edge |
| Frame-and-Panel Cabinet Door | Grooves, stub tenons, precise rail and stile sizing | Grooving with single blade, tenoning jig or sled | Panel rattles or binds from groove depth miscalculated for seasonal movement |
1. Edge-grain cutting board – perfect glue-line rips
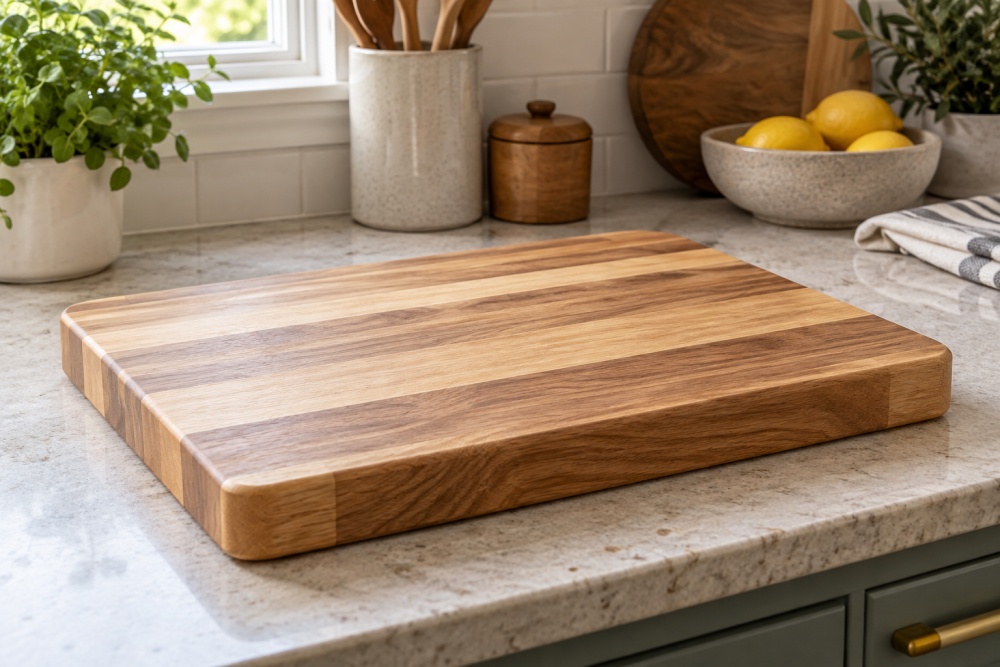
This is the least exciting project and the most useful for calibration. You need 4 to 6 strips of hard maple, walnut, or cherry, each ripped to 1-1/2 to 2 inches wide and crosscut to 18 inches long.
The skill is cutting edges that glue without gaps and without forcing the clamps. Set your fence with a dial caliper or quality tape, not just the cursor. Make a test rip, measure both ends. If the board is 0.010 inch wider at the tail end, your fence is toed out. Fix it before you cut project wood. Use a featherboard for table saw against the fence to keep pressure consistent, and a push shoe that keeps downward pressure over the blade, not just behind it.
Keep feed rate steady at about 3 feet per second. Too slow burns maple, too fast leaves saw marks that require heavy sanding. If you see burning, first clean the blade pitch, then check alignment. A cheaper thin-kerf blade is fine here if you use a proper riving knife and do not force it. Save the premium glue-line rip blade for when you are selling boards.
2. Small dadoed bookcase – mastering width and depth
A 30 inch tall by 24 inch wide bookcase with three fixed shelves is ideal. All joinery is 3/4 inch x 1/4 inch deep dados for the shelves and 3/8 inch x 3/8 inch rabbets for the back panel.
Cut dados in 3/4 inch plywood or MDF first, then hardwood. Plywood is almost never 0.750 inch. Measure every sheet with calipers. If your plywood is 0.705 inch, cut your dado to 0.710 inch, not 0.750 inch. That is why a stacked dado set with shims is worth owning, but you can also do a two-pass cut with a single blade: cut one shoulder, move the fence by the exact dado width minus kerf, cut the second shoulder, then nibble the waste. It takes longer and risks a step in the bottom if your fence micro-adjust slips.
Set blade height with a small ruler or depth gauge. Test on scrap from the same sheet, checking depth at both edges. Use a crosscut sled or miter gauge with a backer board to prevent tearout on the exit side of the dado. The trade-off: a stacked dado cuts cleaner bottoms faster but requires a saw with a long enough arbor and a dado throat plate. Most contractor saws handle a 6 inch dado stack up to 13/16 inch wide safely. Do not use a full 8 inch stack on an underpowered 15 amp jobsite saw.
3. Mitered box with continuous grain – dead-on 45s
A box roughly 12 x 8 x 6 inches with four mitered sides that wrap grain around the corners looks simple and exposes every error. You need to miter both ends of each side board at exactly 45 degrees and get opposite sides identical within 1/64 inch.
Do not use the stock miter gauge for this if it has slop. A shop-made table saw crosscut sled with a 90-degree fence and a 45-degree miter attachment holds the work flat and gives you a stop block system. Cut all miters with the outside face down against the sled so any tearout is hidden inside. Cut one extra board and do a four-corner dry fit before glue. If the last miter has a gap at the tip, your blade is at 45.2 instead of 45.0. Adjust with a digital angle gauge referencing the table, not the blade markings.
Clamping is the other failure point. Painter’s tape as a hinge plus a strap clamp closes miters better than bar clamps that tend to slide the joint. Reinforce with splines later on the same saw if you want more strength, but master the plain miter first.
4. Tapered-leg side table – controlled angled rips
Four legs tapered on two sides teach you to rip angles safely without tilting the blade. Typical size is 20 inches tall, tapering from 1-3/4 inch at the top to 1 inch at the floor, with a simple apron joined by pocket screws or mortise and tenon.
Use a tapering jig that references the fence, or a sled that rides in the miter slot. Set the taper by marking start and stop points on the leg blank, aligning those marks to the jig edge, then locking down. Do not freehand a taper against the fence. The offcut becomes a wedge that can kick back if it gets trapped.
Make all four legs in sequence without changing the jig setting. Then rotate each leg and cut the second taper. If you adjust between legs, you will get two different taper widths. A good habit is to label legs 1 to 4 and keep the same face against the jig. Sand after tapering, not before, since the saw leaves marks you will need to remove anyway.
5. Frame-and-panel cabinet door – grooves and stub tenons
A single 14 x 20 inch cabinet door combines everything: rip and crosscut for rails and stiles to consistent 2-1/4 inch width, grooving for the panel, and short tenons for the frame joints. This is where precision matters for wood movement.
Cut the 1/4 inch wide x 3/8 inch deep groove centered on the edge of all frame parts first. Make this groove in one pass with a standard kerf blade or two passes flipped end-over-end to center it. Then cut stub tenons on the rails to fit that groove. Size the tenon by sneaking up on thickness: cut cheeks with the workpiece vertical against the fence using a tall auxiliary fence or tenoning jig, test, then shave 0.005 inch at a time.
Size the solid wood panel 1/8 inch narrower and shorter than the groove bottoms combined. For example, if your frame opening is 10 inches and you have 3/8 inch grooves on both sides, cut the panel to 10-5/8 inches (10 + 3/8 + 3/8 – 1/8). That 1/16 inch gap per side lets the panel expand. If you make it tight, the door will crack in winter. Cheaper MDF or plywood panels do not need the gap, which is why many beginners start there, and that is perfectly fine for a shop cabinet.
Setup habits that save all five projects
Check three things every time you change blades or angles: fence parallel to miter slot within 0.002 to 0.004 inch toed out at the rear, blade 90 degrees to the table, and throat plate flush. Use a zero-clearance insert for crosscuts and miters to reduce tearout. Replace the insert when the slot widens. Keep a dedicated notebook with fence settings for each dado width and taper angle so you are not re-dialing for repeat builds. And always make test cuts in the same species and thickness as your project wood. Poplar settings will not directly transfer to hard maple.