
What's inside
As an Amazon Associate I earn from qualifying purchases. This post may contain affiliate links at no extra cost to you.
Small patios and balconies punish big, beginner-friendly builds. A full-size picnic table won’t fit, and anything that can’t handle rain, sun, and tight storage will be in the trash by July. These five intermediate spring projects are sized for 4×8 to 6×10 foot spaces, use rot-resistant joinery, and can be built in a weekend with a small shop or even on the balcony itself.
As an Amazon Associate we earn from qualifying purchases at no extra cost to you.


Contents
What Makes a Good Small-Space Build
On a balcony, every inch and every pound matters. You want projects that fold, stack, or do double duty, and that won’t warp or rot after the first wet spring. Intermediate means you’re comfortable with a circular saw or miter saw, a drill/driver, and a pocket-hole or dowel jig. You can cut a straight line within 1/16 inch and you know how to seal end grain.
The biggest failure mode for small outdoor builds isn’t structural — it’s moisture. End grain wicks water, screws rust and split thin stock, and softwoods like pine turn black without finish. For anything that lives outside, use cedar, white oak, or thermally modified wood, or use pressure-treated pine only if you’re painting it. Spend the money on stainless or coated exterior screws and an exterior wood finish for cedar that actually contains UV blockers. A cheap interior poly will peel in two weeks outdoors.
1. Folding Balcony Bar Table
This is the best use of a railing you don’t want to drill into. A 42-inch wide by 16-inch deep bar top hooks over the railing with a French cleat or U-brackets, with folding legs underneath for stability.
Build it from 3/4-inch cedar or 3/4-inch Baltic birch plywood edged with solid wood and sealed on all six sides. The top should be two glued panels or a single 1×16 glue-up, not individual deck boards with gaps — gaps catch glasses and plates. Height is critical: standard balcony railings are 36 to 42 inches high. Measure yours, then make the table surface sit 2 inches below the top rail so you can actually use it while standing.
Cut the cleat at 45 degrees on a table saw or with a compact circular saw with guide rail — trying to freehand that angle is how you get a wobbly table. Use two heavy-duty folding shelf brackets rated for at least 100 lbs per pair; the cheap 50-lb brackets will sag when someone leans on them. Finish with three coats of spar urethane or exterior penetrating oil. Build time is 4-6 hours. Cost is $60-$110 in cedar.
2. Vertical Planter Wall with Integrated Bench
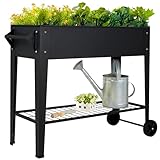
If you have a blank wall and 24 inches of floor depth, this combines storage, greenery, and seating. The base is a 48-inch wide bench, 18 inches deep, 17 inches tall. The back rises 60 to 72 inches as a slatted trellis or pocket planter wall.
Frame the bench with 2×4 cedar, joined with exterior pocket screws and glue. The seat is 5/4 deck boards with 1/8-inch gaps for drainage. The vertical section is a grid of 1x3s with 3-inch spacing — enough to hang 6-inch nursery pots with S-hooks or cedar boxes. Don’t build solid shelves outdoors; they trap water and rot. Slats dry.
Anchor the tall section to the wall with two L-brackets into studs or masonry anchors if you’re on concrete. A freestanding tall planter on a windy 5th-floor balcony will sail. For the planter boxes themselves, line them with landscape fabric and drill four 1/2-inch drain holes per box. Without drainage, soil stays saturated and adds 30-40 lbs per box. That weight will bow a 1×3 frame in one season.
3. Stackable Modular Deck Tiles
Ugly concrete is the reason most small patios feel unfinished. Interlocking wood deck tiles fix it without permanent installation — important if you rent.
Each tile is 24×24 inches, made from 1×4 cedar or thermally modified ash slats screwed to two 3/4-inch plywood cleats underneath. Leave 1/4-inch gaps between slats and 1/8-inch gaps between tiles for expansion. A 6×8 foot patio needs 12 tiles. You can build two tiles per hour once you have a stop block set up.
The trade-off is height. Tiles add 1-1/2 inches. Check your door threshold — if your sliding door has only 1 inch of clearance, you’ll need 1/2-inch slats on 1/2-inch cleats, which is weaker and needs closer support. Use plastic furniture feet or rubber pads under each cleat to allow airflow and prevent the tiles from trapping moisture against concrete. That airflow is what prevents mold lines underneath. Unfinished cedar will silver to gray; if you want to keep the honey color, you need a UV-blocking oil and reapply every spring.
4. Compact Storage Bench
A storage bench is the only seating you should build for a space under 40 square feet. It seats two, hides cushions and tools, and works as a side table.
Target dimensions are 42 to 48 inches long, 17 inches deep, and 18 inches tall. Any deeper and you can’t sit with your back against the wall without your feet sticking into the walkway. Build the carcass from 3/4-inch exterior plywood or cedar, with a 2×2 internal frame for screw holding. The lid should be a torsion box or at least have two 1×3 cleats underneath to prevent warping — a single flat plywood lid will cup after one rain.
Use a continuous piano hinge, not two small butt hinges. Butt hinges concentrate load and tear out of plywood. Add a lid stay that holds the lid open at 95 degrees; without it, the lid slams on fingers and the hinge screws loosen. Drill two 3/4-inch vent holes in the bottom, hidden behind the toe kick. Sealed storage benches without ventilation grow mildew inside. If you use a pocket hole jig kit for exterior projects, set it for 3/4-inch material and use 1-1/4-inch blue-coated exterior pocket screws, not the standard zinc ones.
Comparison: Which Project Fits Your Space
| Project | Footprint | Build Time | Lumber Cost (Cedar) | Best For |
|---|---|---|---|---|
| Folding Bar Table | 42″ x 16″ (folds to 3″ deep) | 4-6 hours | $60 – $110 | Renters, narrow balconies, no floor space |
| Planter Wall + Bench | 48″ x 24″ floor + 72″ tall | 10-14 hours | $140 – $220 | Blank walls, want privacy and seating |
| Deck Tiles (12 tiles for 6×8′) | Modular, 2′ x 2′ each | 6-8 hours | $120 – $180 | Ugly concrete, rentals (no permanent install) |
| Storage Bench | 48″ x 17″ | 8-10 hours | $90 – $160 | Need hidden storage, seating for two |
If you only build one thing this spring, build the storage bench or bar table first. They solve immediate function problems — seating and surface — with the lowest material risk. Deck tiles and planter walls are high-impact but require more precise measuring and more finishing.
Material and Hardware Notes
For outdoor fasteners, GRK, SPAX, or Starborn stainless are worth it. A $9 box of coated deck screws will not rust out in one season, while a $5 box of drywall screws will. For glue, use Titebond III only — Titebond I and II are not waterproof.
You don’t need a jointer or planer for any of these builds. Buy S4S cedar from a lumberyard if you can; big-box cedar is often wet, twisted, and 1/8 inch undersized. Let it acclimate stacked with stickers for 48 hours before you cut. If you have to use pressure-treated pine to save money, that’s fine for the deck tiles and bench frame, but let it dry for two to three weeks and wear a dust mask when cutting. It’s cheaper by 30-40% and stronger, but it will check and twist more than cedar and you must paint or stain it — clear finish looks blotchy on treated wood.
Spring Build Sequence
Start finishing early. Spring humidity in the 50-70% range is ideal for exterior oils and spar urethane — too cold (below 50F) and they won’t cure, too hot and they lap mark. Finish all sides before assembly, including the undersides of seats and tiles. That one step doubles the life of the project.
For a small patio, build in this order over three weekends: weekend one, deck tiles; weekend two, storage bench; weekend three, bar table or planter wall. By then you’ll know your exact remaining space and how the sun moves across the balcony, so you can place the planter where plants will actually get light.