What's inside
As an Amazon Associate I earn from qualifying purchases. This post may contain affiliate links at no extra cost to you.
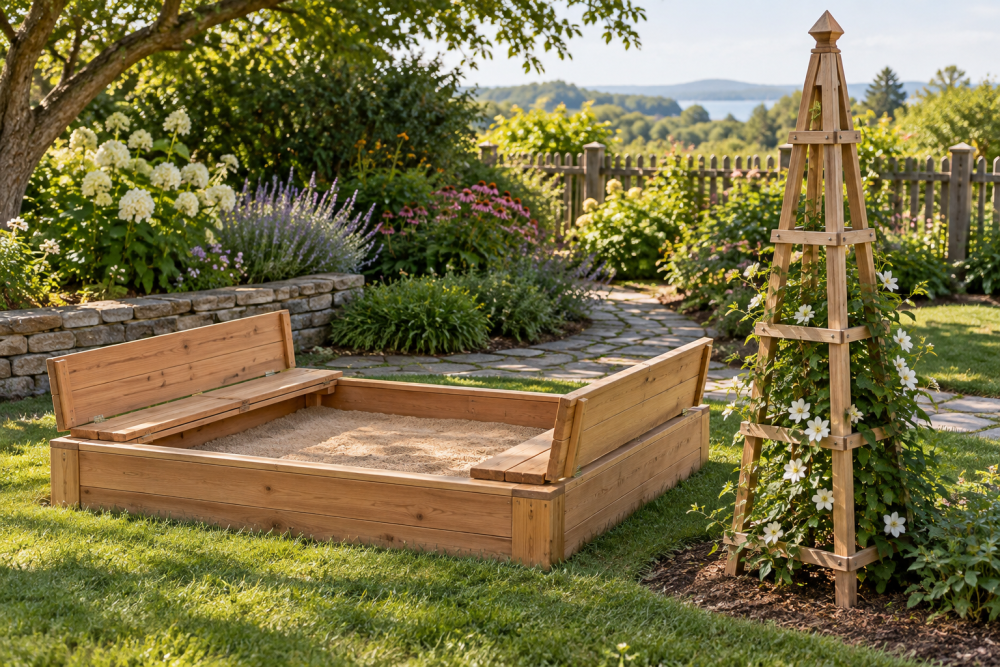
A hinged cover keeps leaves, rain, and animals out of a sandbox, but a heavy lid can be awkward for children to move. A split cover made from two hinged bench leaves solves both problems: open the leaves outward to make seats, then fold them over the sand when play is done. This design suits a square or rectangular sandbox with a sturdy, level rim.
The plan below is for a 4-by-4-foot sandbox with a 2-by-4-foot seat on each side. Adjust the measurements to your box, but keep each leaf narrow enough to lift comfortably and support it with a brace when it is open. The cover is not a climbing structure; an adult should supervise children using the seats.
Contents
Plan and measure
Measure the outside dimensions of the sandbox rim, not the sand opening. Each cover leaf needs to span half the box and reach from the center seam to the outside edge. Leave about ⅛ inch between the leaves and at least ¼ inch of clearance around the outside so seasonal wood movement does not make the cover bind.
Use rot-resistant lumber such as cedar or pressure-treated wood. Cedar is lighter and easier to handle, but costs more and can still split if fasteners are driven too close to an edge. Pressure-treated lumber is often cheaper and durable; use material labeled for residential use, wear gloves while cutting, and wash hands after handling it. Avoid reclaimed boards of unknown treatment.
| Material | Advantages | Trade-offs |
|---|---|---|
| Cedar | Lightweight, naturally decay-resistant, easy to cut | Higher cost; softer edges can dent |
| Pressure-treated lumber | Usually less expensive and long-lasting outdoors | Heavier; can be wet or twisted when purchased |
| Untreated pine | Low initial cost and easy to find | Needs diligent sealing and may decay sooner |
Materials and tools
For the example build, buy enough 1-by-4 boards to make two framed panels, plus two 2-by-4-inch seat-support rails and two folding braces. Actual board widths vary: a nominal 1-by-4 is about ¾ by 3½ inches. You will also need exterior-rated screws, two continuous hinges or several sturdy butt hinges, and a latch that keeps the closed leaves from shifting. A box of exterior deck screws is a practical choice; use corrosion-resistant fasteners compatible with the lumber.
Gather a saw, drill-driver, tape measure, square, clamps, and sandpaper. A set of outdoor-rated hinges is worth buying if the existing hardware is light-duty or rusty. A handsaw and basic drill are enough for this project; a power miter saw is convenient but not essential.
Build the cover panels
Cut each leaf to roughly 24 by 48 inches, adjusting for your rim and planned clearances. Lay parallel slats across the 48-inch dimension with ⅛-inch gaps between them. Those gaps let water drain and reduce cupping, though they also allow some fine debris through. If keeping out small debris matters more than drainage, use closer spacing and brush standing water off after heavy rain.
Fasten the slats to two crosspieces underneath each leaf, set about 4 inches in from the ends. Pre-drill near board ends to reduce splitting, and use two screws per slat at each crosspiece. Keep screw tips from protruding through the top. Check each panel for square by measuring both diagonals; if the measurements differ, adjust the frame before tightening the last screws.
Sand corners and edges until they feel smooth, especially where children will sit or grip the panels. Do not leave exposed screw heads, splinters, or sharp hinge corners. A water-based exterior wood sealer can slow weathering. Follow its label and let the finish cure fully before children use the cover.
Attach hinges and braces
Set the two panels across the sandbox with the center edges nearly touching. Attach hinges along the outside edge of each panel so it can swing outward and rest on the rim. A continuous hinge spreads the load along the edge; individual hinges are cheaper and easier to replace, but must be aligned carefully. Use fasteners long enough to bite into the rim without passing through it.
Add a folding support under each leaf so the seat cannot simply tip down when someone sits near the outer edge. A wooden brace can be made from a 2-by-4 cut to fit between the underside of the leaf and the sandbox side. Hinge one end to the leaf and use a removable pin or simple stop at the other. Test the brace with an adult applying gradual pressure before allowing children to sit. Do not rely on the hinge alone to carry a seated person.
Support matters more than the exact brace style. If the sandbox rim is thin, loose, or made from flexible boards, reinforce it first with corner blocks or a stronger rail. A cover attached to a weak rim can pull screws out even when the panels themselves are well built.
Test and maintain
Fold both leaves over the sand and check that they meet without forcing them. Add a latch or hasp to keep wind from lifting the cover, but place it where children cannot trap fingers or lock themselves inside. Open the panels and confirm that each brace holds its leaf at a level, comfortable seat height. Mark a “no standing or jumping” rule; slatted panels and simple braces are not designed for that kind of impact.
Inspect the cover every spring and after storms. Tighten loose screws, replace rusted hinges, and sand any raised grain or splinters. If a board twists enough to create a gap or prevent the leaves from closing, replace it rather than forcing the latch. Keep the cover propped open while children play, and close it when the sandbox is not in use. That simple routine keeps the sand cleaner and reduces the chance of a panel dropping unexpectedly.