What's inside
As an Amazon Associate I earn from qualifying purchases. This post may contain affiliate links at no extra cost to you.
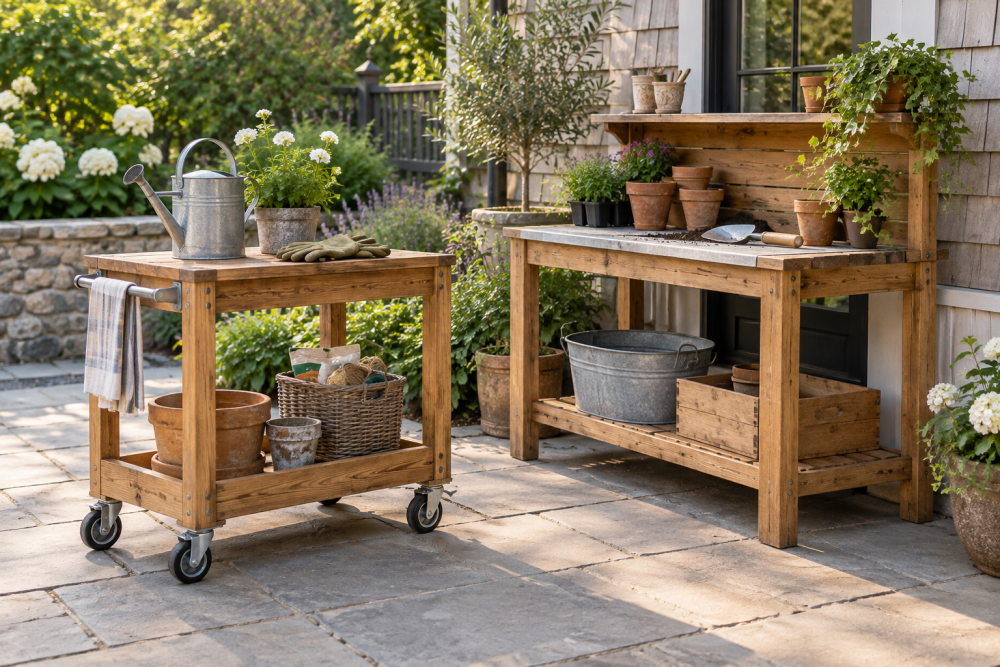
This cart is sized for a patio or deck: about 30 inches long, 18 inches deep and 32 inches high, with two slatted shelves and a handle at one end. It will hold drinks, plates and a modest serving tray. It is not a substitute for a heavy-duty shop cart, and it should not be left outside all winter.
Contents
Materials and sizing
Use naturally rot-resistant cedar, redwood or exterior-rated lumber. Cedar is light and easy to work, but dents more readily than many hardwoods. Pressure-treated lumber is cheaper and durable, but it can be wet, heavy and rough; let it dry before finishing, and avoid using it for surfaces that will directly contact food. For this project, buy straight, dry boards and seal every face, including the ends.
Dimensions below assume actual 1-by-3 boards are about ¾ by 2½ inches and 2-by-2 stock is about 1½ by 1½ inches. Check your lumber before cutting. The frame is built to fit the shelf slats, so a small change in board width affects spacing more than strength.
| Material choice | Good fit | Trade-off |
|---|---|---|
| Cedar or redwood | Light cart that is easy to move | Costs more than treated lumber; dents and checks are possible |
| Pressure-treated pine | Lower-cost cart kept outdoors | Often heavier and wetter; needs time to dry before finishing |
| Exterior-rated screws | Any lumber used outside | Stainless steel costs more, but resists rust best near salty air |
Cut list and tools
For a 30-by-18-inch footprint, cut four 2-by-2 legs at 32 inches; four 2-by-2 long rails at 27 inches; four 2-by-2 end rails at 15 inches; and sixteen 1-by-3 slats at 30 inches. The rails fit between the legs, producing an outside frame roughly 30 by 18 inches. The slats run across the full 30-inch length. You may need to adjust the number of slats to suit your actual board width and preferred drainage gaps.
You will also need four 3-inch swivel casters, exterior screws in 1¼- and 2½-inch lengths, a drill/driver, square, tape measure, saw and sandpaper. A box of exterior-rated screws is a sensible purchase if you do not already have corrosion-resistant fasteners. Use a set of 3-inch swivel casters with brakes; brakes help keep the cart from rolling while you serve.
Build the two shelf frames
Make the upper and lower frames separately. For each one, place two 27-inch rails between two 15-inch end rails to form a rectangle. Check both diagonals; they should match within about ⅛ inch. Drill pilot holes to reduce splitting, then drive two 2½-inch screws through each rail end into the adjoining piece. Keep the screw heads flush, not buried in the wood.
Mark the lower frame about 6 inches above the bottom of the legs. That leaves room for casters and gives useful clearance for a tray. The upper frame sits with its top edge at 29½ inches, leaving the 2½-inch-wide slats flush with the 32-inch leg tops. Fasten the frames to the inside faces of the legs, using a square to keep the legs vertical. A clamp helps; otherwise, tack one screw into each joint, recheck the frame, then add the remaining screws.
Add the shelves and handle
Lay eight slats across each frame, spacing them evenly with roughly ⅜-inch gaps for drainage. Adjust the gaps if your lumber width differs. The slats should sit on the rails, not bridge a wide unsupported span. Predrill near the ends and attach each slat with 1¼-inch screws, two per rail. A narrow gap lets water escape; no gap traps water and encourages finish failure and rot.
Make a simple handle from a 24-inch piece of 1-by-3. Attach it horizontally to the two legs at one short end, with its top near the upper shelf. Use two 2½-inch screws at each end, driven into the leg through pilot holes. If you expect to push a loaded cart often, add a second screw at each end rather than relying on one fastener per side. Sand corners and exposed edges to reduce splinters.
Fit the casters
Turn the cart upside down and mount one caster at each leg. Check that the caster plates fit fully on the leg ends and that screws will not split the wood. Use the manufacturer’s supplied fasteners only if they are suitable for outdoor use and long enough to bite securely. If the plate has holes close to the leg edges, drill pilot holes carefully; a split leg can loosen the caster under load.
Swivel casters make the cart easy to steer in tight spaces, but they can wobble on uneven pavers. Fixed casters track straighter but make turns harder. For a small patio cart, four swivels are usually the more useful choice. Test the brakes on your actual surface: some casters hold on a smooth deck but creep on sloped concrete. Do not load the cart beyond the caster rating, and remember that the weakest caster and the wood joints set the practical limit.
Finish and maintenance
Sand to 120 or 150 grit, then remove dust. Apply an exterior penetrating oil or outdoor-rated finish according to its label, including the underside and end grain. A penetrating exterior wood oil is easy to renew, though it may need attention every year or two depending on sun and rain. Film-forming finishes can look smoother but may peel when water gets beneath a damaged spot.
Let the finish cure fully before putting food or serving pieces on the shelves. Wipe spills promptly, keep the cart under cover when not in use, and check screws and caster plates at the start of each season. If a shelf slat cups, splits or stays wet, replace it rather than covering the problem with another coat of finish.