What's inside
As an Amazon Associate I earn from qualifying purchases. This post may contain affiliate links at no extra cost to you.
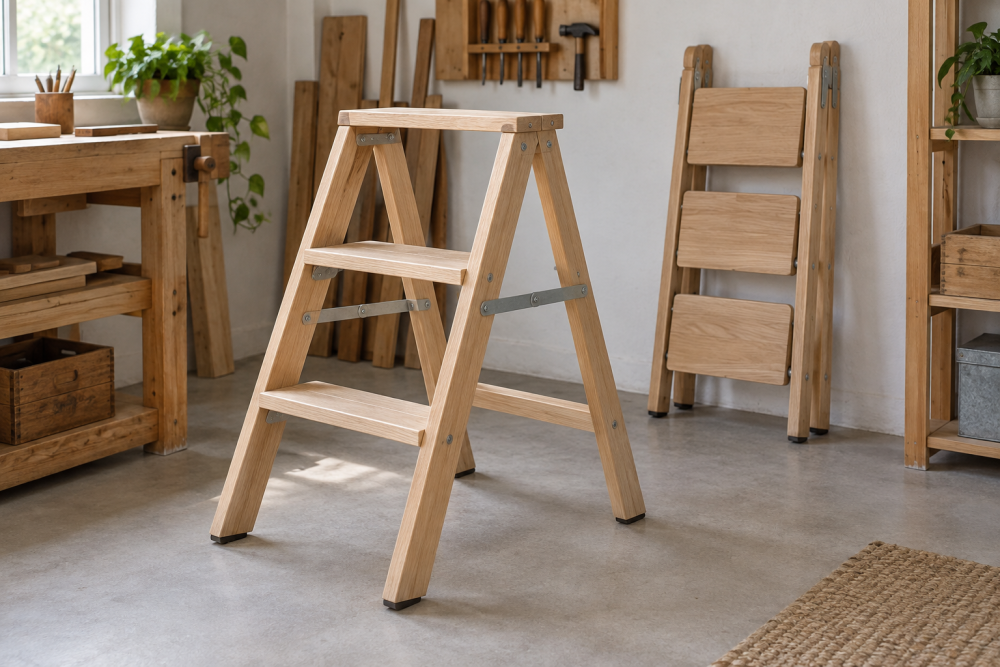
A wooden step ladder is a useful shop project, but it is also a structure people climb. This design uses two side rails joined at the top with bridle joints, four fixed steps, and a hinged spreader to keep the ladder open. It is intended for light household or workshop use on a level floor—not for industrial work, outdoor exposure, or standing on the top cap.
Contents
Design and limits
The ladder described here is about 36 inches tall, with four steps and a roughly 18-inch-wide stance. The front and rear rail assemblies pivot at the top; a folding spreader limits how far they open. The bridle joint gives the top rails a broad interlocking connection, but it does not replace sound lumber, strong step joints, or a properly secured spreader.
Do not treat a home-built ladder as a rated commercial ladder. If you need a ladder for frequent, heavy, overhead, or jobsite use, buy one with a stated duty rating. Never stand on the top cap or top step, and do not use this design on stairs or uneven ground.
Materials and tools
Use straight, dry hardwood such as ash, maple, or beech for the rails and steps. Clear, straight-grained construction lumber can be cheaper, but inspect every piece for knots, splits, twist, and grain runout. Reject stock with defects near joints or fasteners. For the dimensions below, buy 4/4 stock wide enough to yield rails about 2 1/2 inches wide and steps about 3 inches wide.
You will need a saw, square, marking knife or sharp pencil, chisels, drill and bits, clamps, and a way to rip and thickness stock accurately. A table saw helps with repeatable cuts, but careful hand-tool work is suitable. A basic woodworking chisel set is enough for cleaning the bridle joint; sharp edges matter more than a premium brand.
Starting dimensions
| Part | Quantity | Finished size | Notes |
|---|---|---|---|
| Front rails | 2 | 36 × 2 1/2 × 3/4 in. | Set about 18 in. apart at the feet |
| Rear rails | 2 | 36 × 2 1/2 × 3/4 in. | Match front rails as a pair |
| Steps | 4 | 18 × 3 × 3/4 in. | Space roughly 8 in. vertically |
| Top cap | 1 | 18 × 3 1/2 × 3/4 in. | Fit between front rails |
| Spreader links | 2 | About 12 × 1 1/4 × 3/8 in. | Length depends on open stance |
These are planning dimensions, not a certified plan. Keep the ladder narrow enough to store but wide enough to feel stable, and verify the spreader geometry before drilling its pivots. A sliding bevel gauge makes it easier to transfer the rail angle consistently.
Cut and mark the rails
Mill the four rails to equal thickness and width, then cut them to length. Mark each pair together so corresponding shoulders, step locations, and pivot holes line up. Lay out the steps with the bottom step about 8 inches above the floor and the remaining steps at 8-inch intervals. Keep the top cap below the bridle joint area, leaving enough solid rail around the joint.
Bevel the bottom ends so the rails sit flat when the ladder is open. Do not guess the angle from a drawing: temporarily clamp the rails in the intended stance, mark the floor-contact angle, then cut both feet to match. Check contact on a flat floor before proceeding. A rocking foot is a warning, not a detail to hide with a thick finish.
Cut the bridle-joint side rails
At the top of each front rail, mark a centered slot about 3/4 inch deep and as wide as the mating rear rail is thick. On the rear rail, mark a matching tongue that fits the slot. The joint should slide together with firm hand pressure; a loose fit will rack, while a tight fit can split the rail during assembly. Cut just outside the waste line, pare to the line with a chisel, and test the fit often.
Make the shoulders square and keep the joint centered across the rail width. Dry-assemble the front and rear rails and confirm that the ladder opens and closes without binding. Glue the bridle joint with a suitable wood glue and clamp it square. Do not rely on screws driven into end grain to correct a poor fit.
Fit the steps and spreader
Cut shallow housings in the inside faces of the front rails for the steps. A housing about 1/4 inch deep helps resist step rotation; fit each step snugly, then glue and secure it with screws or dowels. Predrill near the ends to reduce splitting. The step tops should be level when the ladder is open, not merely parallel to the rails. Check this with a straightedge and a level before the glue sets.
Join the rear rails with a matching top cap or crosspiece, then attach the spreader links between the front and rear assemblies with bolts and washers. Use a positive stop or a robust over-center arrangement so the ladder cannot spread farther under load. The links must fold freely but have no sloppy side play. If the spreader can slip, detach, or fold while the ladder is loaded, do not use the ladder.
Finish and inspect
Ease sharp corners with sandpaper, but leave enough flat surface on the steps for secure footing. Apply a thin oil or clear finish if desired; avoid glossy coatings that can become slippery. Add non-slip feet only if they remain secure and sit flat. Cheap rubber caps are acceptable for a dry indoor shop, but replace them if they split, loosen, or compress unevenly.
Before climbing, inspect every joint and fastener, open the ladder fully, and press down on each step while keeping your weight off the ladder’s top. Check that all four feet contact the floor and that the spreader is locked. Recheck after the first few uses and periodically thereafter. Stop using it if a rail cracks, a step loosens, the bridle joint opens, or the ladder rocks under a modest hand-applied load. A wood moisture meter can help when buying stock, but straight grain and defect-free joints matter more than chasing a precise moisture reading for an indoor project.