What's inside
As an Amazon Associate I earn from qualifying purchases. This post may contain affiliate links at no extra cost to you.
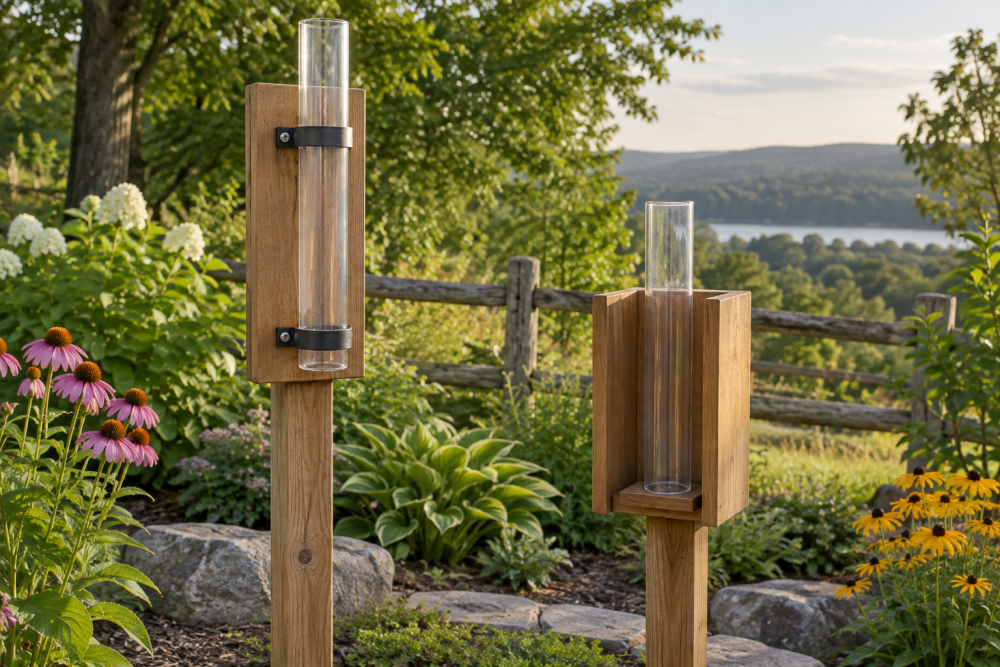
A rain gauge shelter protects the gauge from falling leaves, bird droppings, windblown dirt, and accidental knocks while still allowing rain to enter freely. The useful design is not a sealed box. It is a small, open-sided wooden screen with a roof, mounted securely on a post.
This project suits a beginner with a saw and drill. It takes about two to three hours, not counting paint or finish drying time. Use pressure-treated lumber for the post, but ordinary cedar or exterior-rated pine is easier to cut for the shelter itself.
Contents
What the Shelter Needs to Do
The rain gauge should sit level, with its opening unobstructed from above. The shelter should block debris and reduce direct wind exposure without creating a roof that catches and diverts rain into the gauge. Leave at least 3 inches of clearance around the gauge and keep the roof 4 to 6 inches above its rim.
A simple shelter measuring roughly 12 inches wide, 10 inches deep, and 14 inches tall works for most cylindrical garden rain gauges. If your gauge is unusually large, measure its diameter first and add 3 inches to the width and depth.
| Material | Advantages | Drawbacks |
|---|---|---|
| Cedar | Rot-resistant, light, easy to work, attractive unfinished | More expensive; can split near screw holes |
| Exterior-rated pine | Cheap, widely available, easy to paint | Needs thorough sealing; knots can warp or bleed through paint |
| Pressure-treated lumber | Best for the ground-contact post; resists rot | Heavier, wet when new, and harder on cutting tools |
Materials and Tools
Buy one 1×6 cedar or exterior pine board, 4 feet long, for the shelter. You will also need a 1×2 board for battens and trim, a 2×2 or 4×4 post, 1 1/4-inch exterior screws, 2-inch exterior screws, exterior wood glue, and a small amount of roofing material. Asphalt shingle offcuts, exterior plywood with roofing felt, or a scrap of corrugated plastic will work.
For the post, a 4×4 is sturdier but visually bulky. A 2×2 is adequate if the shelter is small and the soil is firm. A galvanized post spike avoids burying the wood and is a good choice in damp soil.
Basic tools are a tape measure, combination square, pencil, handsaw or circular saw, drill, countersink bit, clamps, and sandpaper. A small can of exterior wood paint is usually enough for this project. Use eye protection when cutting, drilling, or driving screws.
Cut List
Adjust these dimensions if your rain gauge is larger, but this is a practical starting point:
- Two side panels: 10 inches long by 8 inches high
- One back panel: 10 inches long by 8 inches high
- Two roof pieces: 14 inches long by 7 inches wide
- Four vertical corner strips: 1×2 lumber, cut to 12 inches
- One mounting shelf: 10 inches long by 5 inches wide
- One post: 36 to 48 inches long, depending on desired gauge height
Set the gauge opening about 30 to 36 inches above ground level. This is high enough to reduce splashback from soil but low enough to read without a ladder. Cut the roof pieces with a small overhang on all sides. A 2-inch overhang is helpful because it keeps runoff away from the shelter walls.
Build the Shelter
Start by sanding the cut edges and lightly rounding sharp corners. Cedar splinters easily, and sharp board ends are unpleasant to handle during maintenance.
Lay the back panel flat. Position the two side panels at its edges, forming a three-sided enclosure. Keep the side panels flush with the back and drive two 1 1/4-inch screws through each side into the back. Drill pilot holes first, especially near the ends of cedar or pine boards. Add exterior glue if the shelter will stay in a wet climate, but do not depend on glue alone.
Attach the four vertical corner strips over the exposed corners. These strips stiffen the shelter and give the roof a solid fixing point. Keep the lower ends aligned. If the boards are slightly warped, clamps will pull them into position while you drive the screws.
Make the roof by joining the two roof pieces along their long edges to create a shallow peak. You can screw a 1×2 ridge strip underneath the joint, or simply fasten each roof panel to the corner strips with 1 1/4-inch screws. The ridge strip is stronger and makes it easier to replace the roof later.
Cover the roof with a scrap of roofing felt, a shingle, or corrugated plastic. Do not extend the covering down into the shelter opening. The roof is intended to shed water, not funnel it toward the gauge. A box of exterior wood screws is worth buying if your existing screws are ordinary indoor screws; drywall screws rust quickly outdoors and are brittle.
Add the Gauge Shelf
Install the 10-by-5-inch shelf inside the shelter, about 2 inches above the bottom. The shelf must be flat and rigid. Fasten it through the side panels with two screws on each side, then check it with a small level.
Do not screw through the gauge itself. If the gauge tends to move, add two small wooden stops beside its base. Leave a little room for removal. A permanently trapped gauge is harder to clean and may crack when winter ice expands.
Mount and Finish the Shelter
Attach the shelter to the post from inside the back panel using four 2-inch exterior screws. Pre-drill through the back and into the post. If using a 4×4, use screws long enough to enter the post at least 1 1/2 inches without punching through the front.
Seal all end grain, especially the bottoms of the side panels and roof boards. Apply two coats of exterior paint or stain to the outside surfaces. Paint is the better choice for inexpensive pine because it provides a more complete moisture barrier. Leave the inside unpainted or use a compatible exterior finish; strong finishes can release odors that attract or repel insects for a while.
Set the post so the shelter is stable in wind. With a buried post, place 12 to 18 inches in compacted soil or use a small amount of concrete in sandy ground. With a post spike, drive the spike fully into the soil and check that it remains vertical before attaching the shelter.
Placement and Maintenance
Choose an open part of the garden, away from roof edges, fences, trees, and sprinklers. Keep the gauge at least twice as far from an obstruction as the obstruction is tall. For example, a 4-foot fence should be at least 8 feet away. This reduces turbulence and prevents the gauge from recording runoff rather than rainfall.
Check the gauge after installation with a level. Inspect it monthly for leaves, insects, algae, and cracks. Clean the funnel with mild soapy water and rinse it thoroughly. Confirm that the shelter remains level after frost or heavy rain.
The most common failure is a roof that extends too far over the gauge and blocks rainfall. The second is a loose post that lets the gauge tilt. If readings seem consistently low, remove the roof temporarily and compare the gauge with a second gauge in an open location. That simple test usually reveals whether the problem is shelter design, placement, or a faulty gauge.