What's inside
As an Amazon Associate I earn from qualifying purchases. This post may contain affiliate links at no extra cost to you.
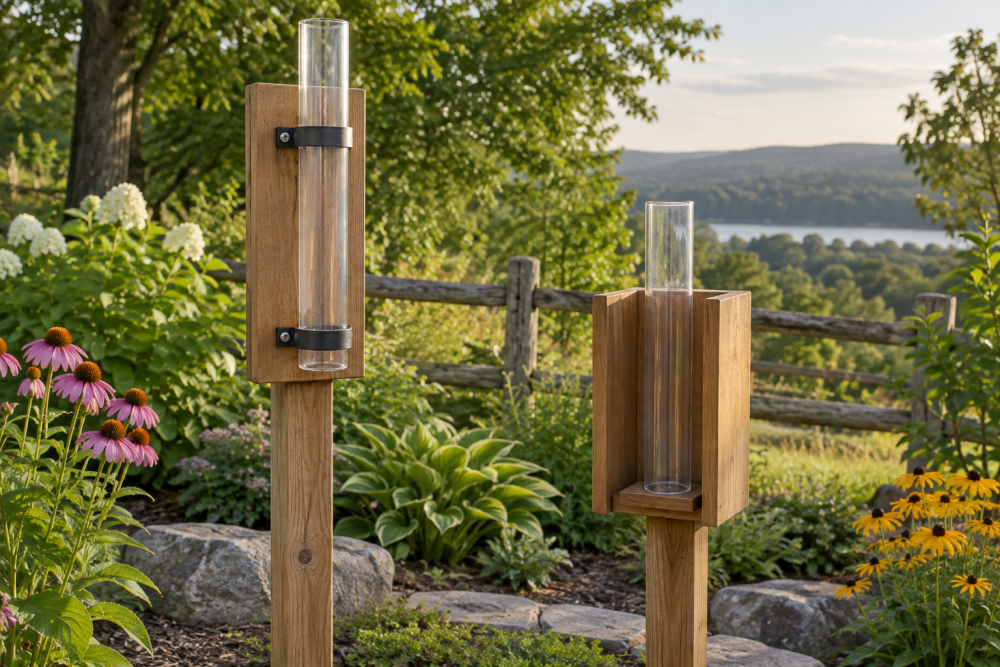
A rain gauge only works if it stands upright, sits in an open spot, and is easy to read. This simple wooden stand holds a common cylindrical gauge without covering its opening. The build uses one post, a short crosspiece, and a small retaining rail. It is a good first outdoor project: the cuts are square, the parts are forgiving, and the stand can be adjusted to fit the gauge you already own.
Contents
Plan the stand around your gauge
Check the gauge’s diameter and height before cutting. This plan suits a gauge about 2 to 3 inches across and 8 to 12 inches tall. The crosspiece supports the gauge from below; a low rail on one side helps stop it sliding in wind without obstructing the opening. Keep the top of the gauge roughly 30 inches above the ground, a practical height for reading and emptying it.
Place the gauge away from roof edges, trees, fences, and sprinklers. Water dripping from a roof or leaves can give misleading readings. Follow any placement guidance supplied with the gauge; an open area is more important than making the stand especially tall.
Materials and tools
You’ll need a straight 1-by-2 board, about 6 feet long, and a short piece of exterior-rated 1-by-3 or similar stock for the base. Use cedar, treated lumber, or another rot-resistant outdoor wood. Untreated pine is cheaper and fine for a low-cost stand, but expect to replace it sooner, especially where the post touches soil.
Gather a tape measure, pencil, square, hand saw or miter saw, drill, 1/8-inch drill bit, exterior screws, sandpaper, and an outdoor finish if desired. A box of 2-inch exterior wood screws is enough for this small build. If you don’t have a saw, a store may cut the boards to length when you buy them.
| Material | Cost and trade-off | Best fit |
|---|---|---|
| Cedar or other rot-resistant wood | Costs more, but handles outdoor exposure better | A stand you want to leave outside for several seasons |
| Pressure-treated wood | Durable and often inexpensive; can be wet or rough when purchased | A utility build where appearance matters less |
| Untreated pine | Cheapest and easy to work, but decays faster at the ground | A sheltered spot or a stand you’re willing to replace |
Cut list
From the 1-by-2, cut a post 36 inches long, a crosspiece 6 inches long, and a retaining rail 3 inches long. From the wider board, cut a base plate about 8 inches long. These dimensions are a starting point, not a requirement: make the crosspiece at least 2 inches longer than the gauge’s diameter, and adjust the rail so it does not cover the gauge’s markings.
Nominal 1-by-2 lumber is usually about 3/4 by 1 1/2 inches. Check actual board dimensions and use the post’s wider face as the face that carries the crosspiece. Sand cut edges until they are smooth enough not to snag a sleeve or splinter your hand.
Assemble the post and gauge shelf
Mark the post 30 inches up from its bottom end. Center the 6-inch crosspiece on the post at this mark, making a T shape. The crosspiece should sit with its broad face horizontal so it gives the gauge a stable shelf. Drill two pilot holes through the crosspiece into the post, then drive in two 2-inch exterior screws. Pilot holes matter here: without them, narrow stock can split, especially near an end.
Set the gauge on the shelf and check that its base sits flat and its opening remains fully exposed. If the gauge is noticeably narrower than the shelf, position it in the middle. Fasten the 3-inch retaining rail upright at the back edge of the shelf, using one or two screws. Leave a gap between the rail and gauge rather than clamping the gauge tightly; plastic gauges can crack, and you need to lift yours out for emptying.
Before driving the screws home, check the assembly with a square. A crooked shelf can make the gauge lean or spill. If your gauge has a broad flange or a shape that won’t fit this shelf, measure its base and alter the crosspiece or rail rather than forcing it into place.
Mount the stand securely
For a movable stand, screw the bottom of the post to the center of the 8-inch base plate with two exterior screws. The plate adds stability on firm ground, but it can still tip in strong wind or soft soil. For a more secure garden installation, drive the post 6 to 8 inches into firm soil instead. Cut the post longer if you use this method so the shelf remains about 30 inches above ground.
Check the post for plumb from two directions, then press soil firmly around it. If the ground is loose, add a small wood stake beside the post and screw the two together. Avoid putting the crosspiece directly against a fence or wall, which can block rainfall and complicate readings.
Seal the wood with an exterior water-repellent finish if you want to slow weathering. Apply it before assembly if you can, and keep finish off the inside of the rain gauge. Finish is optional; it won’t prevent rot if water sits around a post buried in wet soil. A basic exterior wood sealer is reasonable for cedar or pine, but untreated pine can still be used without it if you accept a shorter service life.
Check the reading and maintain the stand
Put the gauge in the holder and confirm it is vertical. Pour in a small measured amount of water as a check, then empty the gauge and reset it according to its instructions. Recheck after heavy rain or wind: a loose screw, leaning post, or gauge that has shifted can make readings unreliable. Clear soil and leaves from around the post, and tighten screws if the shelf begins to wobble.
Common failures are easy to avoid. A shelf that is too short lets the gauge rock; a rail set too close makes removal awkward; and a post placed under a branch can collect runoff that never fell directly from the sky. If the wood begins to soften at ground level, replace the post rather than trusting a weakened stand. A simple build works well when the location is right and the gauge can be removed and read without a struggle.