What's inside
As an Amazon Associate I earn from qualifying purchases. This post may contain affiliate links at no extra cost to you.
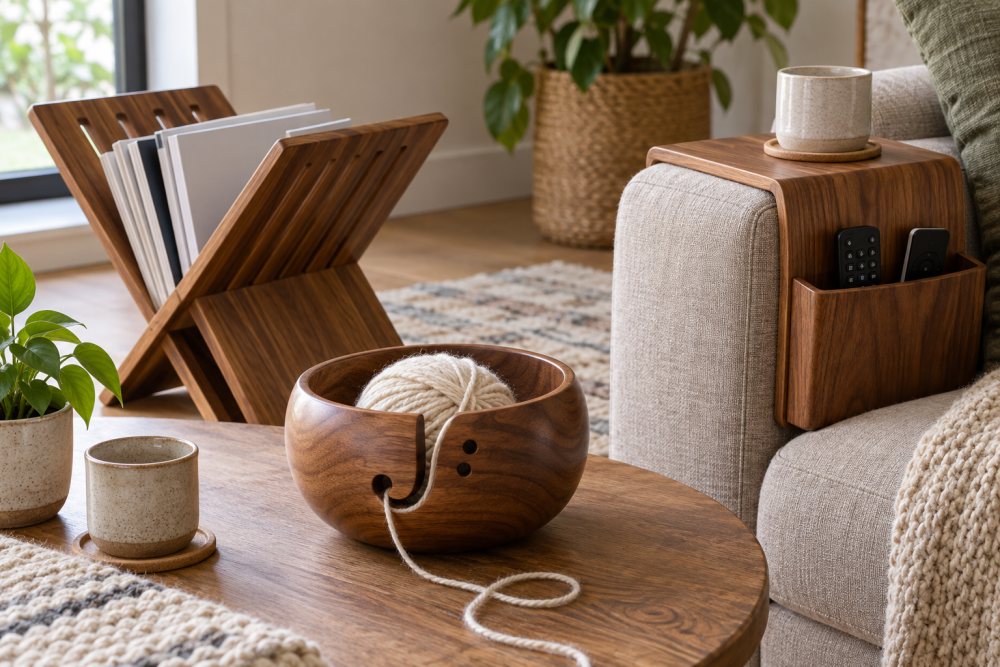
A wooden sofa-arm remote holder is a small project, but the fit matters: a loose sleeve slides off, while a tight one can scuff the upholstery or refuse to go on at all. This version uses a simple U-shaped body that slips over the arm, with a shallow tray for remotes. Measure your sofa first; the dimensions below are a starting point, not a universal size.
Contents
Materials and tools
Use 1/2-inch plywood for the tray and sides, plus a piece of 1/4-inch plywood for the inside face of the sleeve. Birch plywood is smooth and stable; inexpensive sanded plywood works if you fill rough edges. Solid wood is fine, but thin boards can warp, and joining them cleanly takes more care.
You’ll also need wood glue, 1-inch brad nails or small screws, sandpaper (120 and 180 grit), a tape measure, square, saw, and clamps. A jigsaw or circular saw is enough for the cuts. If you want clean, repeatable straight cuts, a circular saw guide can help, but a straightedge clamped to the work is a cheaper substitute.
Measure the sofa arm
Measure the arm’s width from side to side, its height from the top to the bottom edge, and the distance from the front of the arm to the back where you want the holder to stop. Check the shape, too. A rounded or sloped arm may need a cardboard template rather than square dimensions.
For a first build, make the sleeve’s inside width about 1/4 inch wider than the measured arm. That gives roughly 1/8 inch clearance on each side. Measure upholstery at the thickest point and avoid forcing the holder into place: fabric compresses, but a sharp plywood edge can snag it. If the arm has a pronounced taper, size the sleeve to its widest section and add thin felt pads later to reduce wobble.
Cut list and layout
For an arm measuring about 7 inches wide and 10 inches tall, with a 12-inch-long holder, start with these pieces. Adjust the sleeve width and height to match your measurements. The tray is deliberately shallow so the remotes are easy to reach rather than buried.
| Part | Material | Starting size | Purpose |
|---|---|---|---|
| Tray bottom | 1/2-inch plywood | 12 × 8 inches | Holds the remotes |
| Tray sides | 1/2-inch plywood | Two at 12 × 1 inch | Keeps items from sliding off |
| Tray ends | 1/2-inch plywood | Two at 7 × 1 inch | Closes the short edges |
| Sleeve outer face | 1/2-inch plywood | 12 × 10 inches | Hangs down the outside of the arm |
| Sleeve inner face | 1/4-inch plywood | 12 × 10 inches | Completes the U-shaped sleeve |
These example dimensions assume a 7-inch arm and a tray that overhangs by about 1/2 inch on each side. Change the tray width if you want it flush with the arm. For several remotes, a 1-inch side is usually enough; taller sides can make narrow remotes harder to grab.
Build the sleeve and tray
Cut the pieces square and dry-fit the sleeve around the arm before gluing. The tray bottom sits on top of the arm, and the outer and inner faces hang down on opposite sides. Position the outer face flush with the tray’s outside edge. Attach it with glue and 1-inch brads or screws, keeping fasteners short enough not to poke through. The thinner inner face should sit against the inside of the arm; glue it to the underside of the tray and to the outer face’s top edge to form the U.
Keep the inside face low-profile so it does not press against the sofa. If it rocks, check whether the arm is rounded or tapered before sanding the sleeve wider. Removing too much material can make the holder slide around. A strip of thin felt on the contact surfaces can cushion the fit, but thick padding may make a close sleeve too tight.
Build the tray by gluing the two long sides and two end pieces around the bottom. Clamp until the glue sets, and check each corner with a square. If using screws, drill pilot holes near the ends; plywood edges split easily. A basic interior wood glue is adequate for a dry living room. Waterproof glue is unnecessary unless the holder may regularly get wet.
Sand and finish
Sand the edges and corners, especially the sleeve edges that touch fabric. Start with 120 grit and finish with 180. Ease sharp corners with a few strokes; a crisp edge is more likely to catch upholstery. Fill visible nail holes if appearance matters, but do not fill the sleeve’s inside gap.
For a quick, low-cost finish, leave the wood bare after sanding. It may pick up marks over time, but that is acceptable for a small utility tray. If you want easier cleanup, apply two thin coats of water-based polyurethane, sanding lightly between coats. Let it cure fully according to the label before placing it on fabric; a finish that feels dry can still be tacky.
Test the fit and adjust
Slide the holder onto the arm without twisting. It should stay put when you set down a remote, but come off without lifting or stretching the upholstery. If it shifts, add thin felt strips to the inside faces. If it binds, remove the holder and sand the inner surfaces in small passes, then test again. Do not lever it off against the sofa seam.
Check that the tray does not tip when a remote sits near an edge. If it does, shorten the overhang or move the tray slightly toward the sofa’s center. For a very rounded arm, a plywood sleeve may never sit securely; a fabric-backed panel or a holder designed for that arm shape is a better choice than forcing a rigid fit.