What's inside
As an Amazon Associate I earn from qualifying purchases. This post may contain affiliate links at no extra cost to you.
A scrap-board marble run is a good first woodworking project: it needs little material, tolerates rough finishes, and can be built with basic hand or power tools. The key is not fancy joinery. It is making the track smooth, keeping the sides high enough to contain the marble, and testing each section before you fasten it permanently.
Contents
Materials and a practical size
Use a flat plywood offcut or solid board for the back, about 12 by 24 inches. A 1/2-inch-thick base is stiff enough at that size; a larger board may need a thicker back or a frame to resist flexing. For tracks, rip scrap boards into strips about 1 1/2 to 2 inches wide. Side rails can be 1/4 to 1/2 inch high. A standard glass marble is roughly 5/8 inch across, but measure the marbles you plan to use before setting the rails.
Choose dry, clean scrap without nails, deep cracks, or splinters. Plywood works well for the back because it stays relatively flat. Solid wood is fine for tracks, though very thin strips can split when nailed near an edge. If you need new stock, inexpensive unfinished wood craft boards are easier to handle than rough, warped offcuts.
Tools and safety
You can make the project with a handsaw, ruler, pencil, drill, and sandpaper. A miter saw speeds up repeated cuts, but is not required. Keep a small bar clamp handy if you have one; a temporary clamp makes it easier to check a track’s position before fastening it.
Wear eye protection when cutting or drilling. Sand every edge the marble can touch, and remove loose splinters. If children will use the run, use large marbles only with close adult supervision; small marbles are a choking hazard. Do not leave the finished run where a child can pull it over or use it as a climbing surface.
Choose a track style
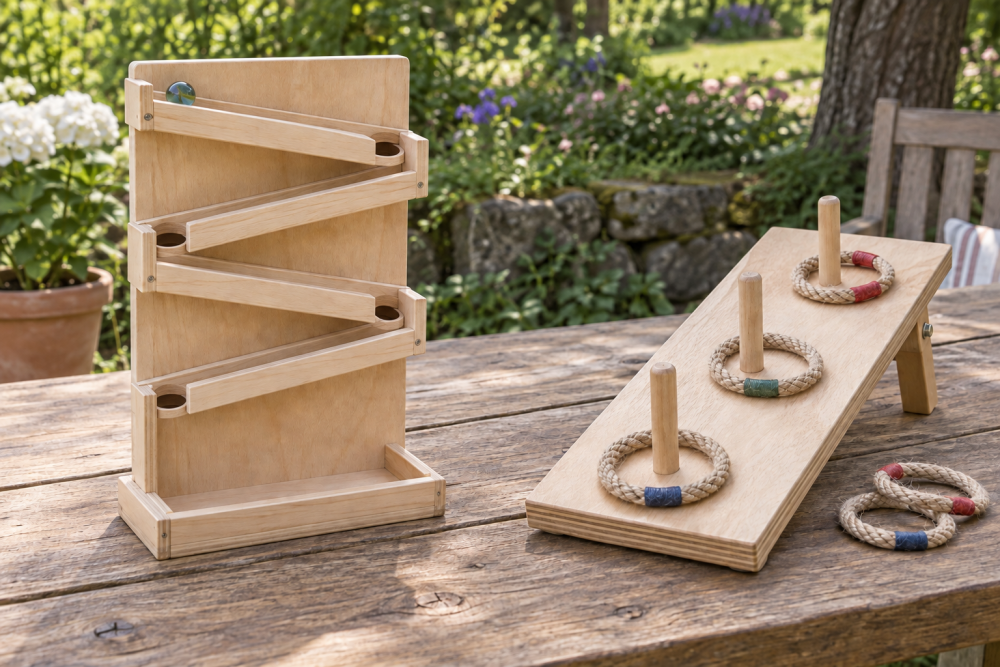
A simple zigzag is easier to build and troubleshoot than a loop or jump. The marble drops from one sloped shelf to the next, with short end stops directing it across the board. A covered channel contains the marble better but takes more fitting and may hide jams. For a first build, open tracks are easier to adjust and clean.
| Track option | Best for | Main trade-off |
|---|---|---|
| Open zigzag | First builds and quick repairs | Marble can bounce off if rails are low |
| Shallow channel | Keeping the marble contained | Needs accurate width and smooth joints |
| Curved track | More varied runs | Harder to cut and more likely to snag |
Plan the layout
Set the back board flat on a bench and draw a path in pencil. Allow about 3 inches of drop from one track to the next on a 24-inch-tall board, leaving room for the marble to roll and change direction. A track should slope roughly 1/2 to 1 inch over each 8-inch run. Less slope can leave the marble stalled; too much speed makes it bounce at the ends.
Mark the landing area for each shelf before cutting. The marble needs to arrive on the next track, not on its edge. Leave at least 1/2 inch of overlap between the end of an upper track and the surface below. Make the channel at least 1 inch wide for a single marble, or about 1 1/4 inches if the boards are uneven. A pack of standard-size glass marbles is useful for testing, but use the same marble throughout construction so the fit stays consistent.
Cut and assemble the run
Cut four to six track pieces to fit the layout. For a 12-inch-wide back, pieces between 5 and 9 inches long usually leave enough space for the marble to change direction. Cut short rail strips to match each track. Ease the edges with 120-grit sandpaper, then finish with 180-grit. A rough joint or a raised screw head can stop a marble even when the slope looks right.
Attach rails to the track pieces before mounting them to the back. Use glue and small brads, or predrilled screws if that is what you have. Avoid driving a nail close to the end of a narrow strip; it can split. Keep fasteners short enough that their tips cannot emerge through the running surface. After the glue sets, place each track on the back and test the route with the marble. Fasten only after the path works. Small screws are easier to reposition than glue alone, while glue is quieter and leaves fewer exposed heads.
At each turn, add an end stop made from a short scrap block or rail offcut. It should redirect the marble without making it jump. If the marble hits hard and rebounds, lower the track above, lengthen the landing area, or angle the stop slightly toward the next track.
Test and fix common problems
Run the marble from the same starting point several times. If it stalls, check for a flat or uphill section, a glue ridge, a proud fastener, or a rail that narrows the channel. Sand high spots lightly rather than enlarging the whole track. If the marble escapes, raise the rail or reduce the slope. If it reaches the bottom too fast, add a longer track, a gentle bend, or a small block that slows it without pinching the marble.
Finish with a final sanding and wipe away dust. An unfinished run is usually fine indoors; paint or clear finish adds appearance but can create a rough edge or sticky surface if applied heavily. Let any finish cure fully before testing, and keep paint away from the rolling surface if it changes the marble’s speed.