What's inside
As an Amazon Associate I earn from qualifying purchases. This post may contain affiliate links at no extra cost to you.
Contents
Project overview
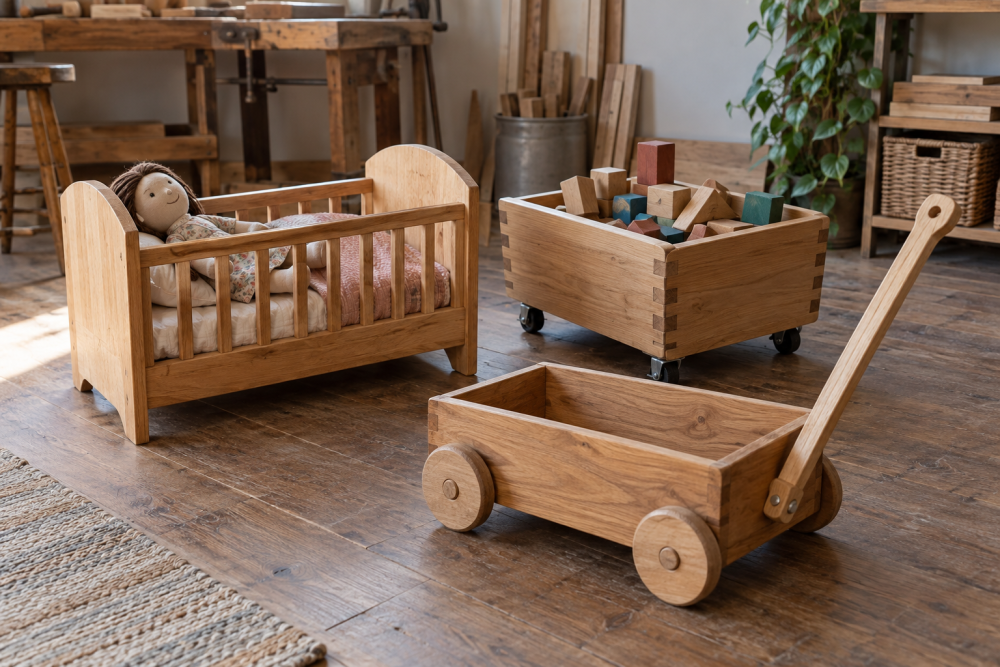
This small pull-along cart is a good first woodworking project: it uses straight cuts, basic drilling and a simple handle joint. The finished cart has a 12-by-16-inch deck, four wheels and a handle about 24 inches long. It suits stuffed animals, blocks and light toys—not children to ride in or stand on. Expect to spend an afternoon building it, plus time for glue and finish to dry.
Use ¾-inch plywood for the deck and 1-by-3-inch boards for the sides. Choose smooth, sound lumber without splits or loose knots near joints. A precut plywood panel can save a trip to the saw; if you only have a handsaw, a home center can often cut a larger sheet to size.
Materials and tools
You’ll need one 12-by-16-inch piece of ¾-inch plywood, two 16-inch side boards, two 10½-inch end boards, a 24-inch handle blank, four wheels around 3 inches in diameter, and four bolts to match the wheel hubs. The side and end boards should be about 2½ inches tall. Confirm the wheel hub’s required bolt diameter and length before buying hardware; wheel designs vary.
Also gather wood glue, screws, washers, sandpaper in 120- and 180-grit, and a finish suitable for a toy. A drill/driver and a square make the work easier. A cordless drill/driver is convenient, but a borrowed drill works just as well. For cutting, a basic hand saw is enough if your stock is already marked and clamped securely.
Choose the wheels
Wheel choice affects noise, cost and how well the cart rolls. Measure the hub before drilling the axle holes, and avoid wheels with sharp edges or small detachable parts if a young child will use the cart. Fixed bolts make sturdy axles, but the wheel must spin freely without wobbling excessively.
| Wheel type | Advantages | Trade-offs |
|---|---|---|
| Hard plastic toy wheels | Inexpensive, light and widely available | Noisy on hard floors; inspect for rough edges |
| Rubber or soft-tread wheels | Quieter and gentler on floors | Usually cost more and may add width |
| Wooden wheels | Simple appearance and easy to paint | Can be heavier and may roll less smoothly |
For a basic indoor cart, inexpensive plastic wheels are fine. Choose soft-tread wheels if noise or floor marks matter more than price.
Cut and assemble the deck
Cut the deck to 12 by 16 inches. Lay out the two long sides along the 16-inch edges and the end boards between them. This gives an outside footprint of about 12 by 16 inches when using ¾-inch-thick side boards. Check the actual thickness of your lumber and adjust the end-board length so the corners meet flush.
Sand the cut edges lightly. Apply a thin bead of glue where each rail meets the deck, then clamp or hold the parts square. Drill pilot holes through the rails into the plywood—two screws per rail at each end is a useful starting point. Use screws long enough to bite into the deck without poking through its top; for ¾-inch plywood, 1¼-inch screws are generally suitable. Wipe away squeezed-out glue and let the assembly sit flat while it sets.
A common beginner mistake is driving screws without pilot holes. That can split a rail or pull the joint out of square. If the cart rocks on a flat surface, check the corners with a square before the glue dries, then adjust the clamps.
Make and fit the handle
For a simple fixed handle, use a straight 1-by-2-inch blank, 24 inches long. Round over the end that will be held, then sand it smooth. At the front center of the cart, attach the other end to the outside of the front rail with two screws and glue. Keep the handle low enough that it does not tip the cart easily when pulled.
For a handle that pivots, use a bolt, washers and a locknut rather than relying on screws alone. Drill through the handle and front rail, fit washers on both sides of the moving joint, and tighten the locknut until the handle moves without binding. Check the joint often; a loose handle can suddenly drop or twist. A fixed handle is simpler and cheaper, so it is a sensible choice for a first build.
Install the wheels
Mark each wheel center on the outside of the side rails, about 1½ inches from each end and centered vertically. Keep the marks aligned across both sides. Drill holes sized to the bolts—not so large that the bolts can rock in the wood. Test one wheel first: it should turn freely, with a washer between the wheel and rail if needed to prevent rubbing.
Do not overtighten the bolts against plastic hubs. Tighten the nut enough to hold the wheel securely while leaving it free to spin. If the wheels rub the cart, add a washer or move the wheel outward; if they wobble, check that the holes are aligned and the hardware matches the hub.
Sand, finish and check
Sand every surface, especially corners and the handle, with 120-grit paper, then smooth with 180-grit. Break sharp edges so they feel rounded to the touch. Remove dust and apply a water-based, toy-suitable finish according to its label. More coats do not make a rushed job safer: allow the full stated cure time before use.
Before handing over the cart, pull it slowly across the floor and check for loose wheels, protruding screw tips, splinters and sharp corners. Load it with a few books and inspect the joints again. Keep the cart on level ground, use it only for light toys, and never let a child ride in it. Recheck fasteners periodically, especially after the first few play sessions.