What's inside
As an Amazon Associate I earn from qualifying purchases. This post may contain affiliate links at no extra cost to you.
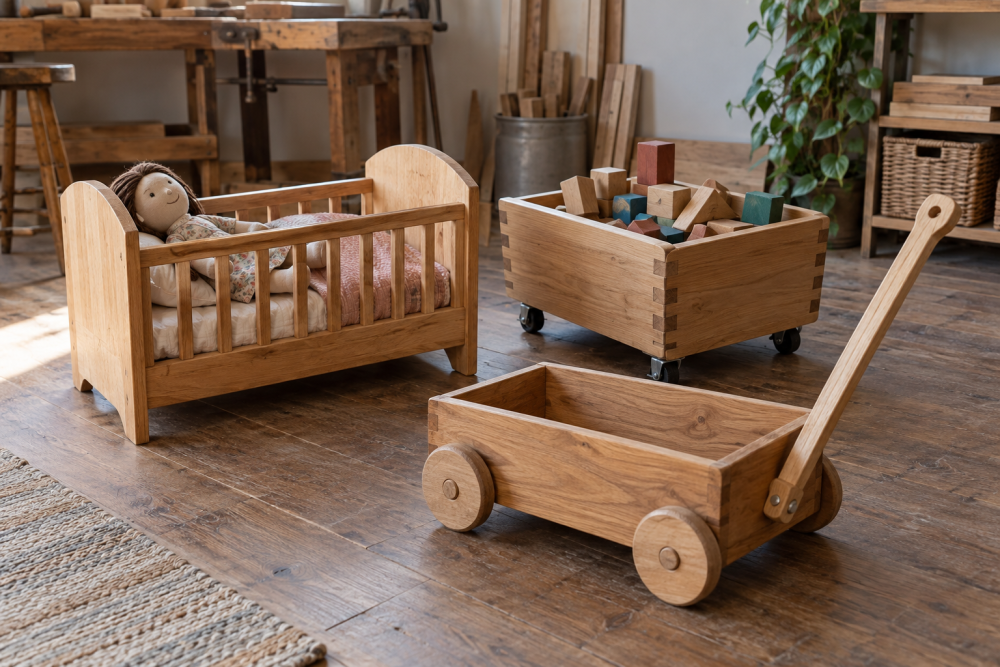
A low storage cart keeps wooden blocks off the floor and makes cleanup easier, but a tall, narrow cart can tip when a child leans on it. This design uses a wide plywood base, a shallow open tray, and four locking swivel casters. It suits a beginner with a drill and circular saw, or anyone who can have a home center cut the plywood.
Contents
Size and design
The finished cart is about 24 inches long, 18 inches wide, and 12 inches high, not counting the casters. That footprint holds a useful pile of blocks without making the cart awkward to steer through a doorway. The tray has 6-inch sides and an open top, so blocks are easy to reach. If your blocks are unusually large, measure the biggest ones before cutting; leave at least an inch of clearance on each side.
Use 3/4-inch plywood for the base and 1/2-inch plywood for the sides. A thicker base resists flexing under a load of blocks and gives the caster screws more material to bite into. Birch plywood makes a smooth, durable cart, but sanded pine plywood is a reasonable lower-cost choice. Avoid thin underlayment: it can split around fasteners and is less forgiving if the cart gets bumped.
Materials and tools
You’ll need one 24-by-18-inch piece of 3/4-inch plywood, two 24-by-6-inch pieces of 1/2-inch plywood, and two 17-by-6-inch pieces of 1/2-inch plywood. The shorter pieces fit between the long sides. Also buy four casters rated for at least 40 pounds each, wood glue, 1 1/4-inch wood screws, and 3/4-inch screws for the casters if their mounting plates allow them. Check the caster plate and screw length before buying; screws must not poke through the top of the base.
A circular saw and straightedge make the cuts, though a jigsaw can work with a careful guide. You’ll also need a drill, countersink bit, tape measure, square, and sandpaper. For a softer, less splinter-prone finish, choose a water-based, toy-safe clear coat and follow its curing instructions before letting children use the cart.
Choosing casters
| Option | Best for | Trade-off |
|---|---|---|
| Four swivel casters, two with brakes | Most playrooms; easy steering and parking | Can drift unless the brakes are set |
| Two fixed and two swivel casters | Straight runs down a hallway | Turns take more space and effort |
| Four swivel casters, all with brakes | Sloped floors or frequent repositioning | Costs more; four brakes take longer to set |
Choose swivel casters with 2- to 3-inch wheels for typical indoor floors. Small wheels may snag on thresholds, while larger wheels raise the cart and can make a loaded tray feel less stable. A set of locking swivel casters is the simplest choice for a cart that will be moved in several directions. A fixed-and-swivel set is fine if the cart mostly travels in one direction and saving a little money matters more than tight turns.
Build the tray
1. Cut the plywood to size, or ask the store to make the straight cuts. Check the pieces with a square. If the base is out of square, the side panels may not meet cleanly, leaving gaps that catch small blocks.
2. Sand the cut edges with 120-grit sandpaper, then smooth them with 180-grit. Round the top edges and corners slightly; sharp plywood corners chip easily and are less comfortable to bump against. Keep the bottom edges flat so the tray sits securely on its base.
3. Lay the base flat and position the long sides along its 24-inch edges. The two short sides go between them, flush with the outside edges of the base. Dry-fit all four pieces before adding glue. Check that the inside corners meet and measure the diagonals; matching diagonal measurements are a quick check that the tray is square.
4. Apply a thin bead of wood glue along each joint. Drill pilot holes through the sides into the base, then drive 1 1/4-inch screws about every 4 inches. Use a countersink so screw heads sit flush. Pilot holes matter here: without them, the narrow plywood edges can split, especially near a corner. Wipe away squeezed-out glue before it dries.
For extra durability, add a small bead of paintable caulk inside the joints after the glue cures, but don’t rely on caulk as a substitute for screws and glue. If you prefer a softer interior, line the bottom with a thin nonslip drawer liner; it is removable and easier to clean than fabric.
Attach the casters
Turn the cart upside down on a padded surface. Position each caster near a corner, with the mounting plate at least 1 inch from both edges so the screws have solid support. Check that the swiveling wheels can turn without striking a side panel. Mark the holes, drill pilot holes, and attach the casters with screws suited to the plate. If the plate has four holes, use all four rather than relying on two screws.
Don’t substitute drywall screws; they are brittle and can snap under a rolling load. If the caster screws are too long for the 3/4-inch base, use shorter pan-head screws or add solid wood blocks under the base at each corner. A pan-head wood screw assortment can help when caster hardware doesn’t include the right length. Test every wheel by swiveling it through a full turn before loading the cart.
Finish and test
Fill visible screw holes if you want a painted finish. Apply paint or clear coat in thin coats, sanding lightly between coats if the surface feels rough. Keep the cart out of use until the finish has fully cured, not merely until it feels dry to the touch. Paint can stick to blocks or leave an odor if the cure time is rushed.
Load the cart gradually and roll it over the floor and any doorway thresholds it must cross. Check for wobble, loose screws, and wheels that bind against the sides. Set the brakes on a flat surface and push gently to confirm the cart stays put. Keep the load below the casters’ combined rating, but remember that their published capacity assumes an even load and a smooth floor. The cart is for blocks, not for children to ride, sit, or climb on.